Posts in Category: DIY
Running Fedora on Macbook Pro 2019
Intro
Running linux on niche hardware can always prove troublesome…and since I have my own website and don’t want to forget how I resolved some of these random issues, I’m just going to plug this here for later use and also…It might help someone else down the road.
Hardware tags
Trying to install Fedora 37 on my Macbook Pro 2019 15″
How to
First, to install, I found this specific release here: https://github.com/mikeeq/mbp-fedora
This helps with the trackpad and keyboard working out of the box. BUT….wifi was my biggest issue. In the meantime, after you’ve installed Fedora, you’ll need a USB wifi adapter to complete the broadcom chipset install.
To complete the wifi fix, I finally found this: https://j3ffyang.medium.com/install-fedora-on-macbook-pro-16-2-with-broadcom-4364-chipset-1d8f90c50798 – Took me a few days before I finally stumbled upon this. The key thing here is that when you run lspci -vnn | grep Network you need to take note of what device you have. Mine specifically was the bcm4364 device 14e:4464 so just take note of that. Yours may be different and in turn, you may need to copy different files from that github link that the j3ffyang site mentions. I just cloned the whole repo locally and then did sudo cp 4364 /lib/firmware/brcm but make sure you are in the directory where all those lib files are.
Conclusion
That’s it! If this helped, let me know!
Laser Engraver
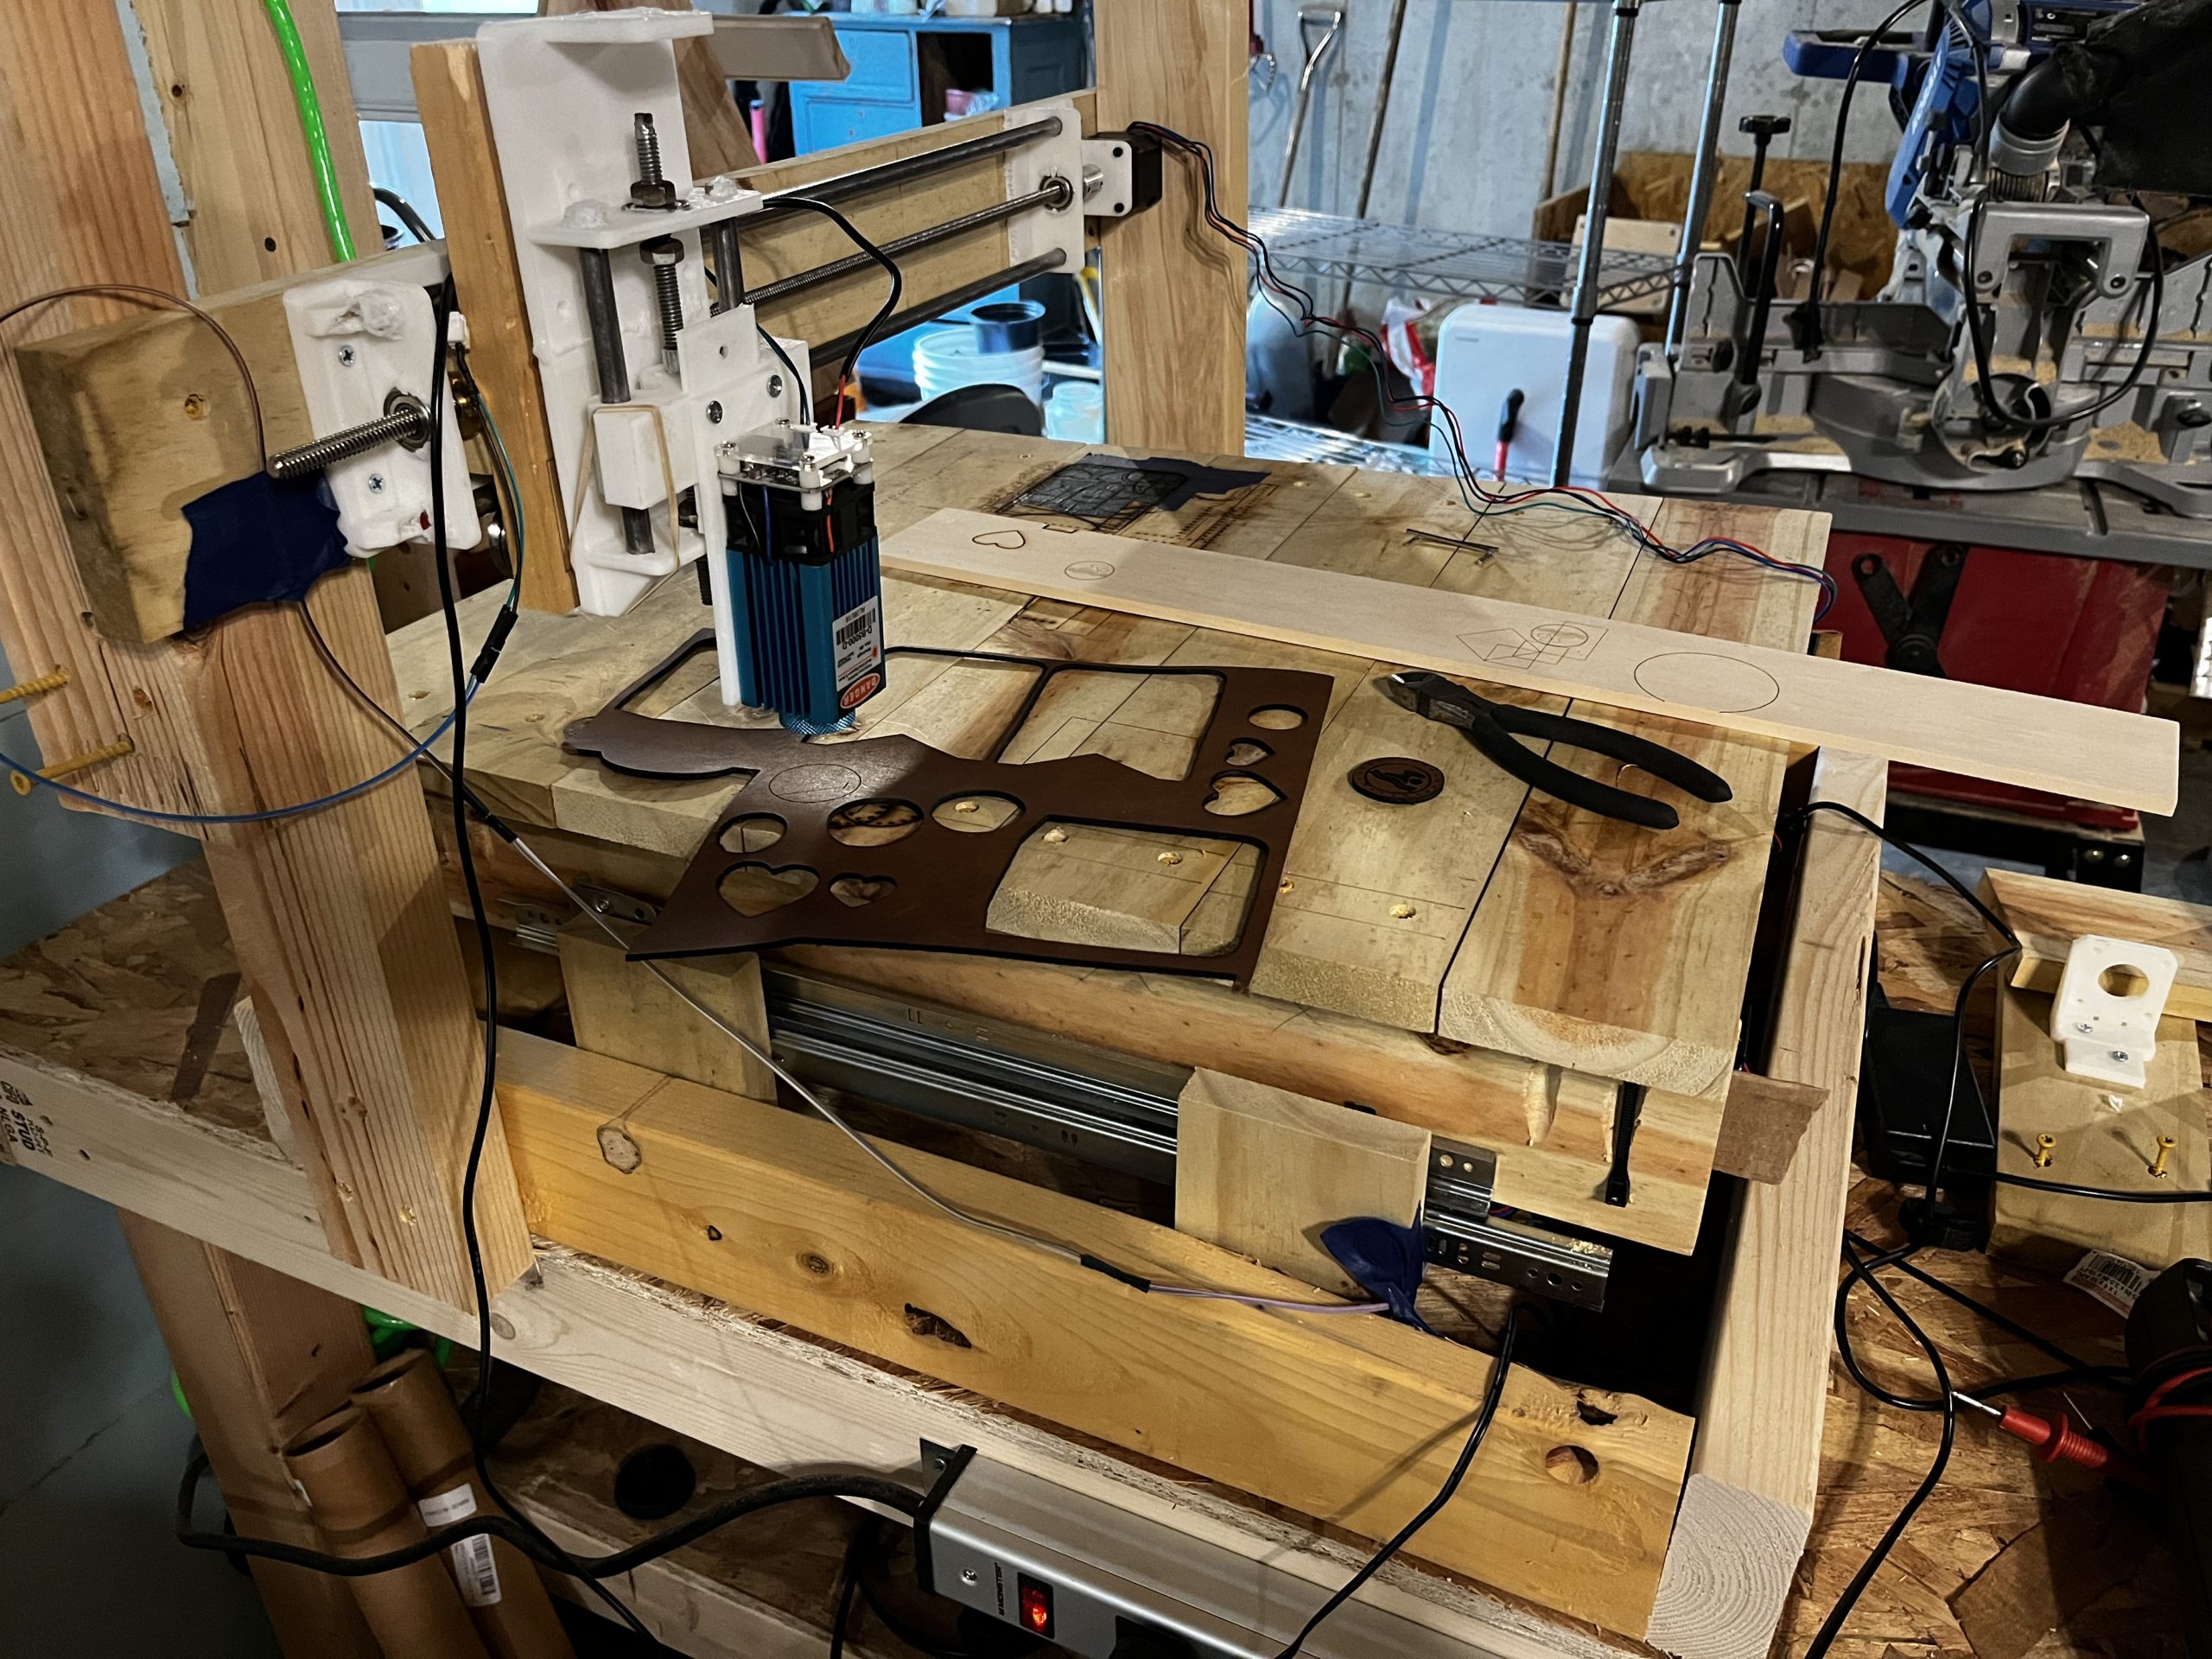
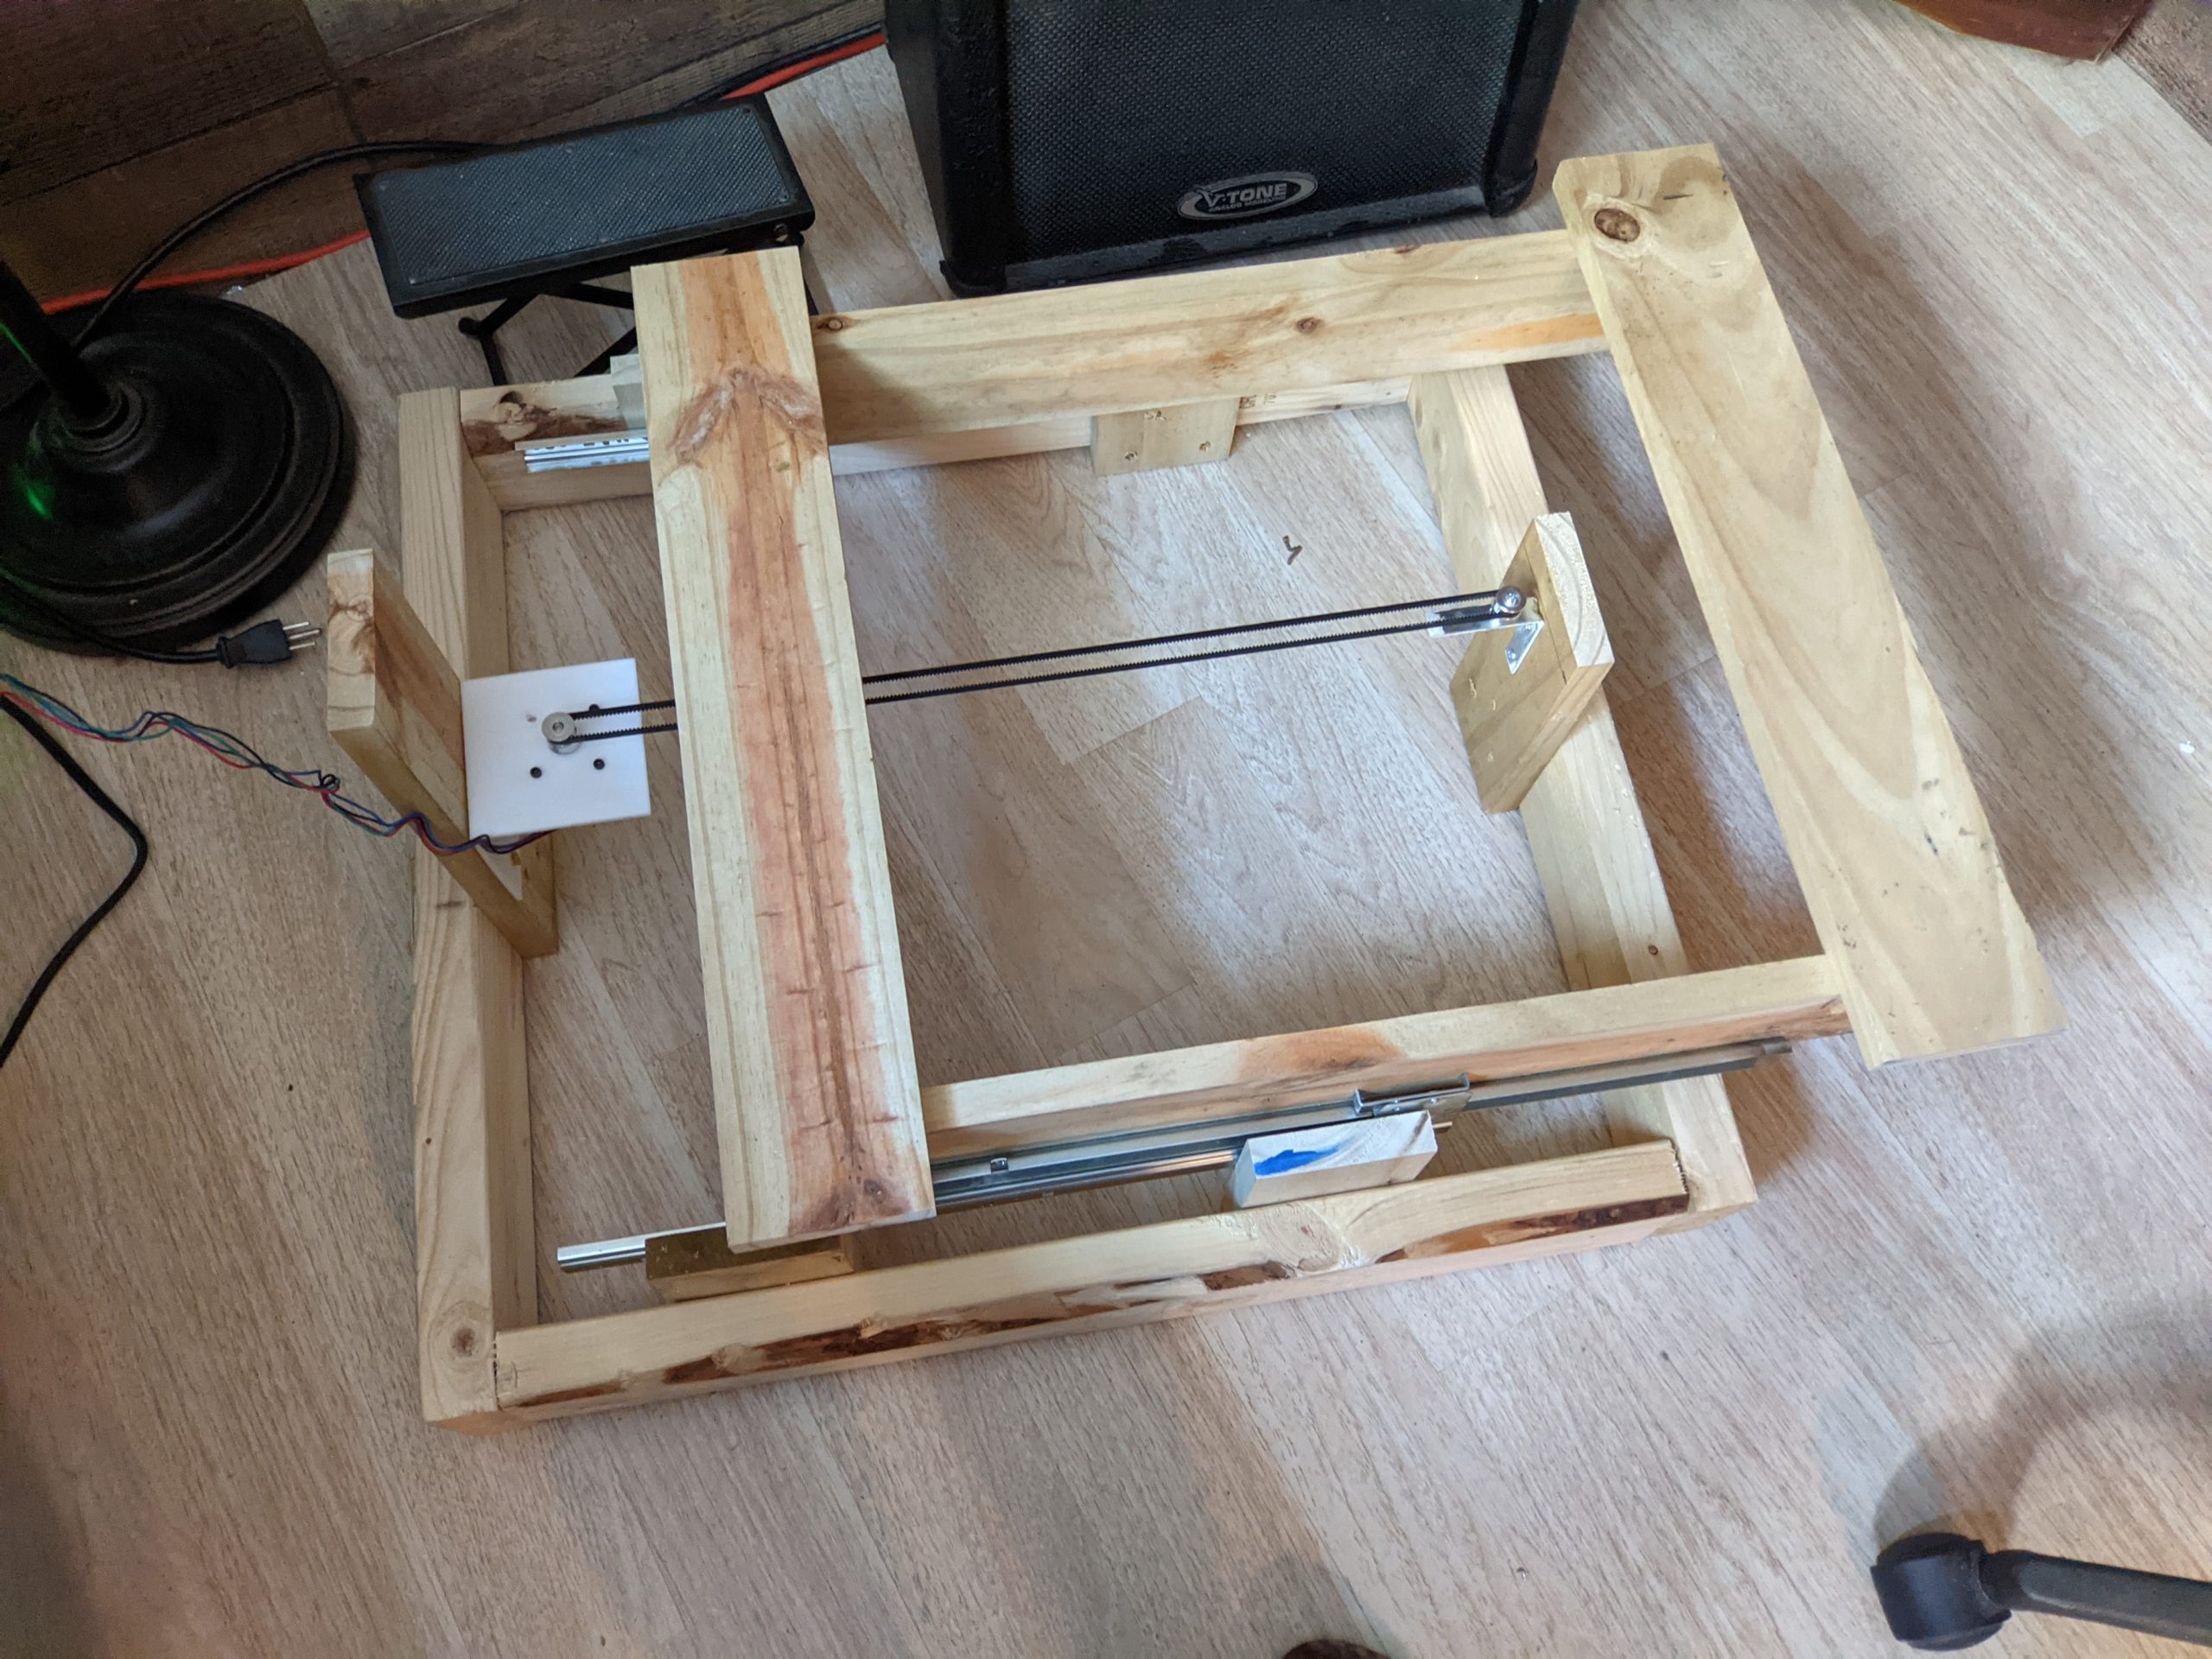
So I originally started with some old printer parts and had a small working laser engraver. I am using some drawer rails as the X axis and now I’ve got some 3/8 rods for the Y axis. I happen to have the v-slotted bearings that a friend gave me a while ago which work great as the carriage.
I ended up purchasing 4 of the precision threaded rods as the regular threaded rods you buy at the hardware store have a bit of a dead zone to them (found that out the hard way). I originally had my X axis using a single belt…then went to two motors with 2 belts…and finally swapped them over to using the precision rods. Now it is pretty solid, especially for using drawer rails to hold it together. =)
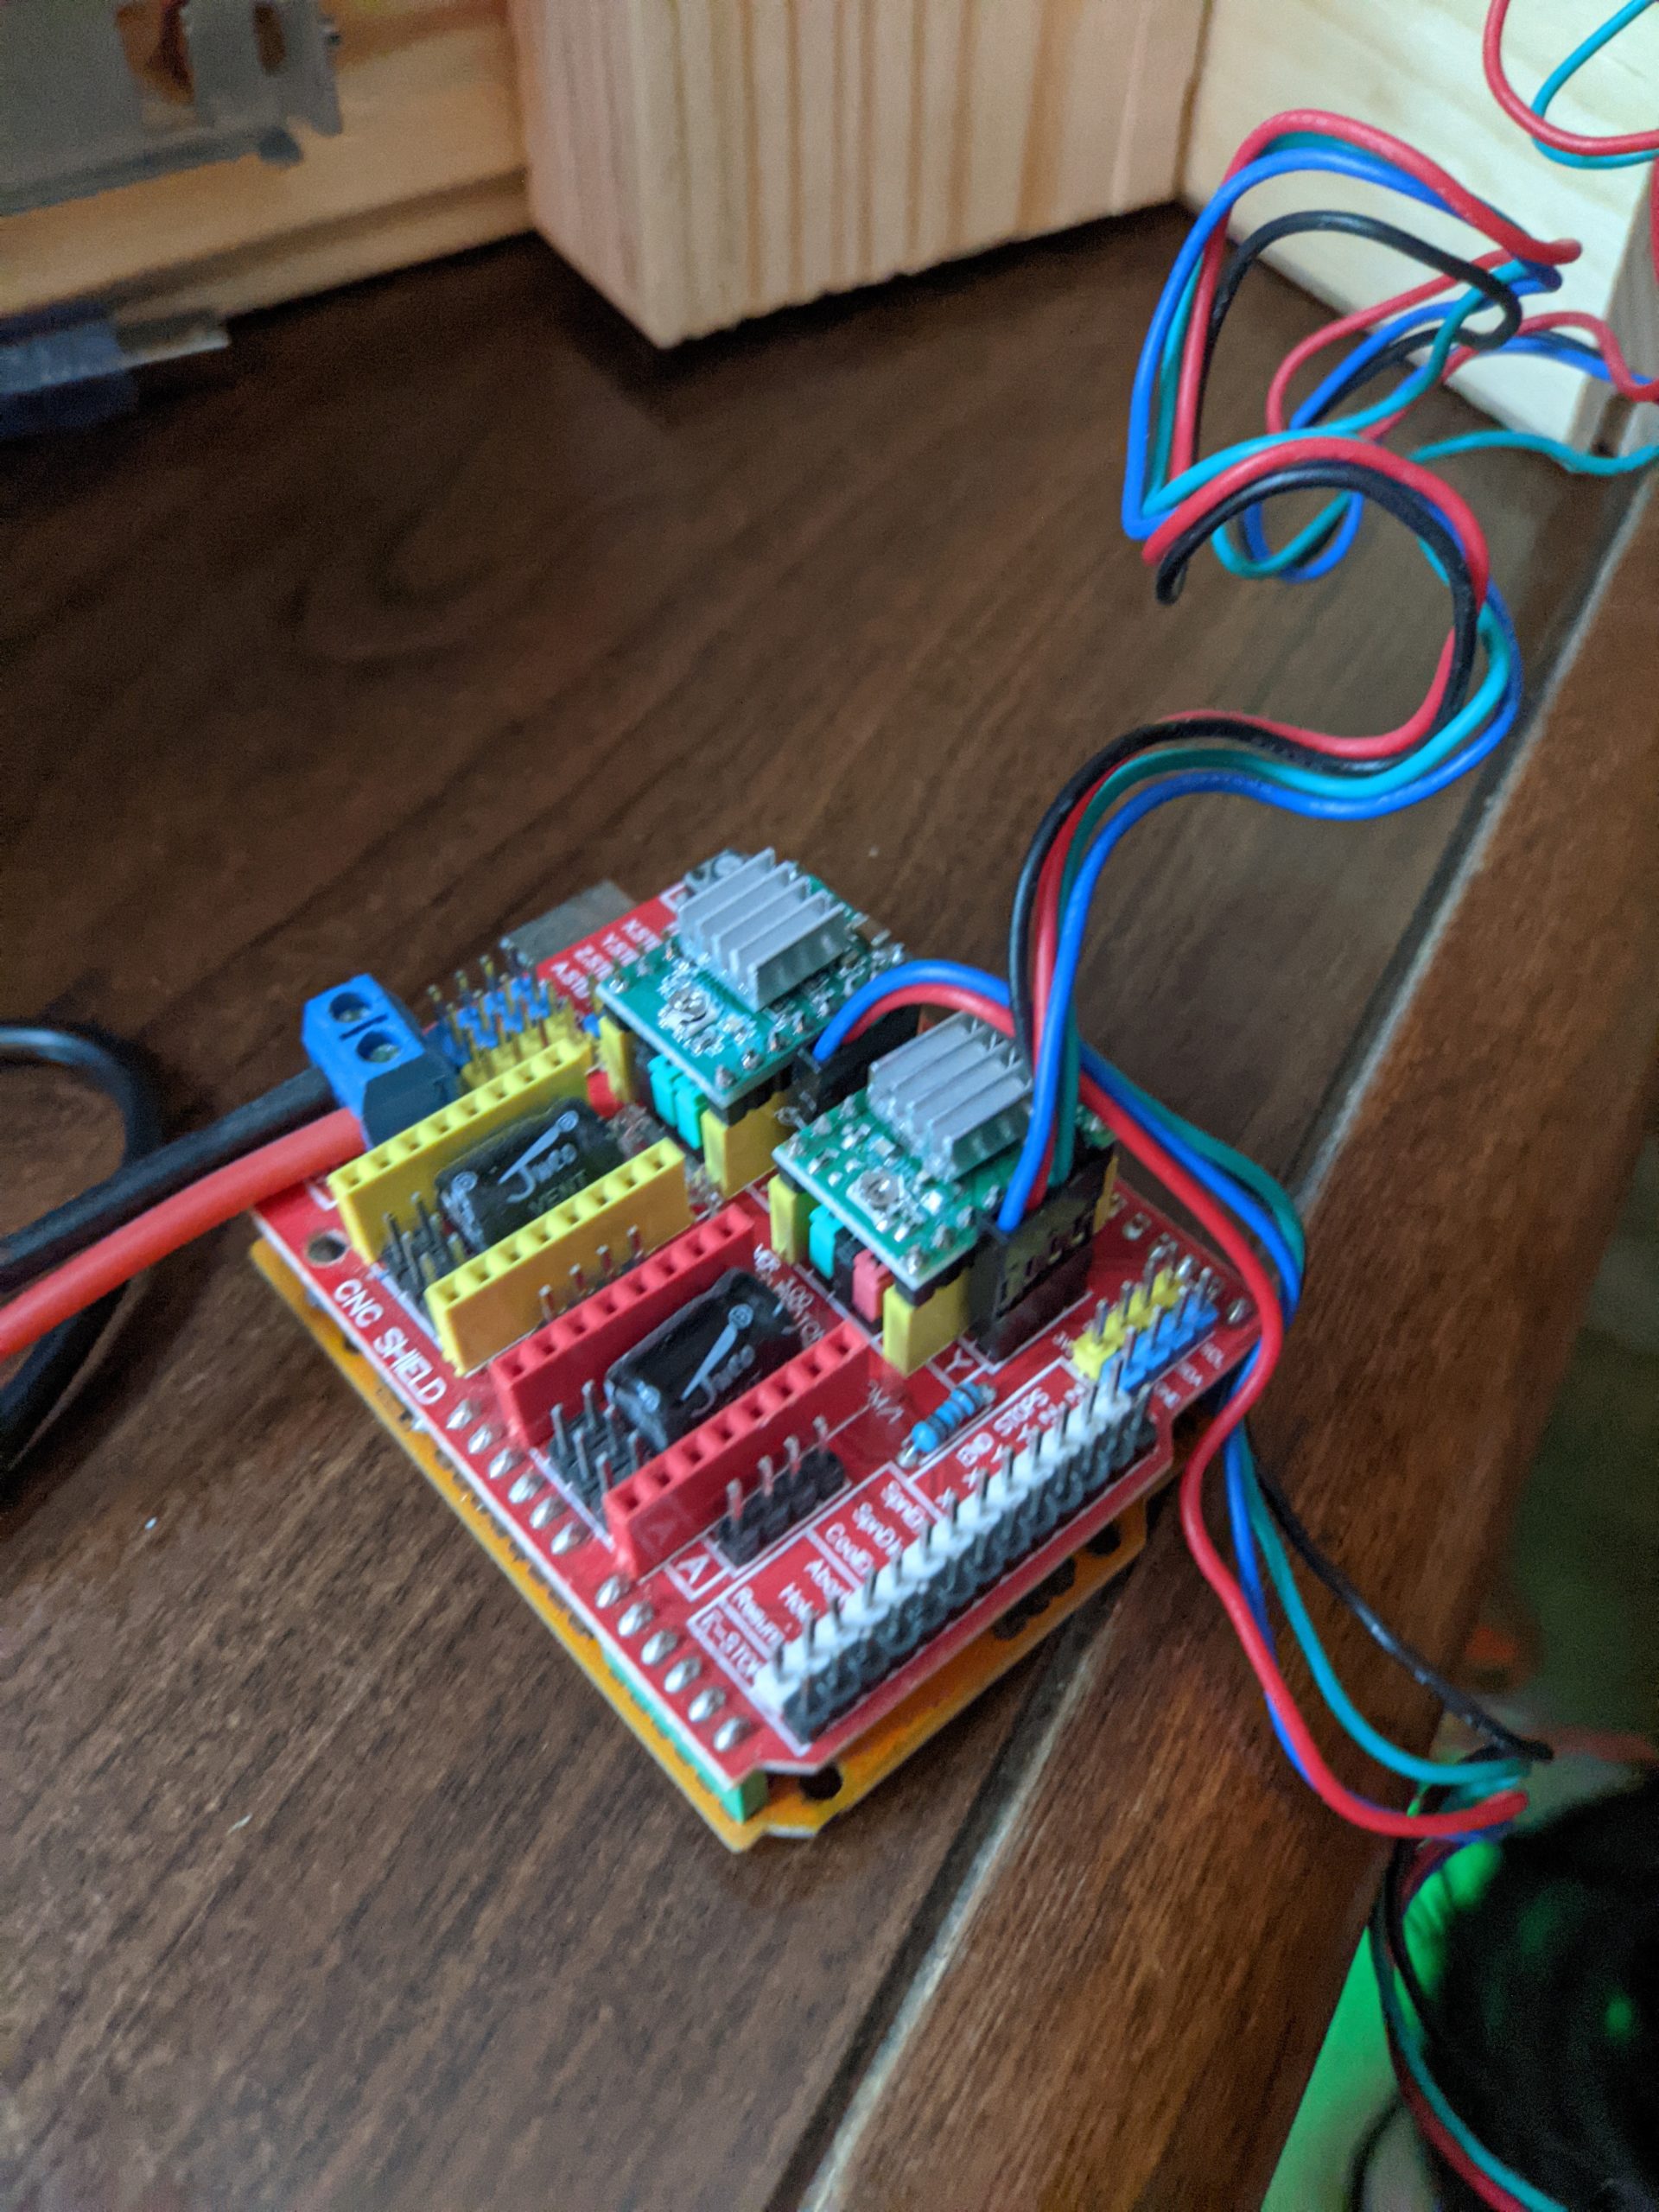
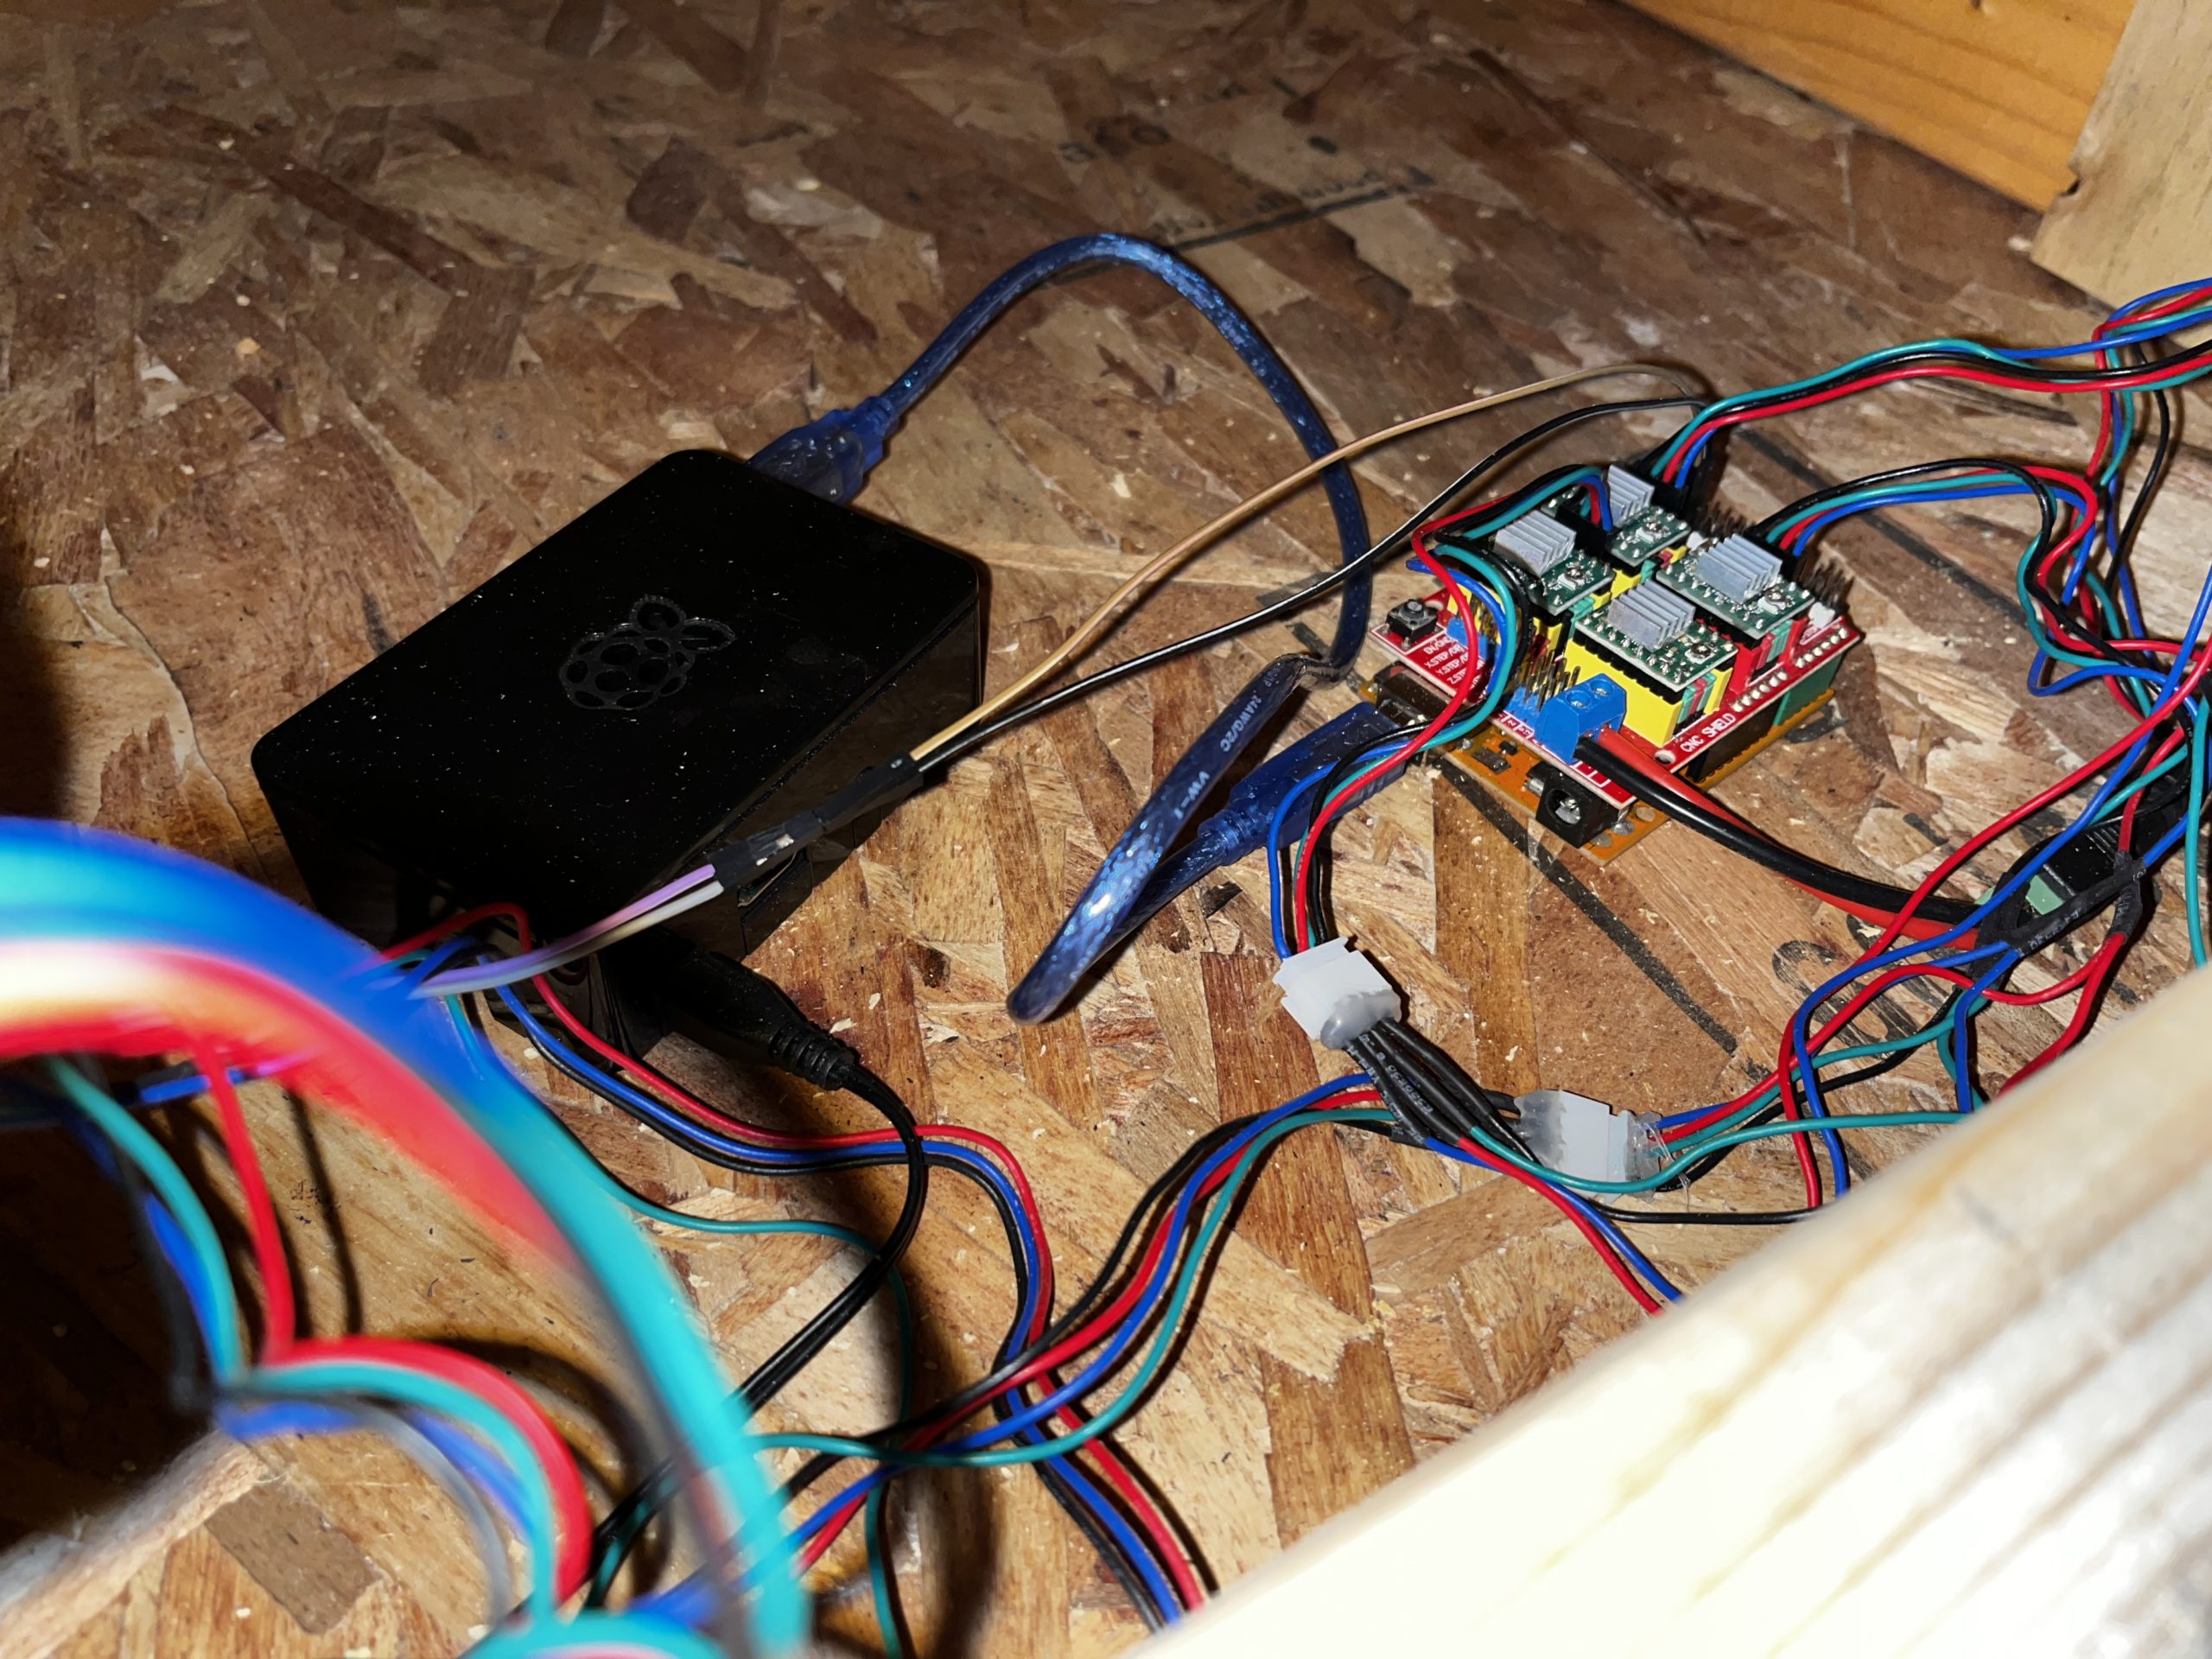
It’s all run by a raspberry pi running OctoPi and then an arduino uno with the cnc hat.
I originally had my Y axis using two 3/8 rods with a 3d printed carriage that slid onto the rods…but this proved too stiff and the laser would show a slight warping when the Y axis would change directions. I then swapped it to the v-slotted bearings and a wooded rig as the carriage. This slid much easier and required no real torque from the motor at all to move around.
My next step with this is to rig the carriage to hold my dremel and act as a sort of mini-cnc…and ultimately handle doing circuit boards!

Modified Power Wheels
Backstory
Back in 2016, we were about to bring home our new daughter from India. She has been diagnosed with Caudal Regression Syndrome. In her case, she is actually missing her legs. So when we saw that Power Wheels was about to release their new “Wild Thing” model, we thought it would be great for her to be able to play in the yard with the kids. Of course, the price wasn’t great at the time and we ended up forgetting about it.
RetroPie Controller
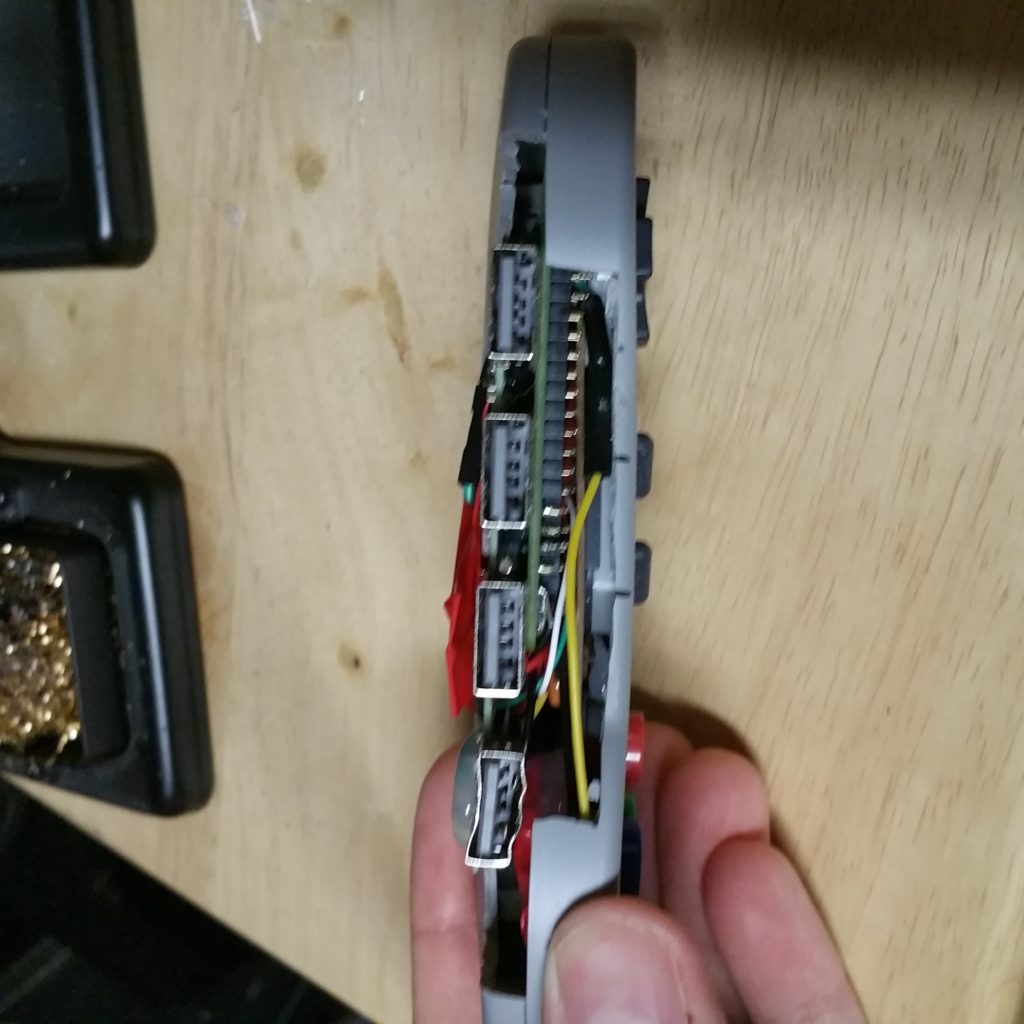
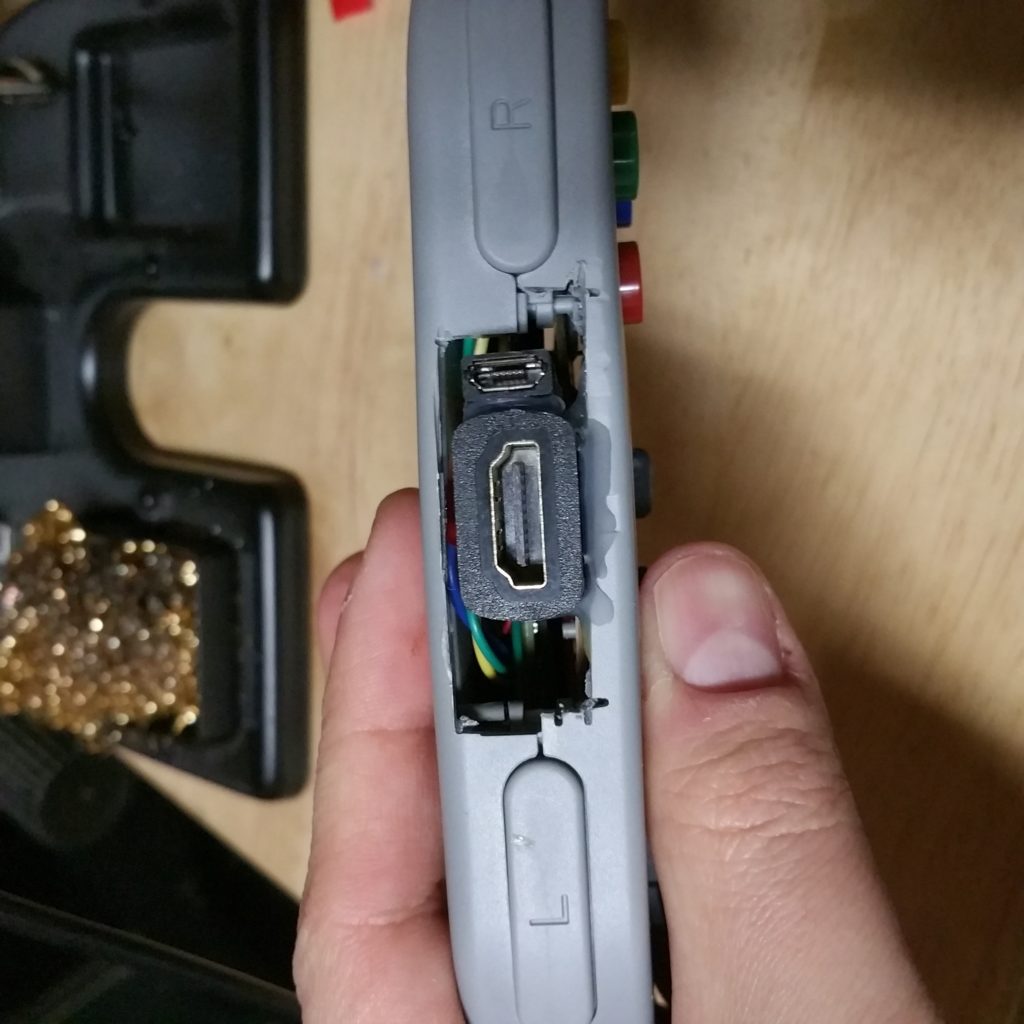
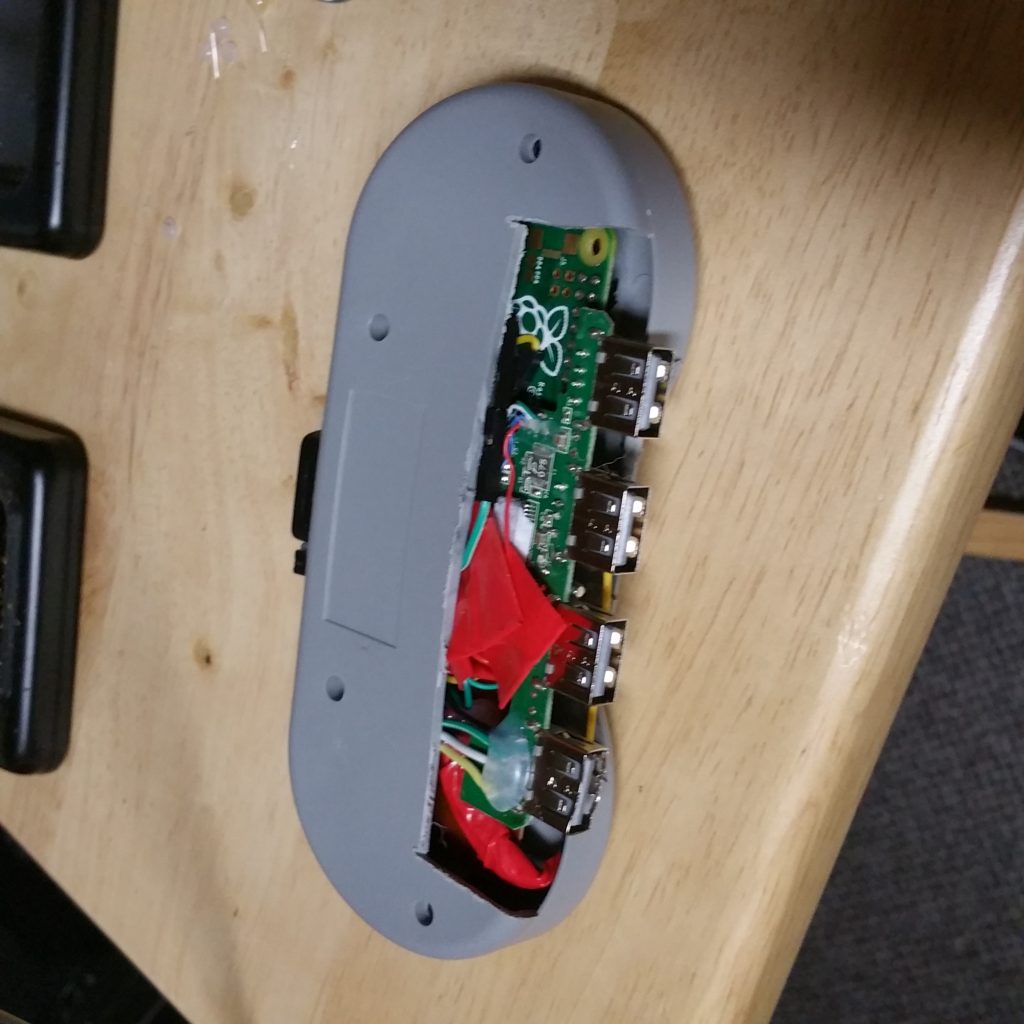
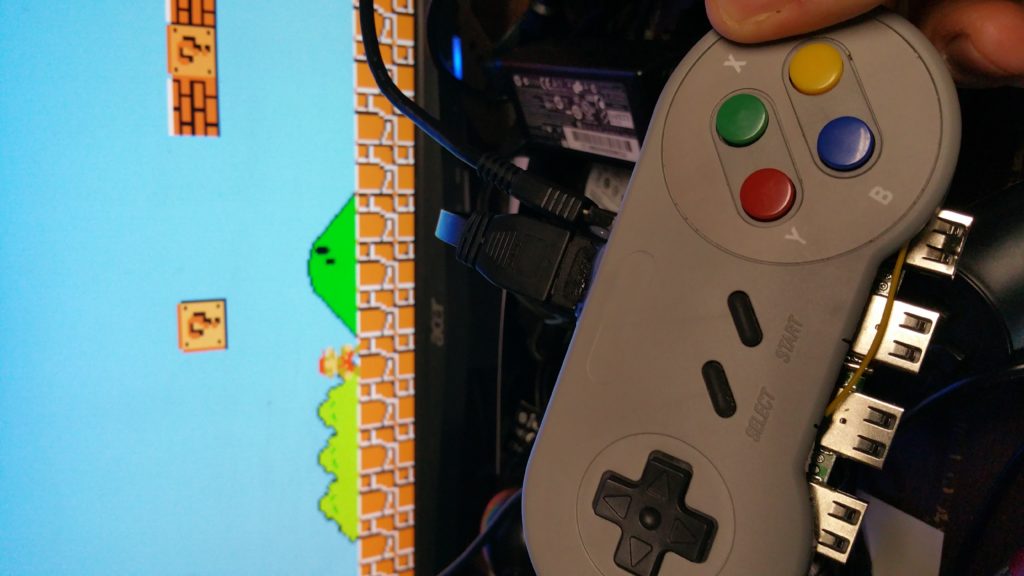
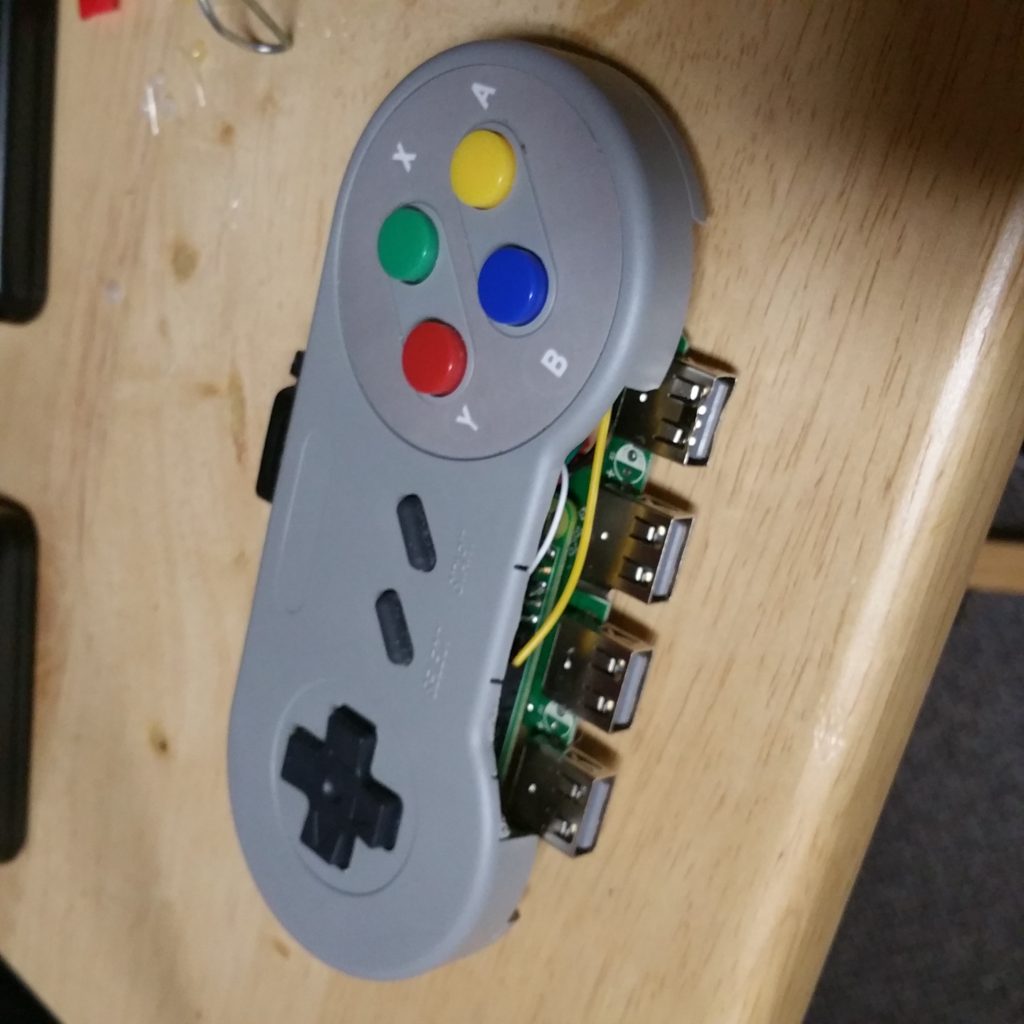
I’ve had a USB SNES controller for a while and kept wanting to throw a Pi Zero in it, but I also wanted a USB hub to be part of it somehow. I have been sitting on it for a while but couldn’t seem to get things to fit in nicely. Well, today I decided not to care about form so I could have function. So I present the ugliest controller build your eyes have seen!
Obviously, not pretty, but at least I can plug in a mouse and keyboard or whatever when needed.