Posts in Category: 3d Printing
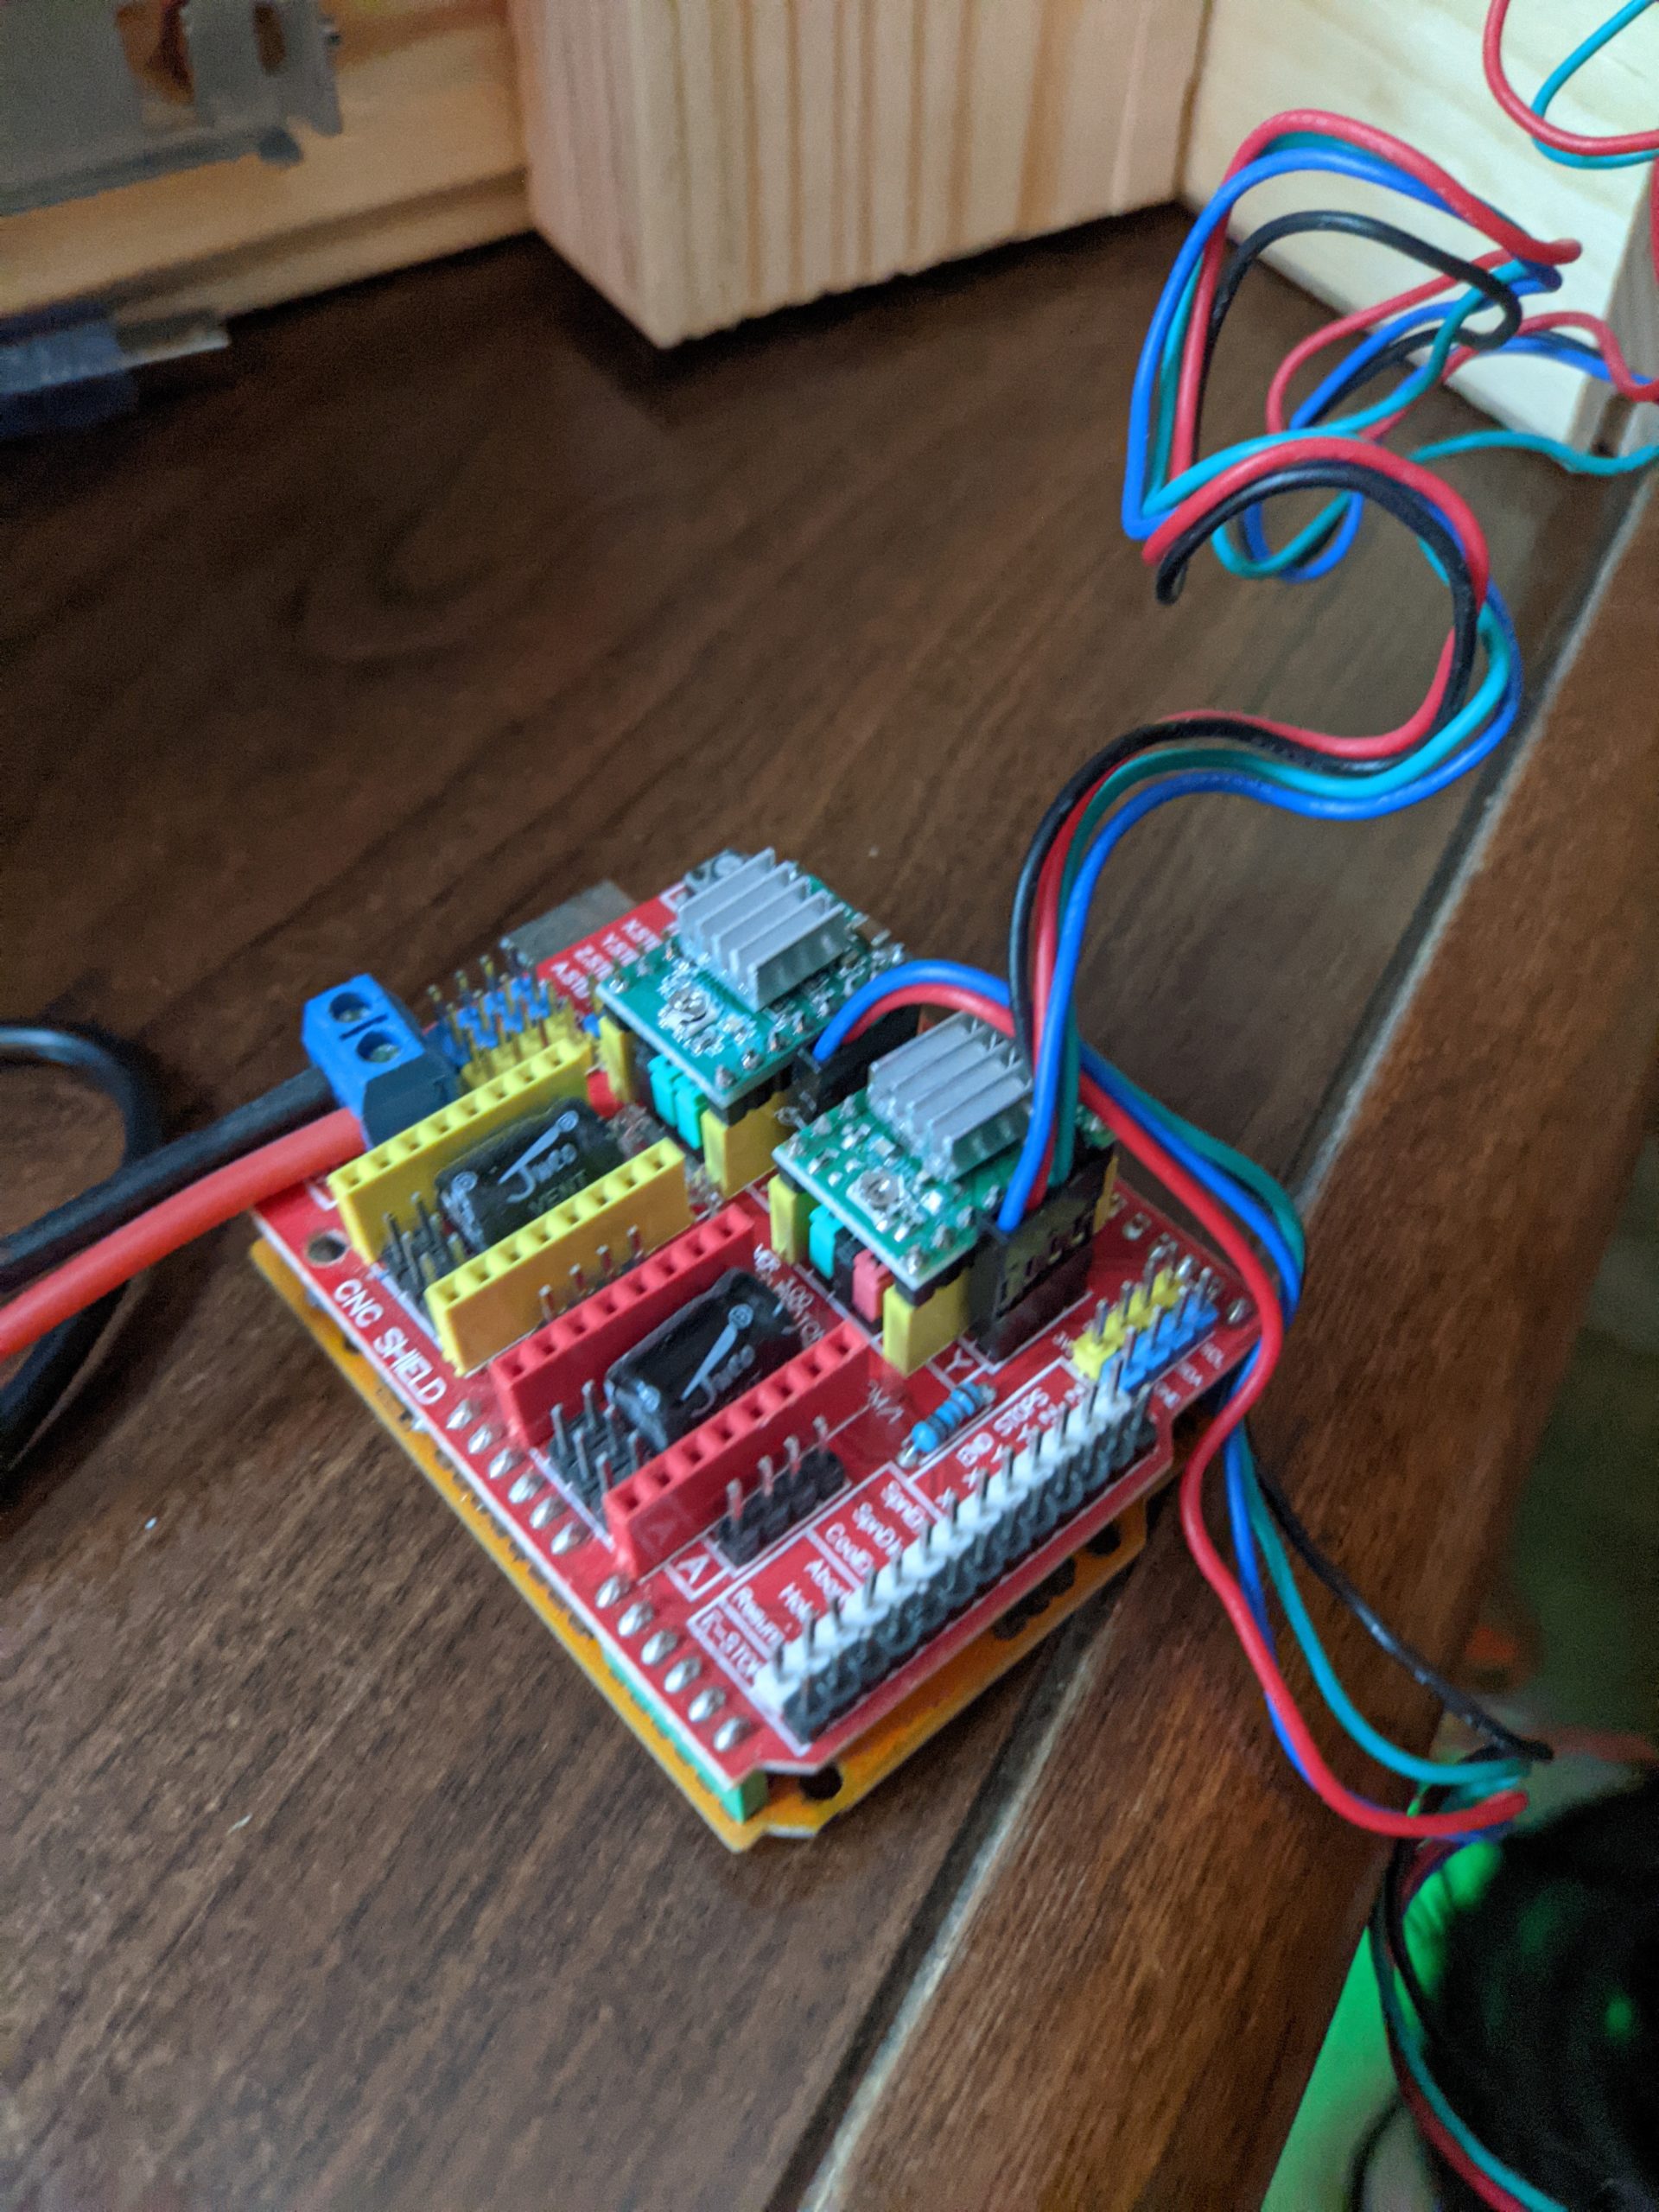
Laser Engraver
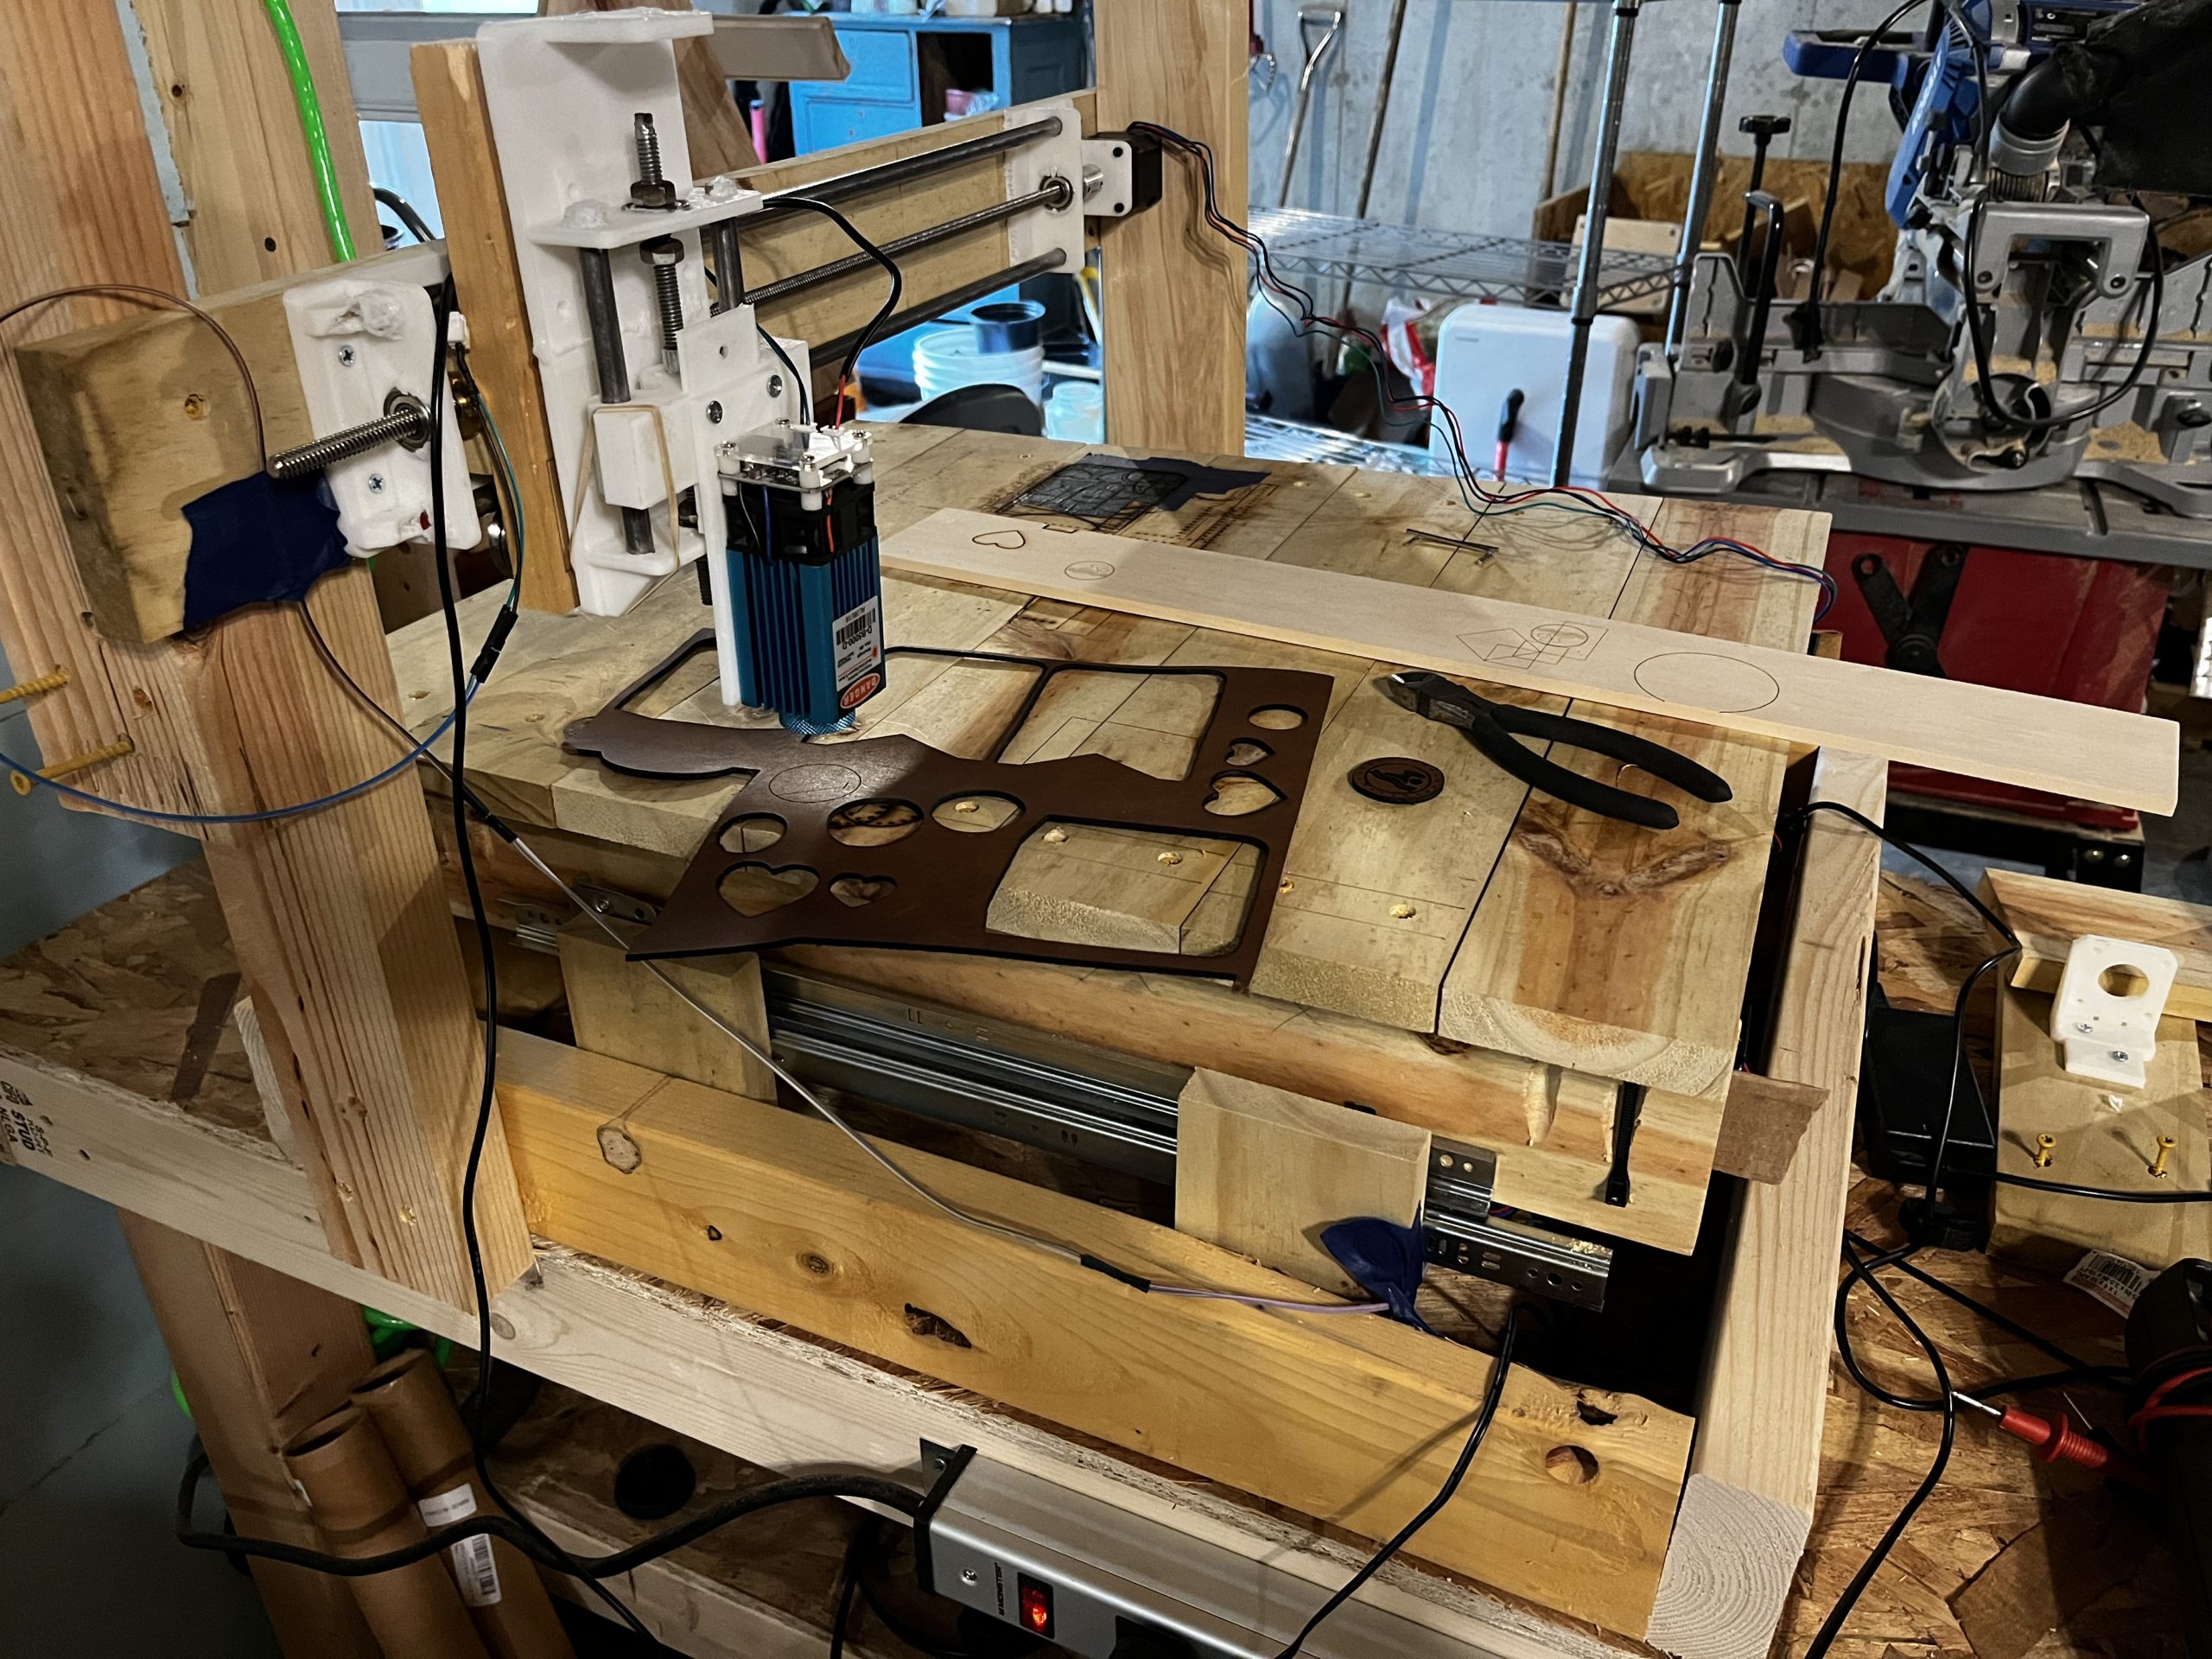
So I originally started with some old printer parts and had a small working laser engraver. I am using some drawer rails as the X axis and now I’ve got some 3/8 rods for the Y axis. I happen to have the v-slotted bearings that a friend gave me a while ago which work great as the carriage.
I ended up purchasing 4 of the precision threaded rods as the regular threaded rods you buy at the hardware store have a bit of a dead zone to them (found that out the hard way). I originally had my X axis using a single belt…then went to two motors with 2 belts…and finally swapped them over to using the precision rods. Now it is pretty solid, especially for using drawer rails to hold it together. =)
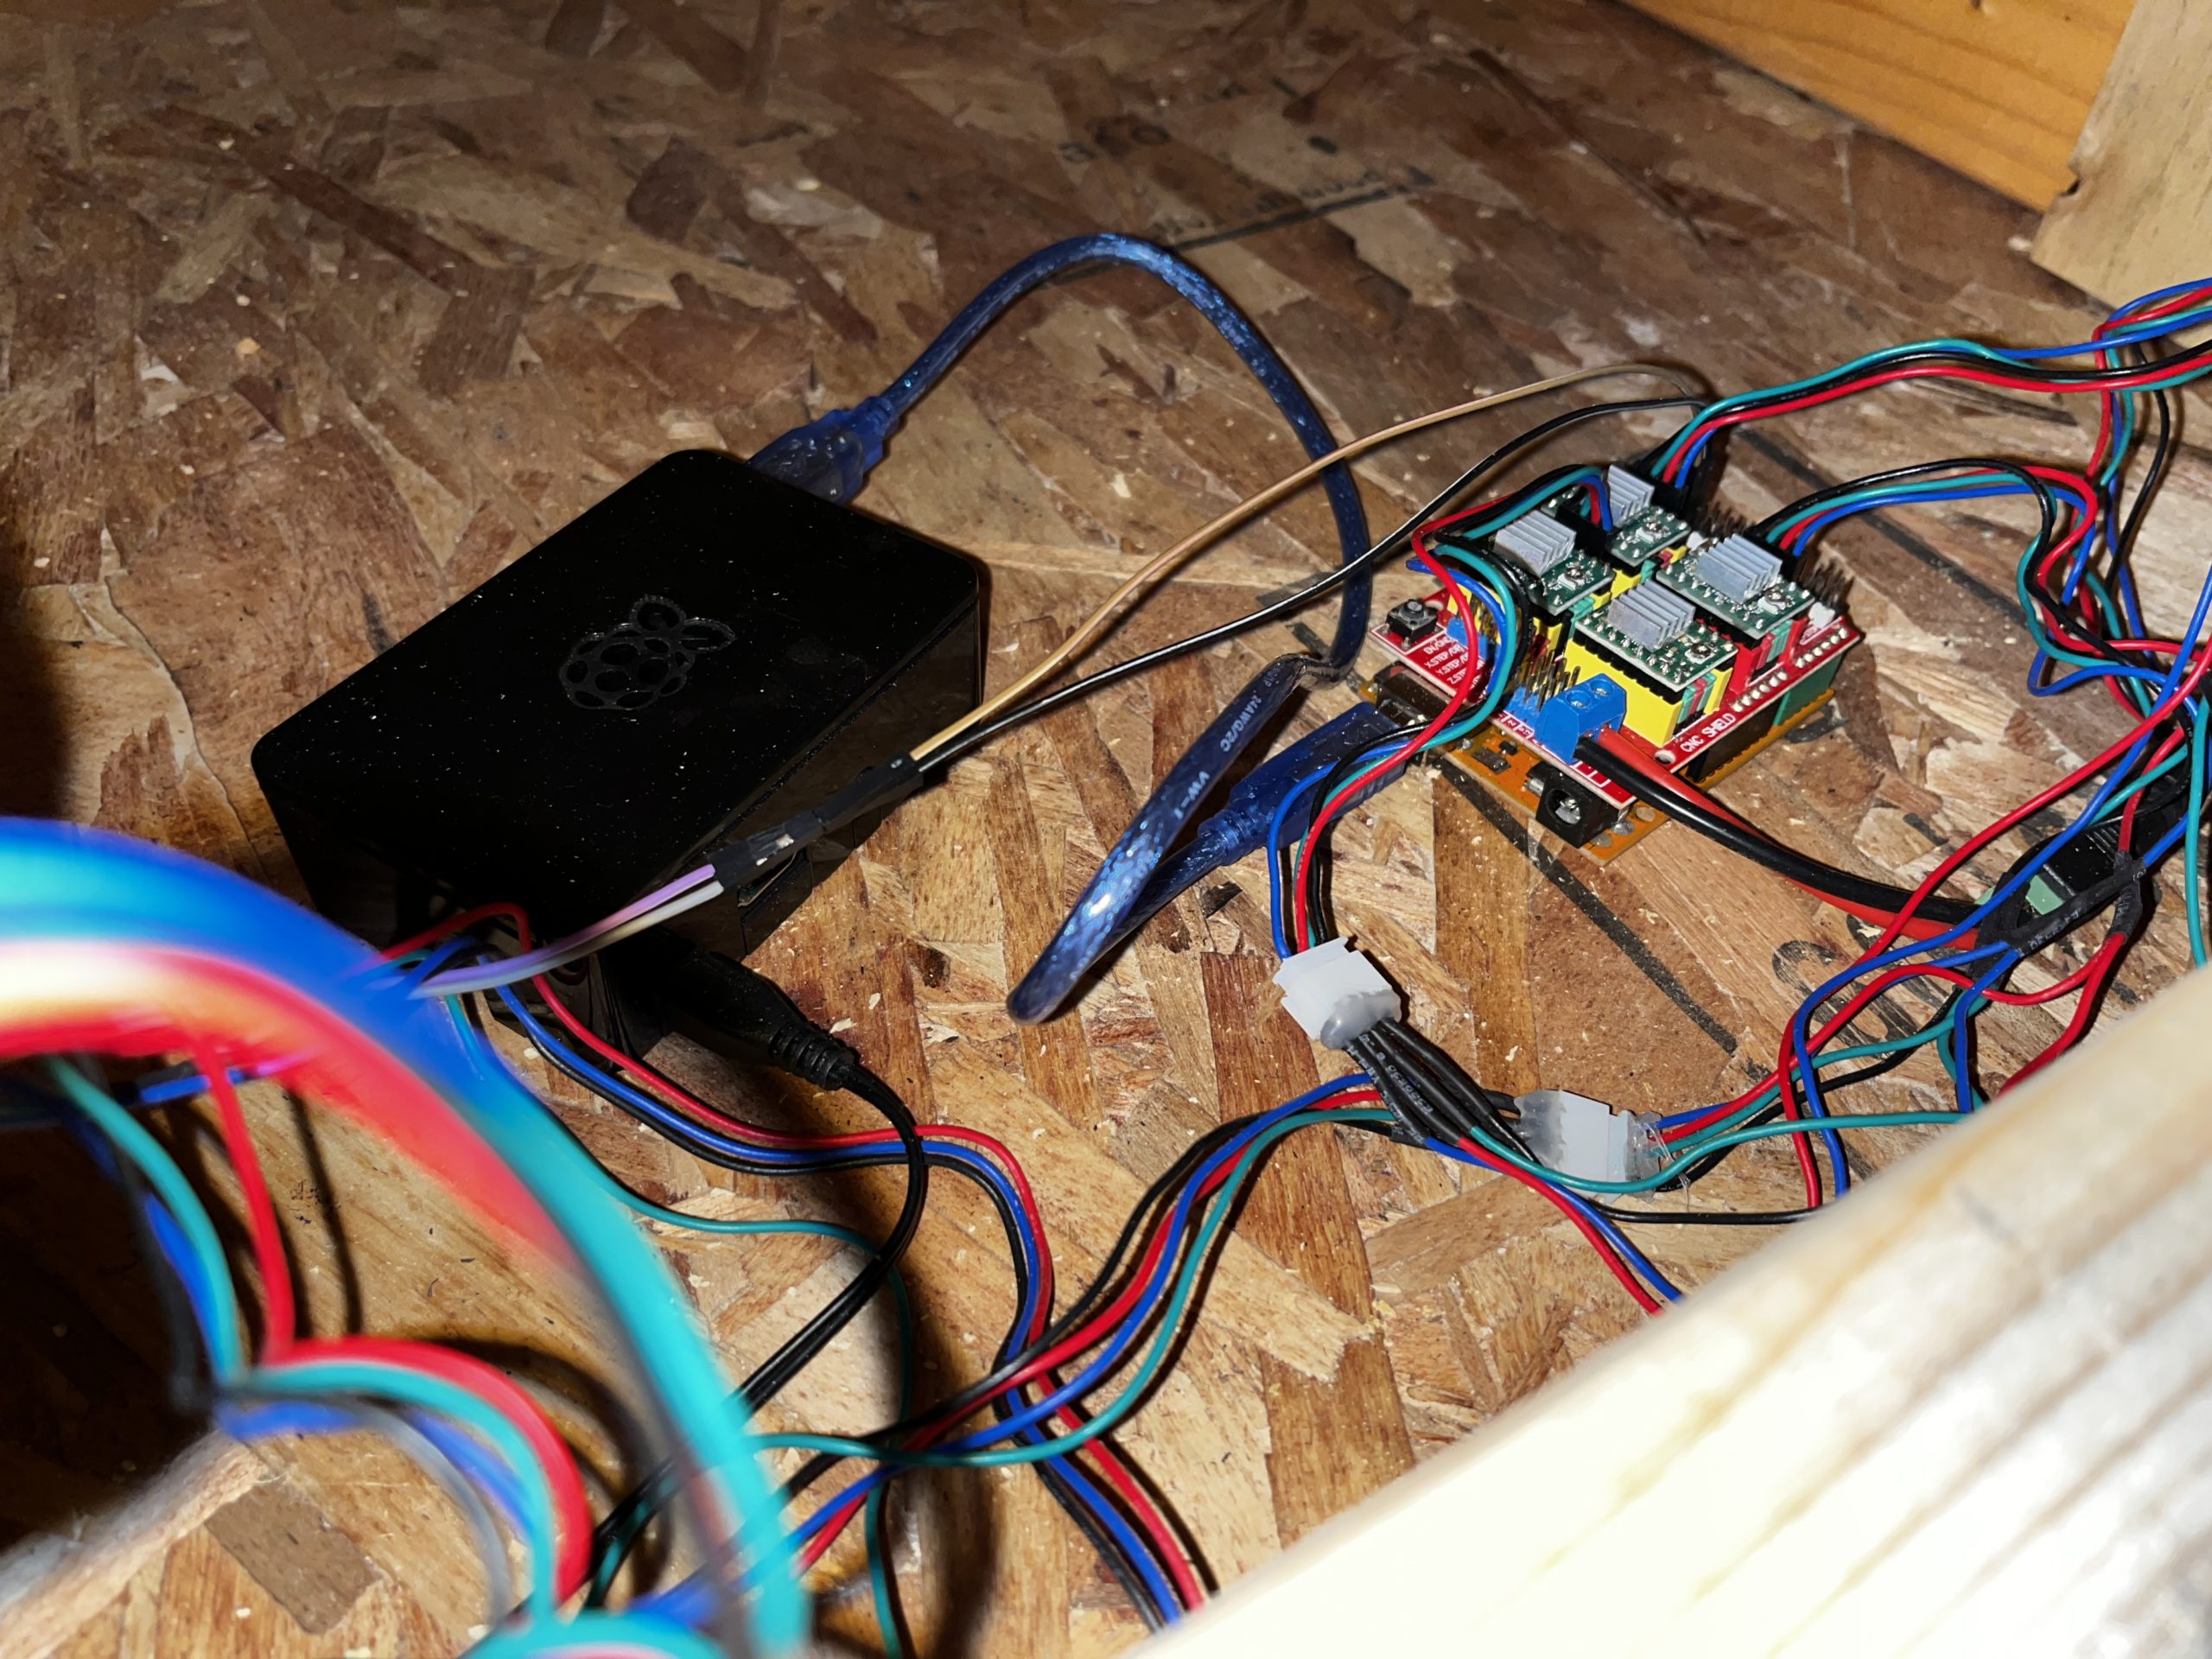
It’s all run by a raspberry pi running OctoPi and then an arduino uno with the cnc hat.
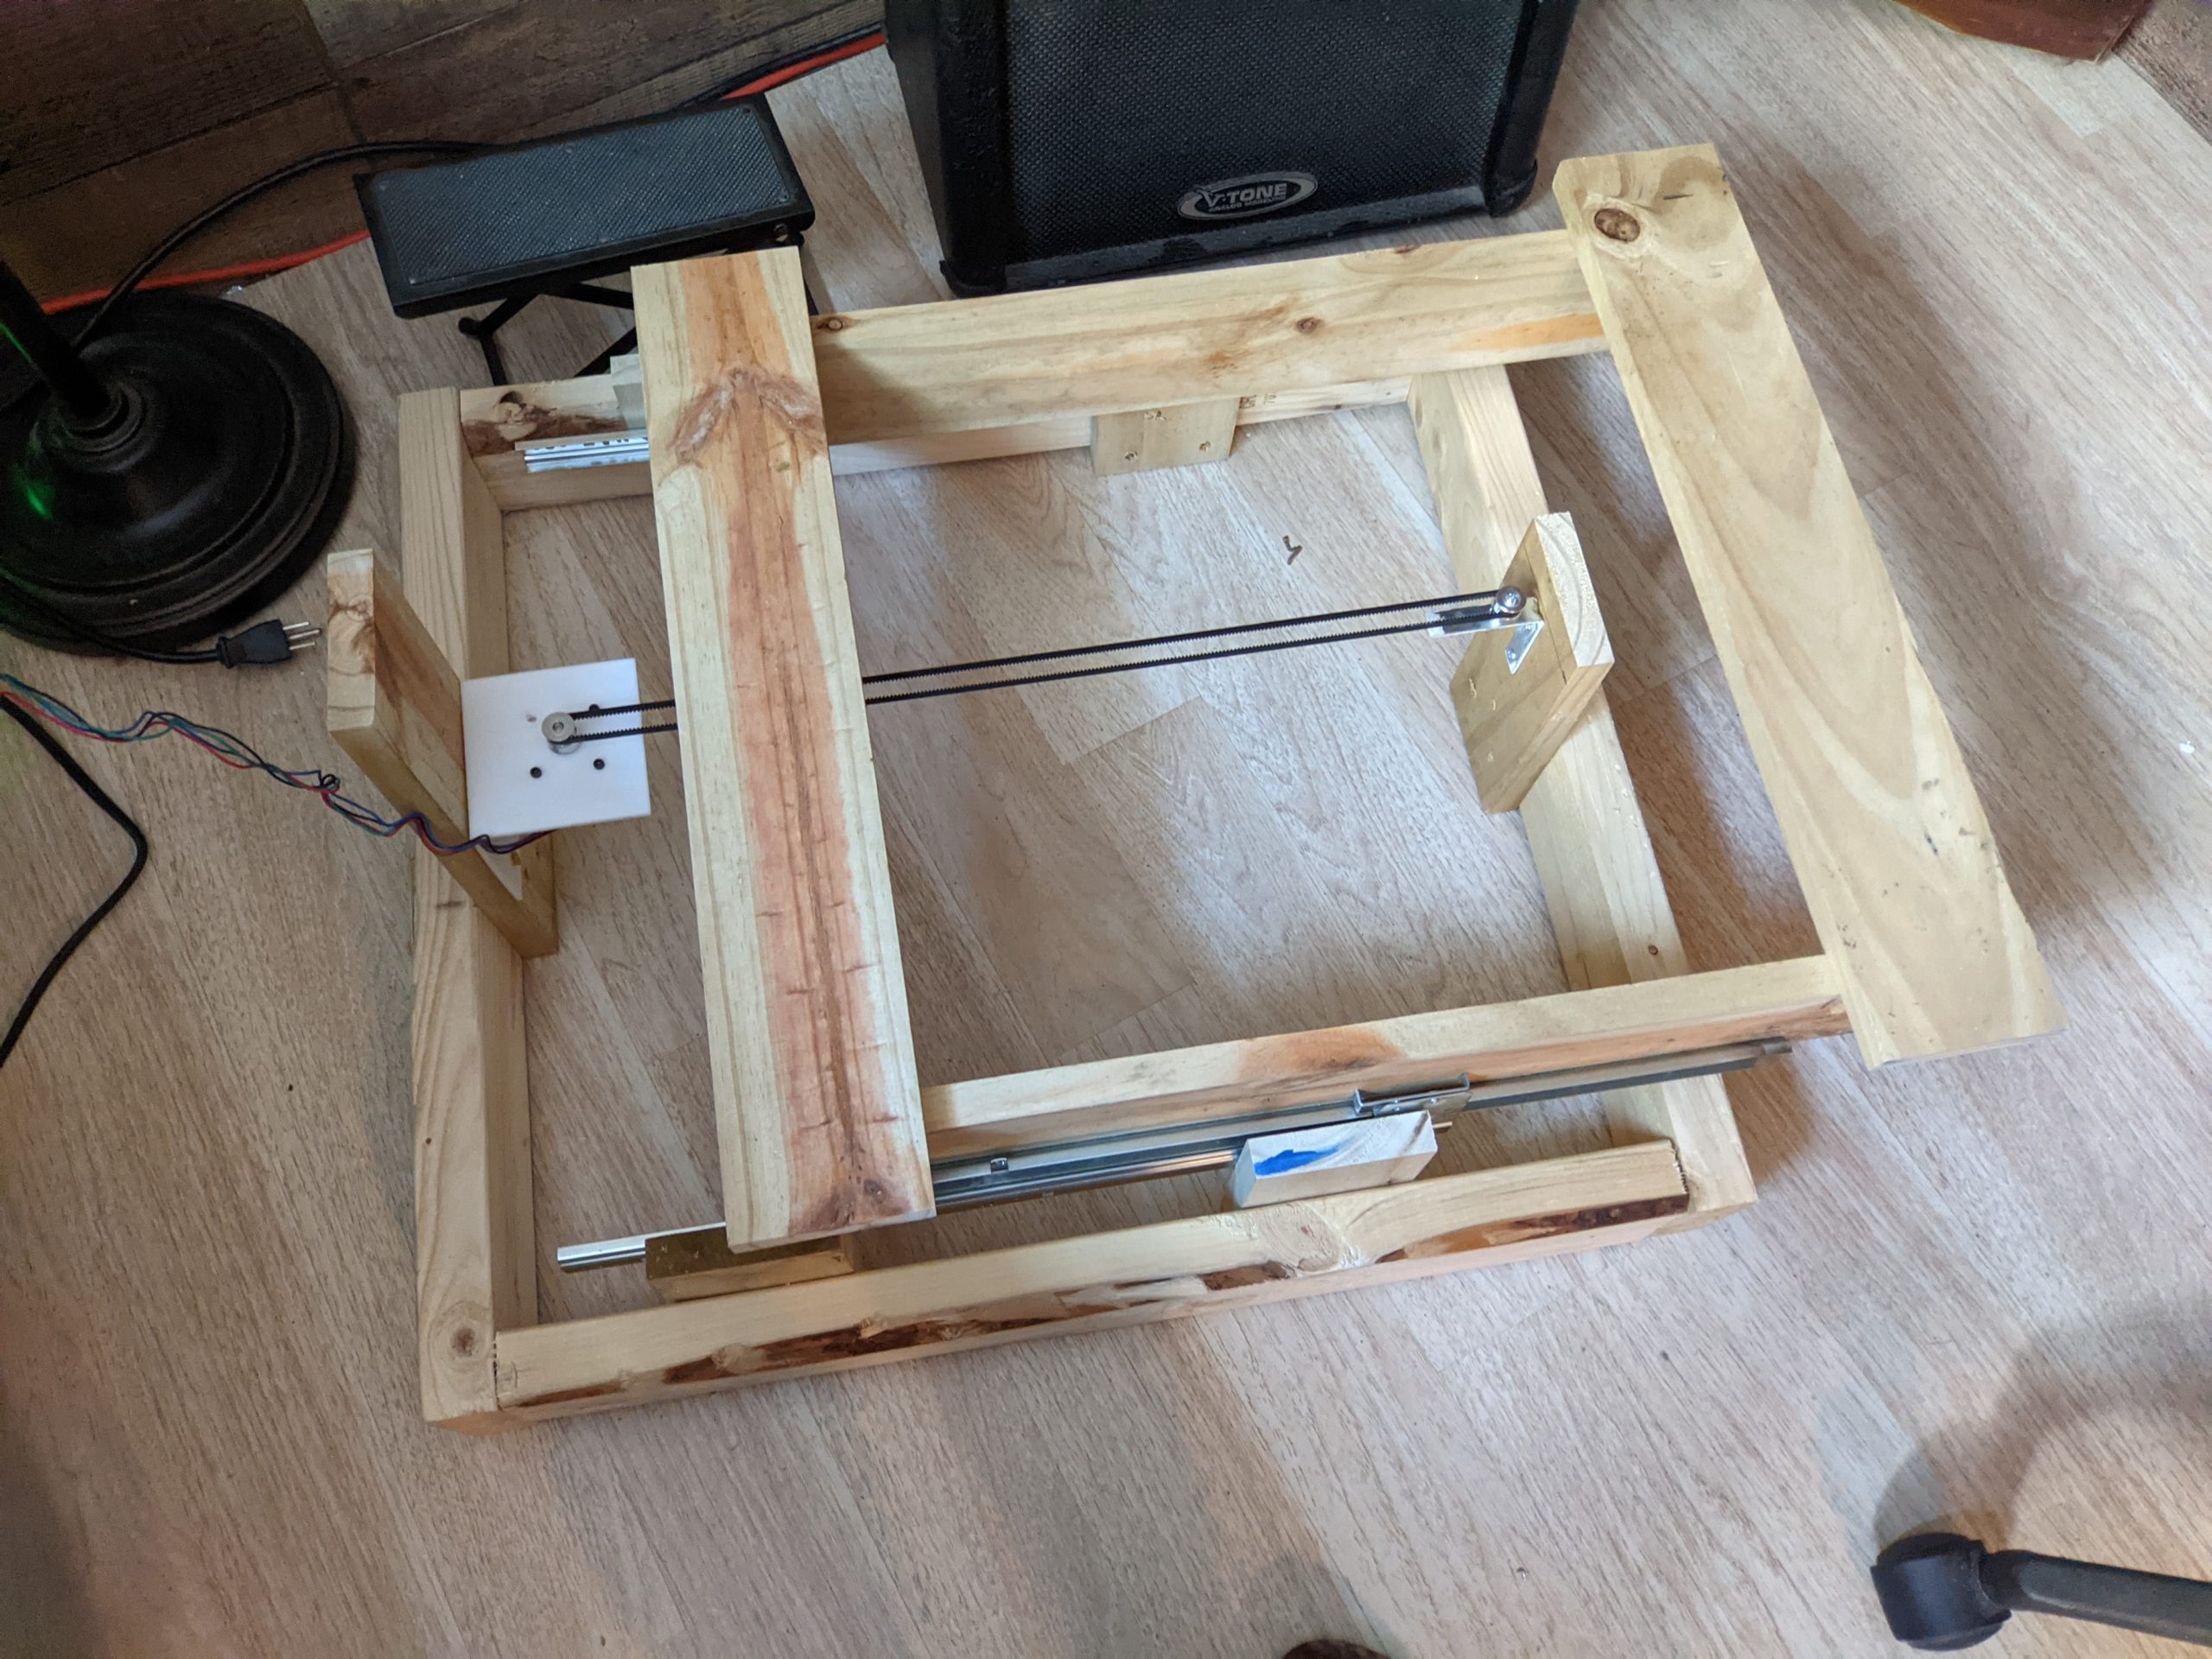
I originally had my Y axis using two 3/8 rods with a 3d printed carriage that slid onto the rods…but this proved too stiff and the laser would show a slight warping when the Y axis would change directions. I then swapped it to the v-slotted bearings and a wooded rig as the carriage. This slid much easier and required no real torque from the motor at all to move around.
My next step with this is to rig the carriage to hold my dremel and act as a sort of mini-cnc…and ultimately handle doing circuit boards!

First try with flexible filament
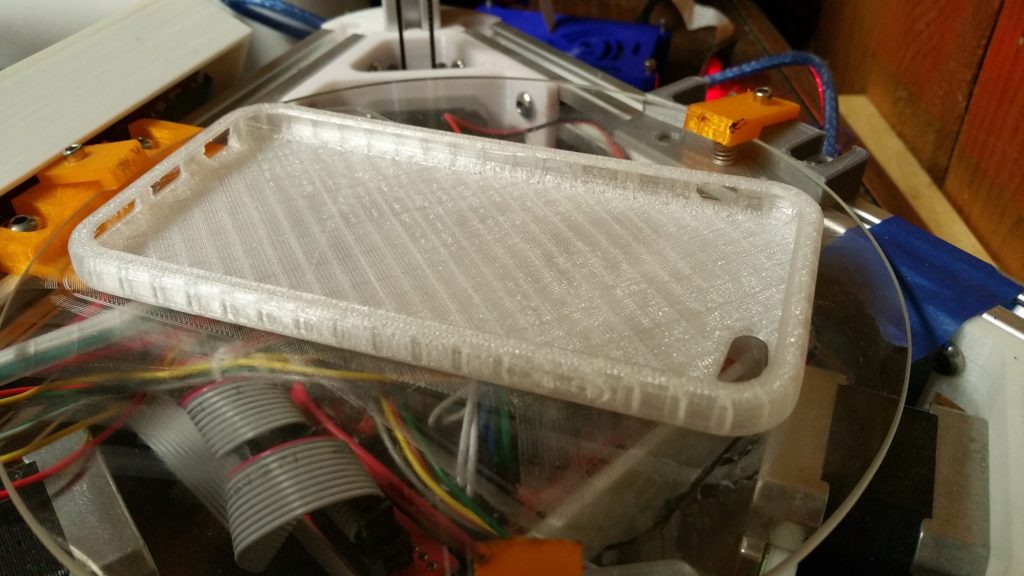
I decided to purchase some sample flexible filament to see if my printer could handle it without any modifications. I decided not to go with the Ninjaflex as I would most likely have to modify my extruder (bowden style) and tube as it might be too flexible. I ended up going with the Sainsmart brand….just purchased some clear off of Amazon.
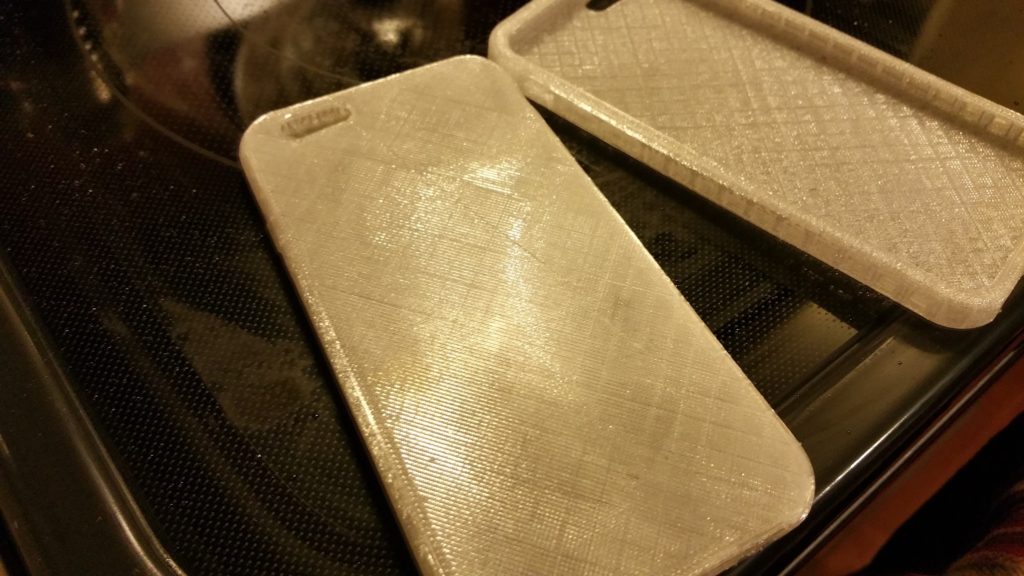
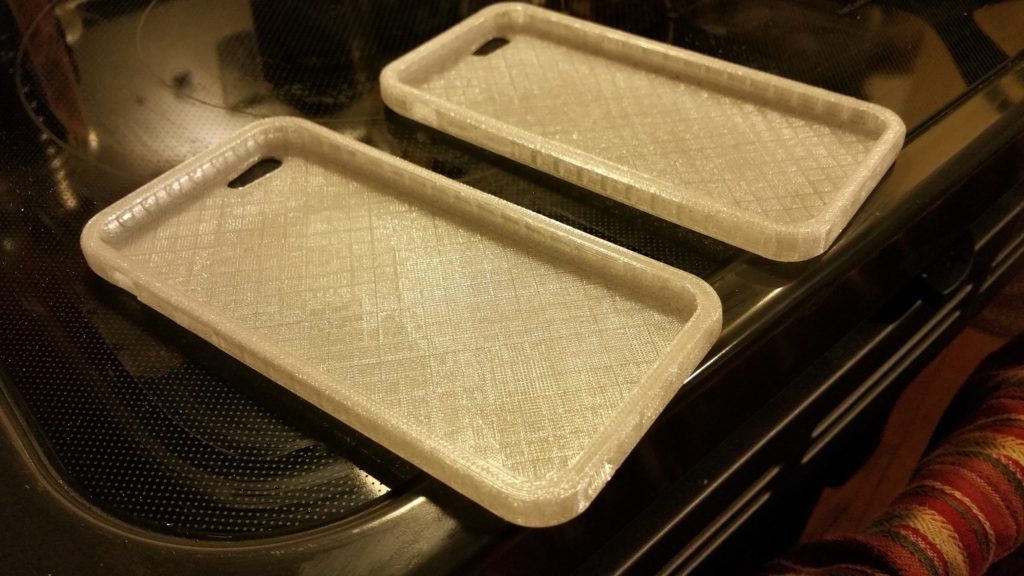
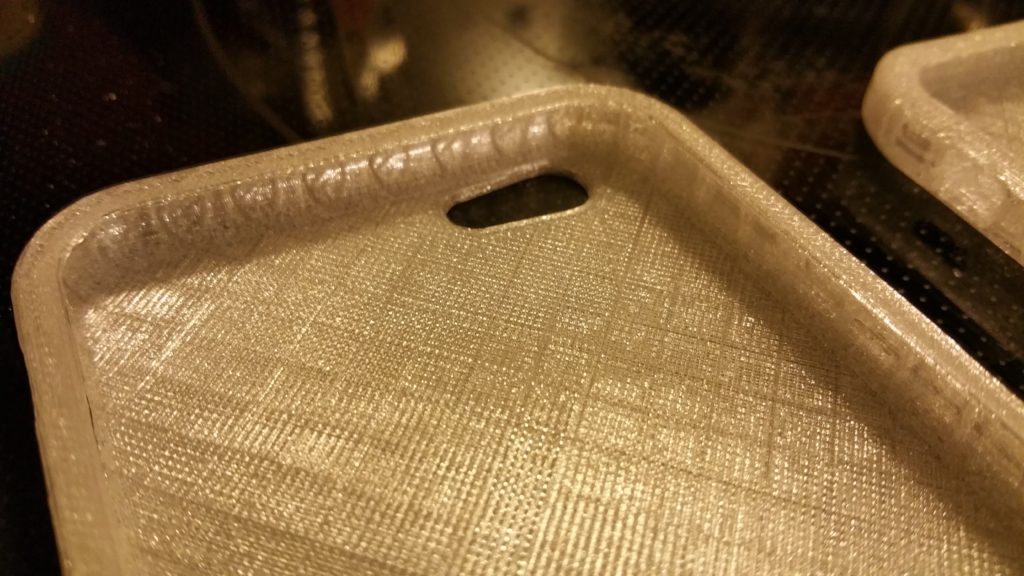
All I did was turn the heat up a little (205 deg) and slow the speed down to 30mms. No heated bed on my printer…just did my typical glue-stick and I am highly impressed with how my prints came out! I started with just a hexagon shape just to see what would happen and then got more adventurous with an iPhone 6 case. Came out amazing! Ended up going with 3 layers on top and bottom and 2 layers for the shell.
Only problem is, I don’t have an iPhone 6, =( I am sporting the Samsung Note 4 currently (I’m an Android guy at heart) but couldn’t find anything on Thingiverse that looked like a good print for this and it would take me forever to design my own. Going to take these cases in to work and have some co-workers give them a try. Might post an update.

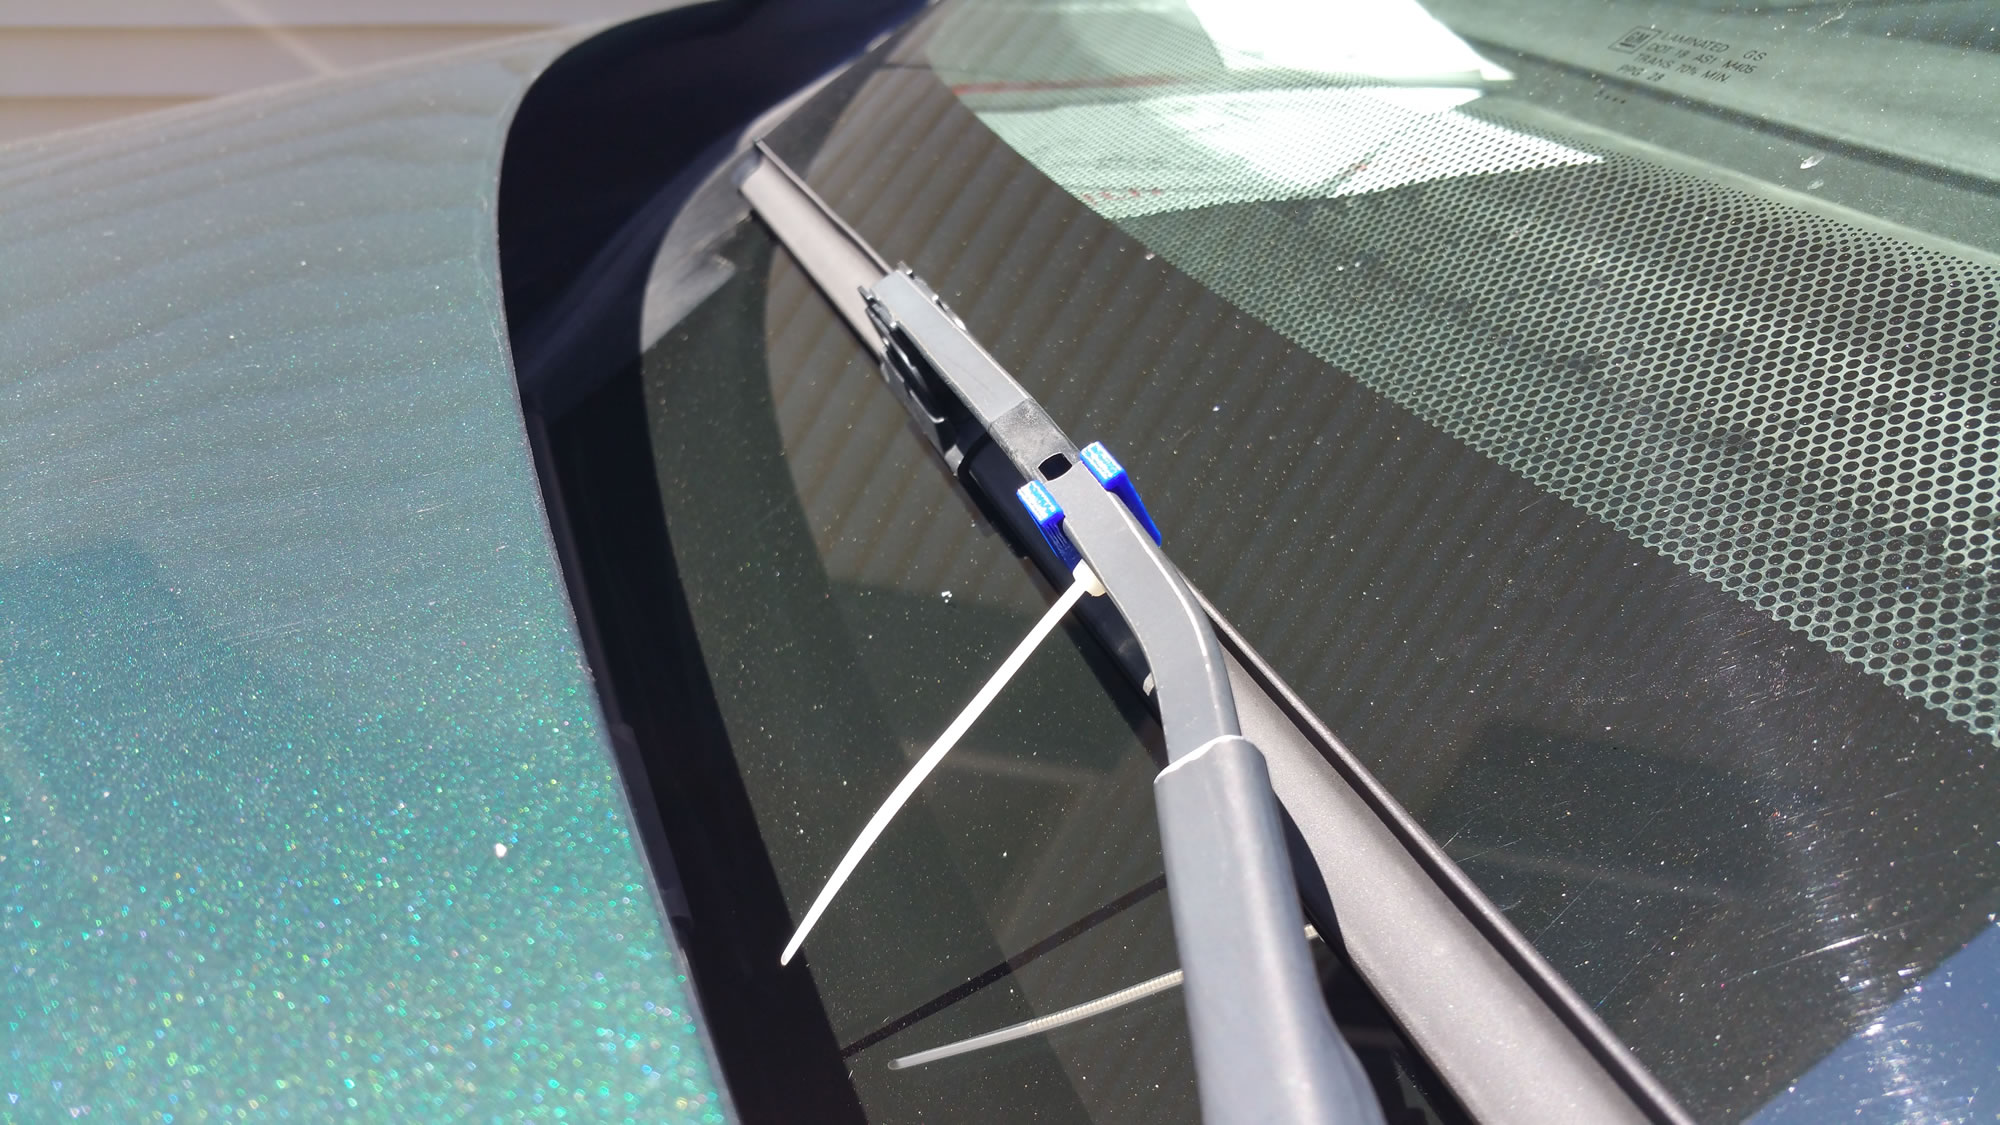
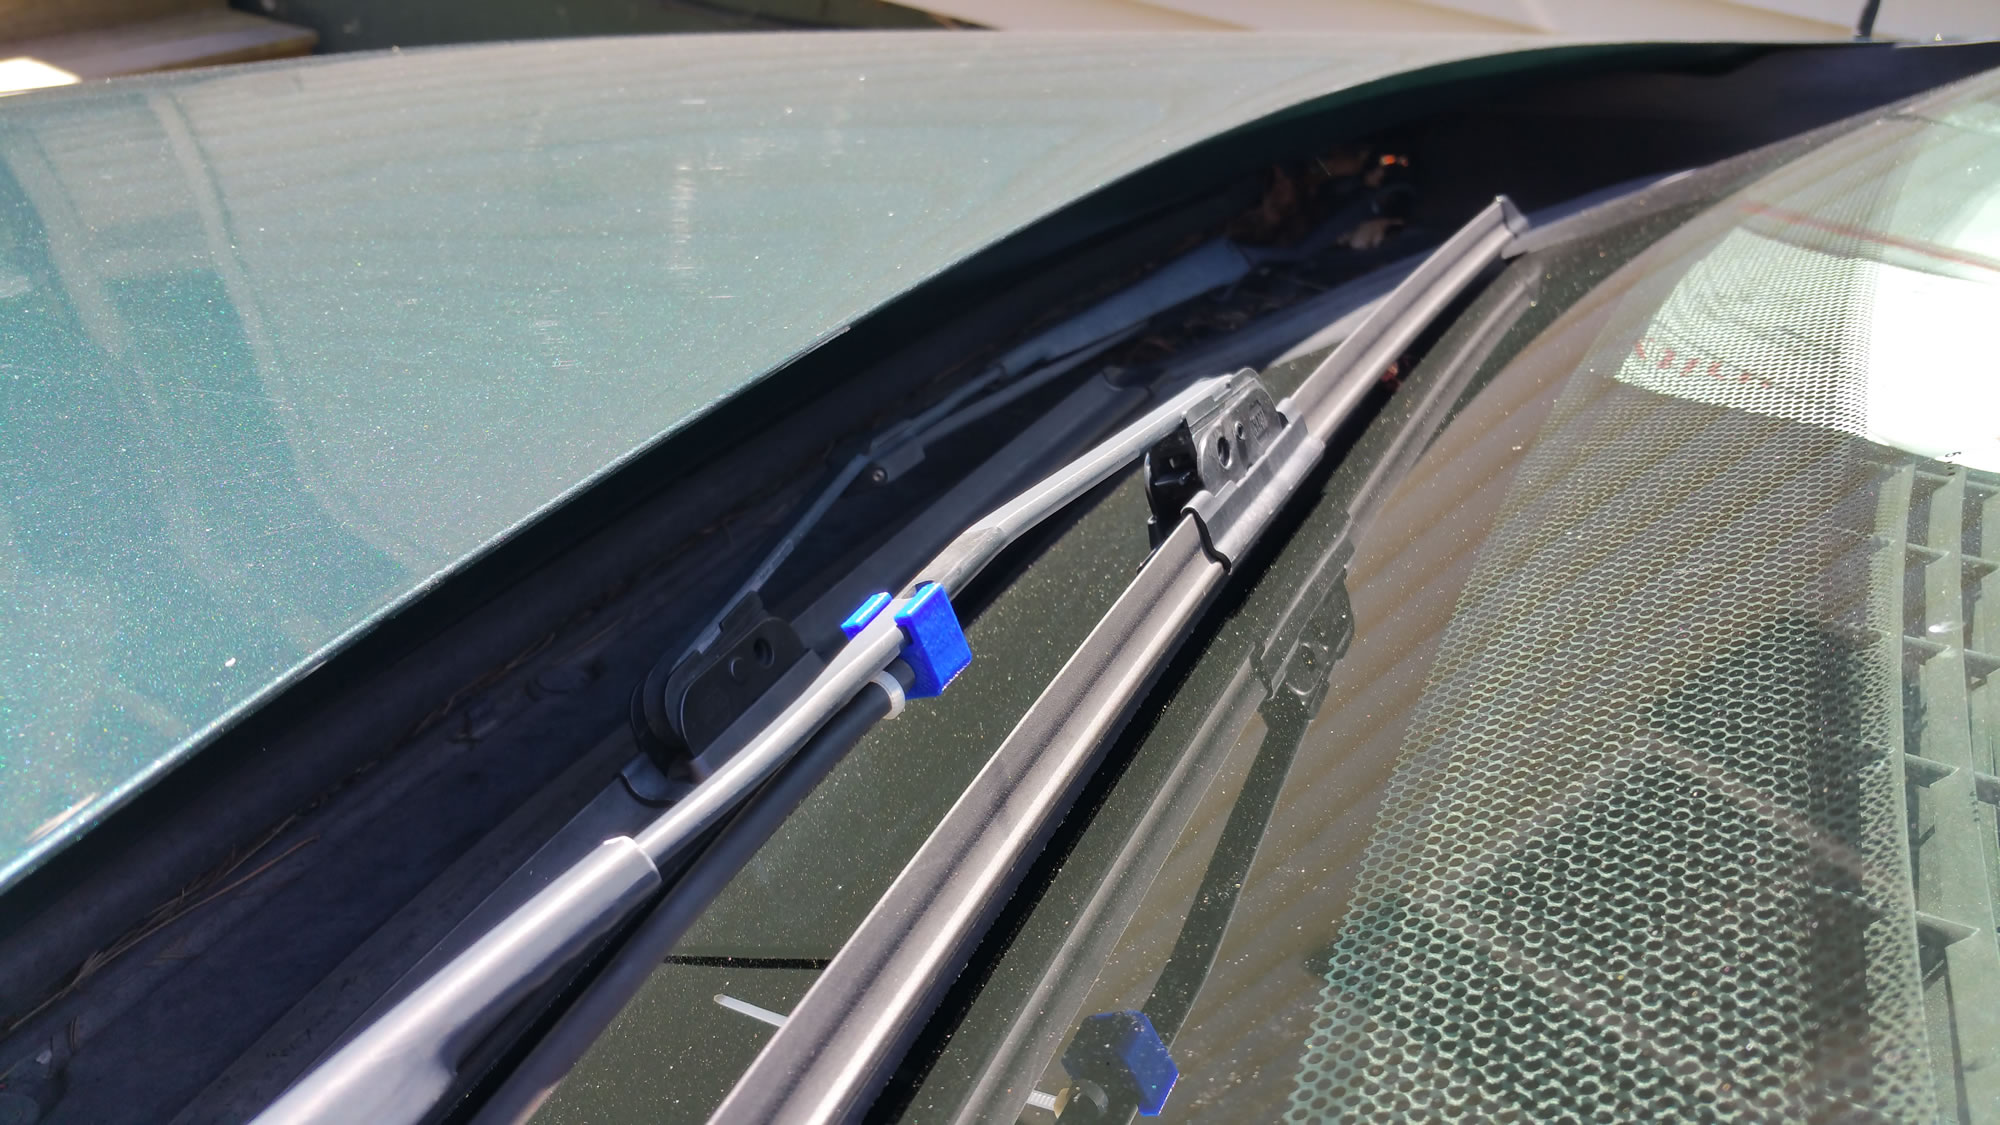
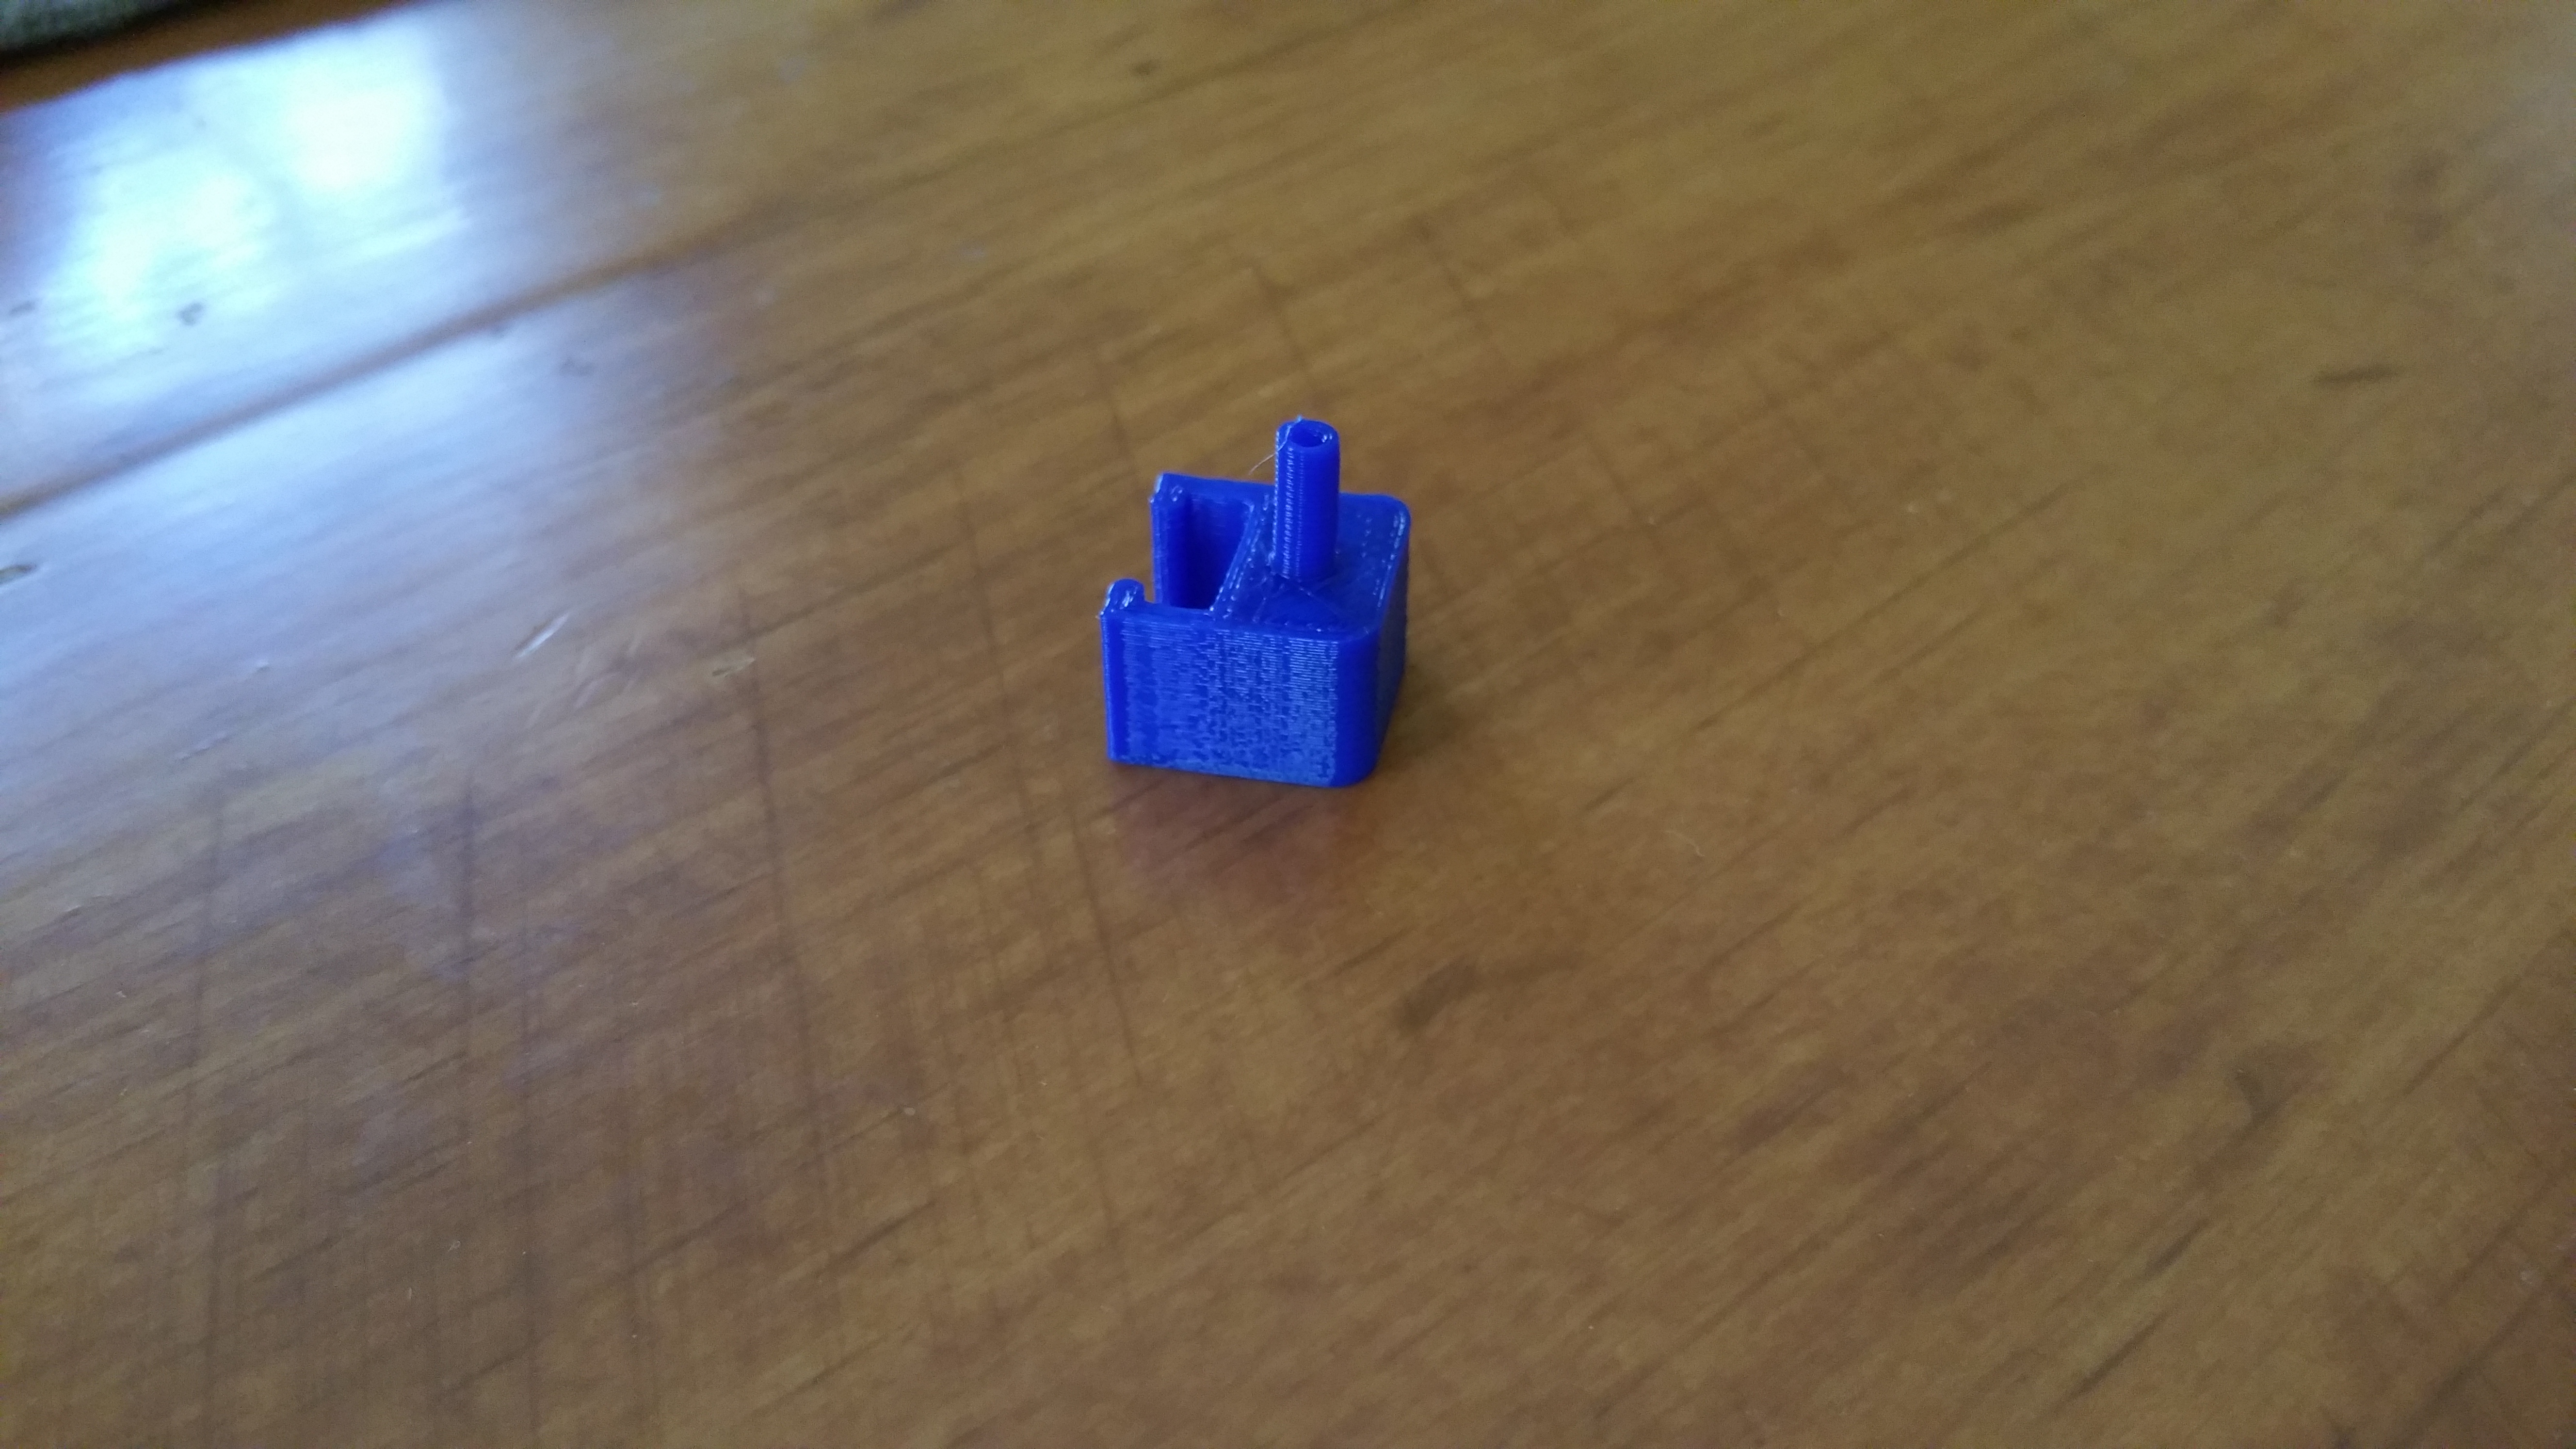
3d Printed wiper sprayer
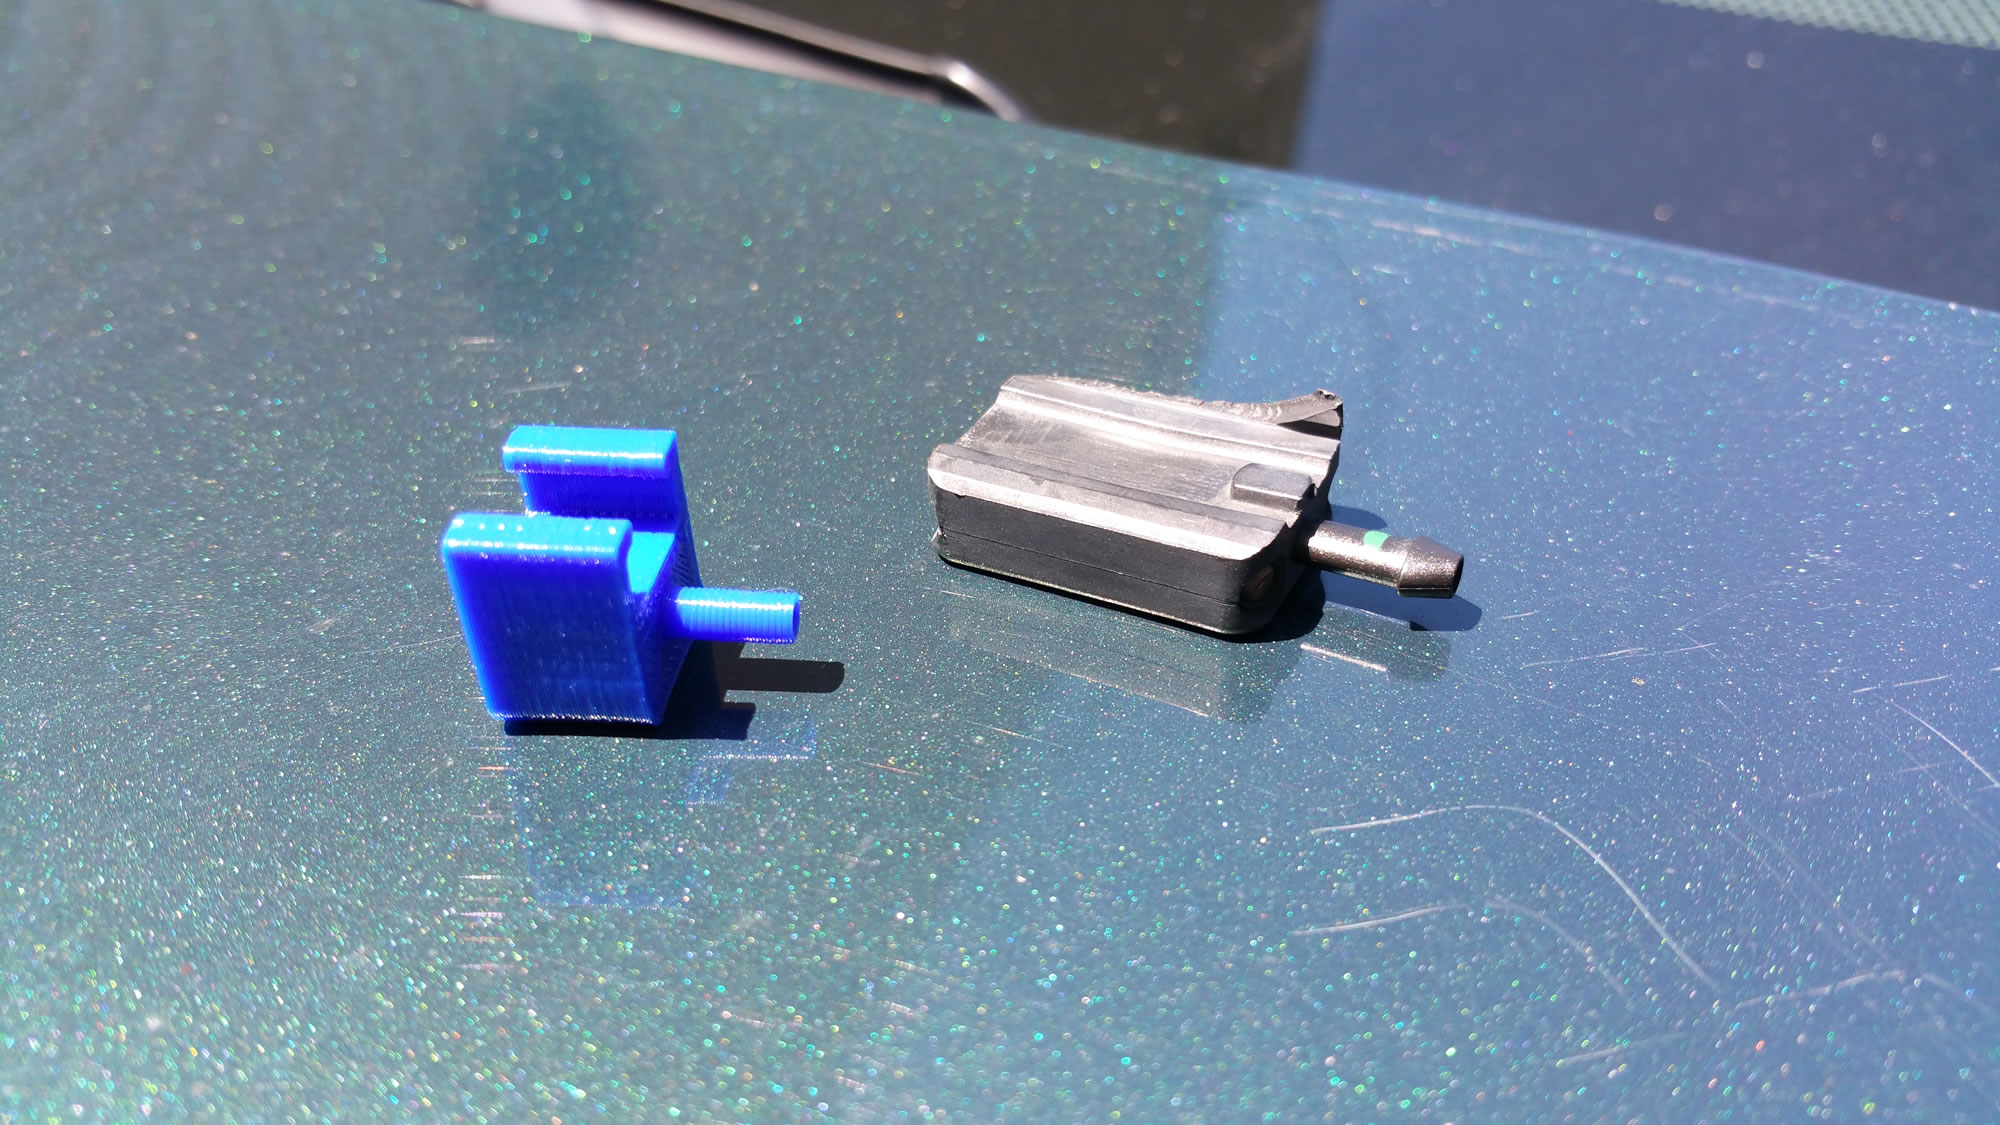
Thought I’d make a little post on a 3d printed part I just did for my van. The wiper washer broke on the driver’s side blade and just for kicks, I searched Thingiverse to see if someone had designed something similar and someone did!
I printed one out and with a zip-tie to hold the hose on, it works pretty decent. It seems to shoot the spray right at the blade but at least now it’s not flapping around like it was before.
P.S. this is for my 2006 Chevy Uplander…in case anyone is interested
Update on the tessel arm
Figured I’d give an update on how the tessel arm has been coming.
I have since purchased a 3d printer kit…which was a little pain-staking to get going but now that I’ve got it working, I definitely know it pretty well…which was the point. I mentally prepared myself for the trials of getting it working and am continuing to learn still.
Using the 3d printer, I’ve been using a guy’s design and tweaking it as needed.
Here are some pics.
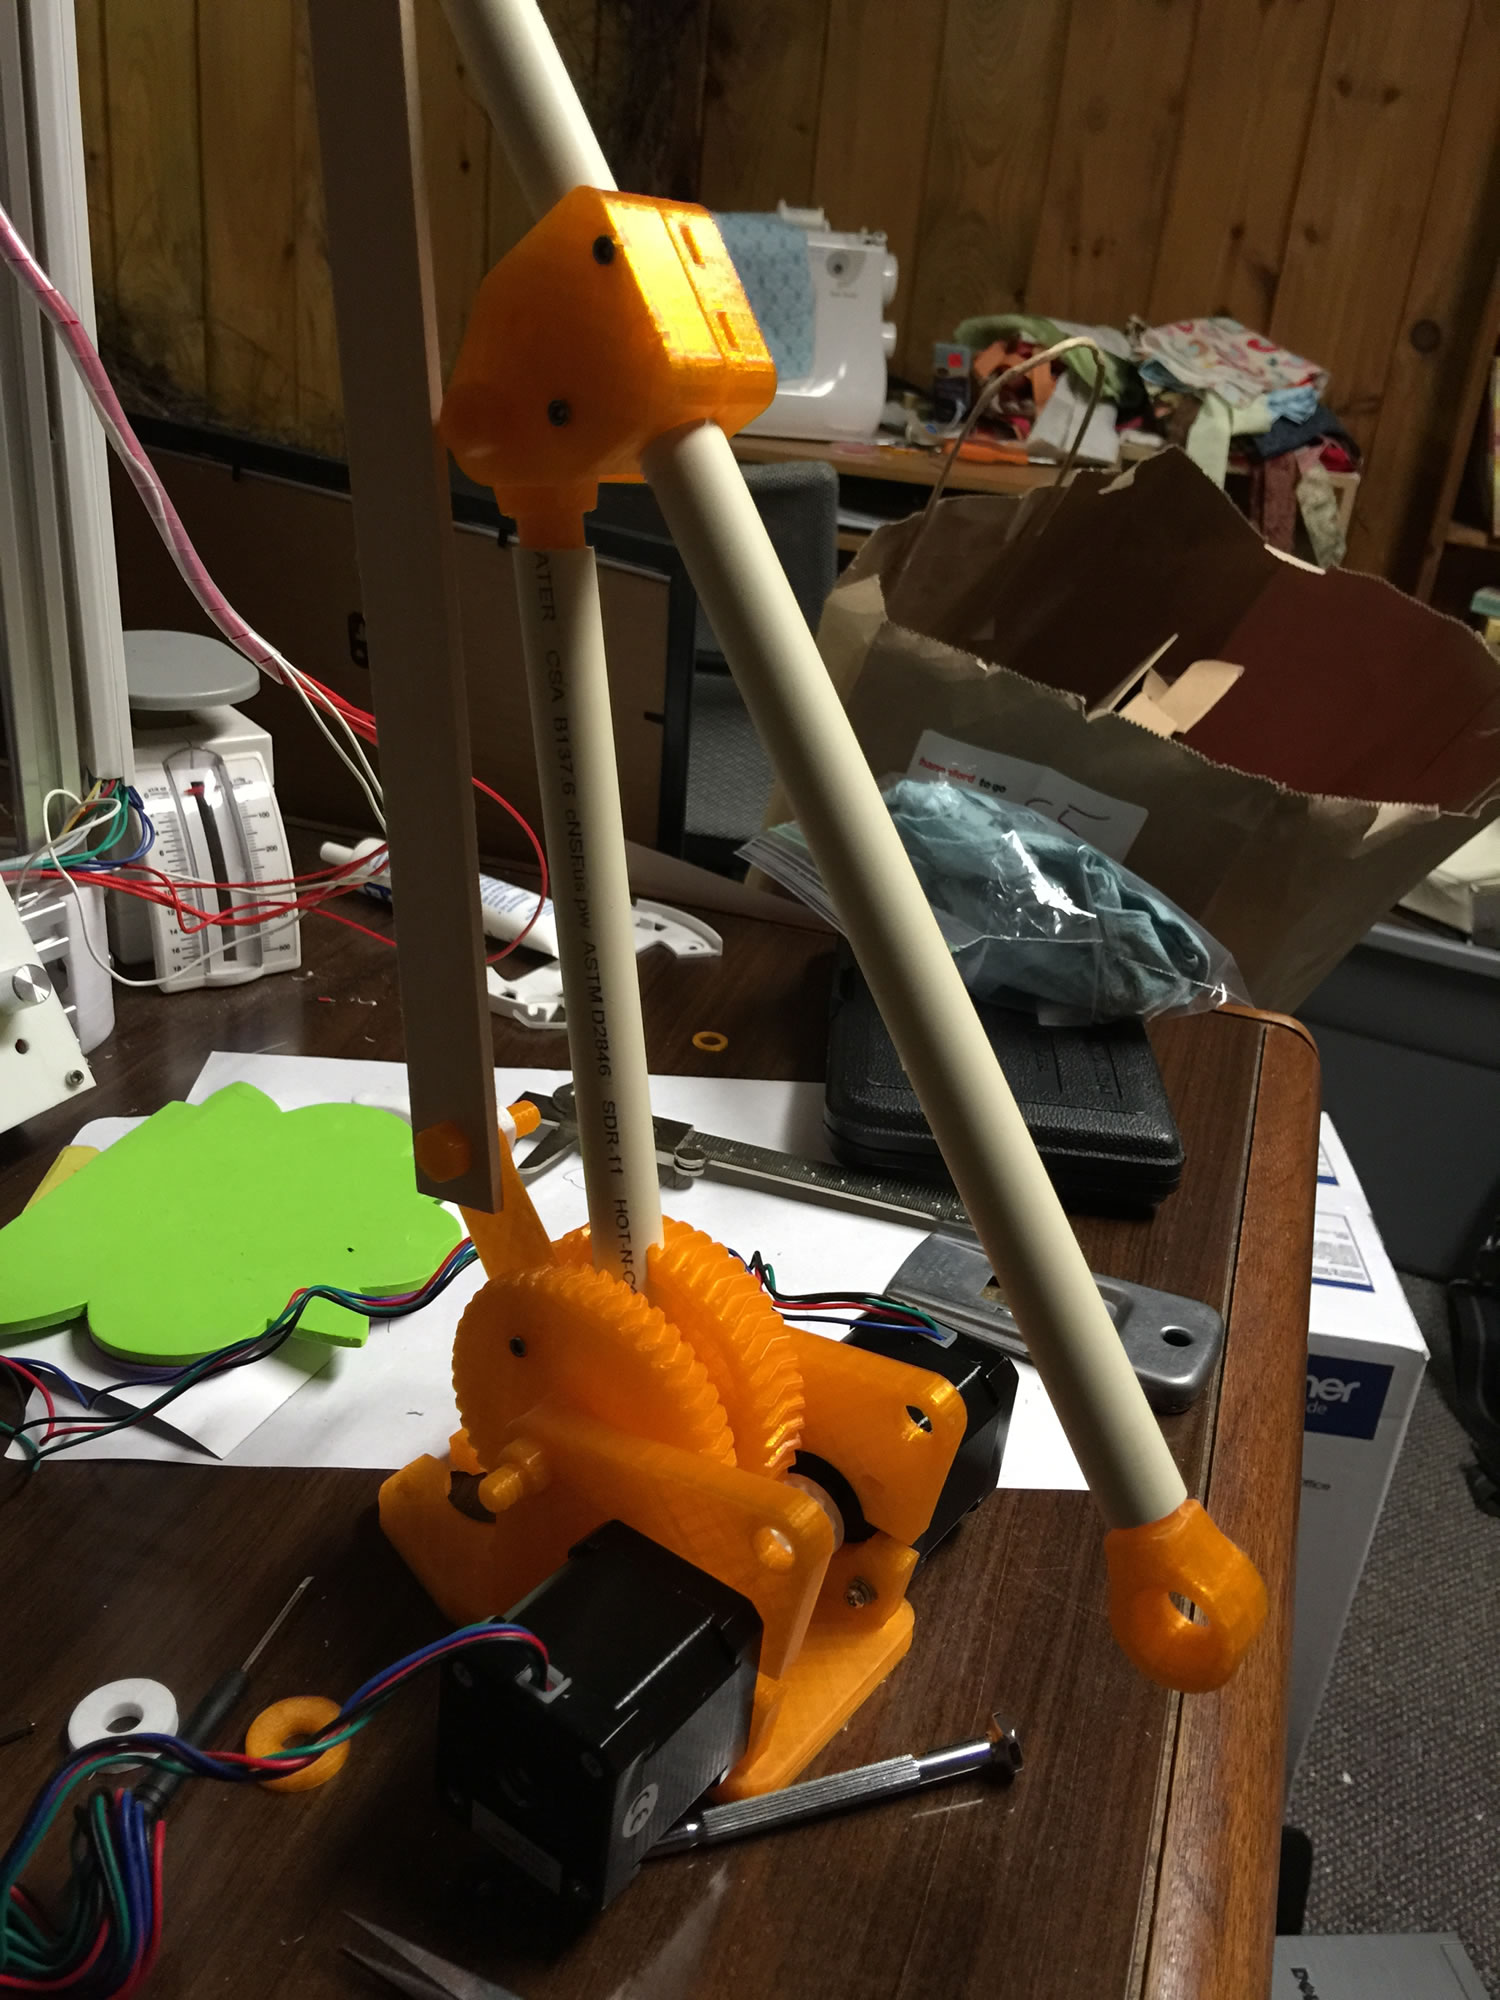
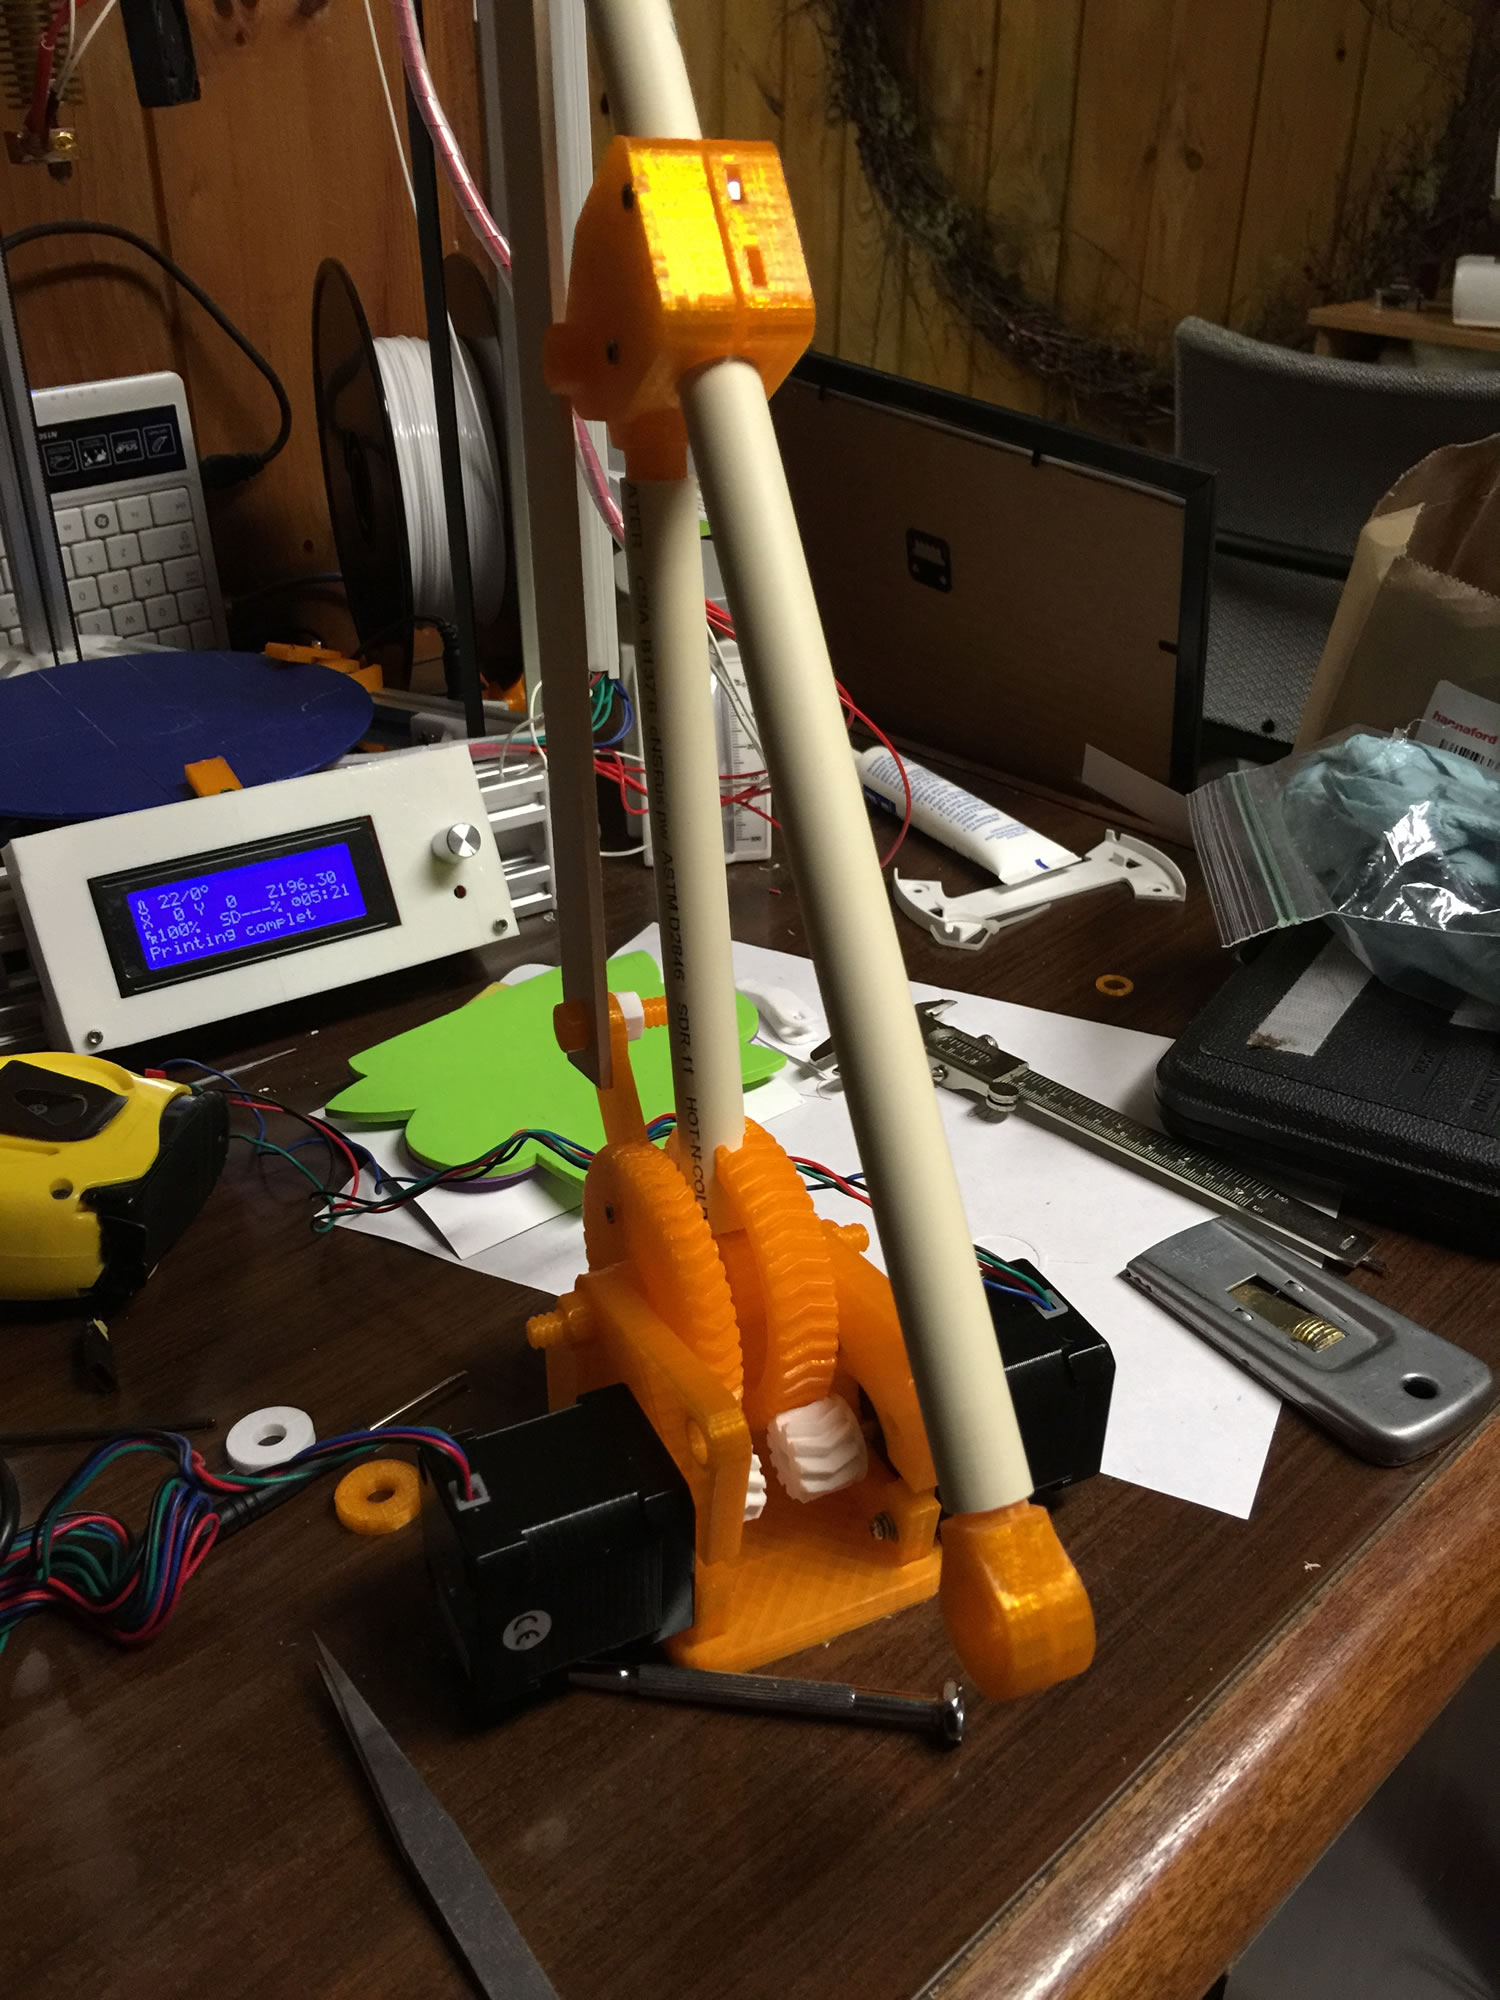
I’ve got it using pretty simple g-code right now. The software is going to be the kicker for this. I will end up having it work pretty similar to 3d printer to pic things up and move them. I’d like the software to be pretty intuitive to the user, drag and drop “locations” and loops to handle tedious tasks. =)
A buddy an I went in on a 10 pack of some 84oz/in torque steppers….and those things hold pretty well. With the motors engaged, I can pick up the whole thing by the end of the arm and it doesn’t budge. =)
Will post more as I progress. Time for this is short but still fun to play with when I can.