Posts in Category: Arduino
Laser Engraver
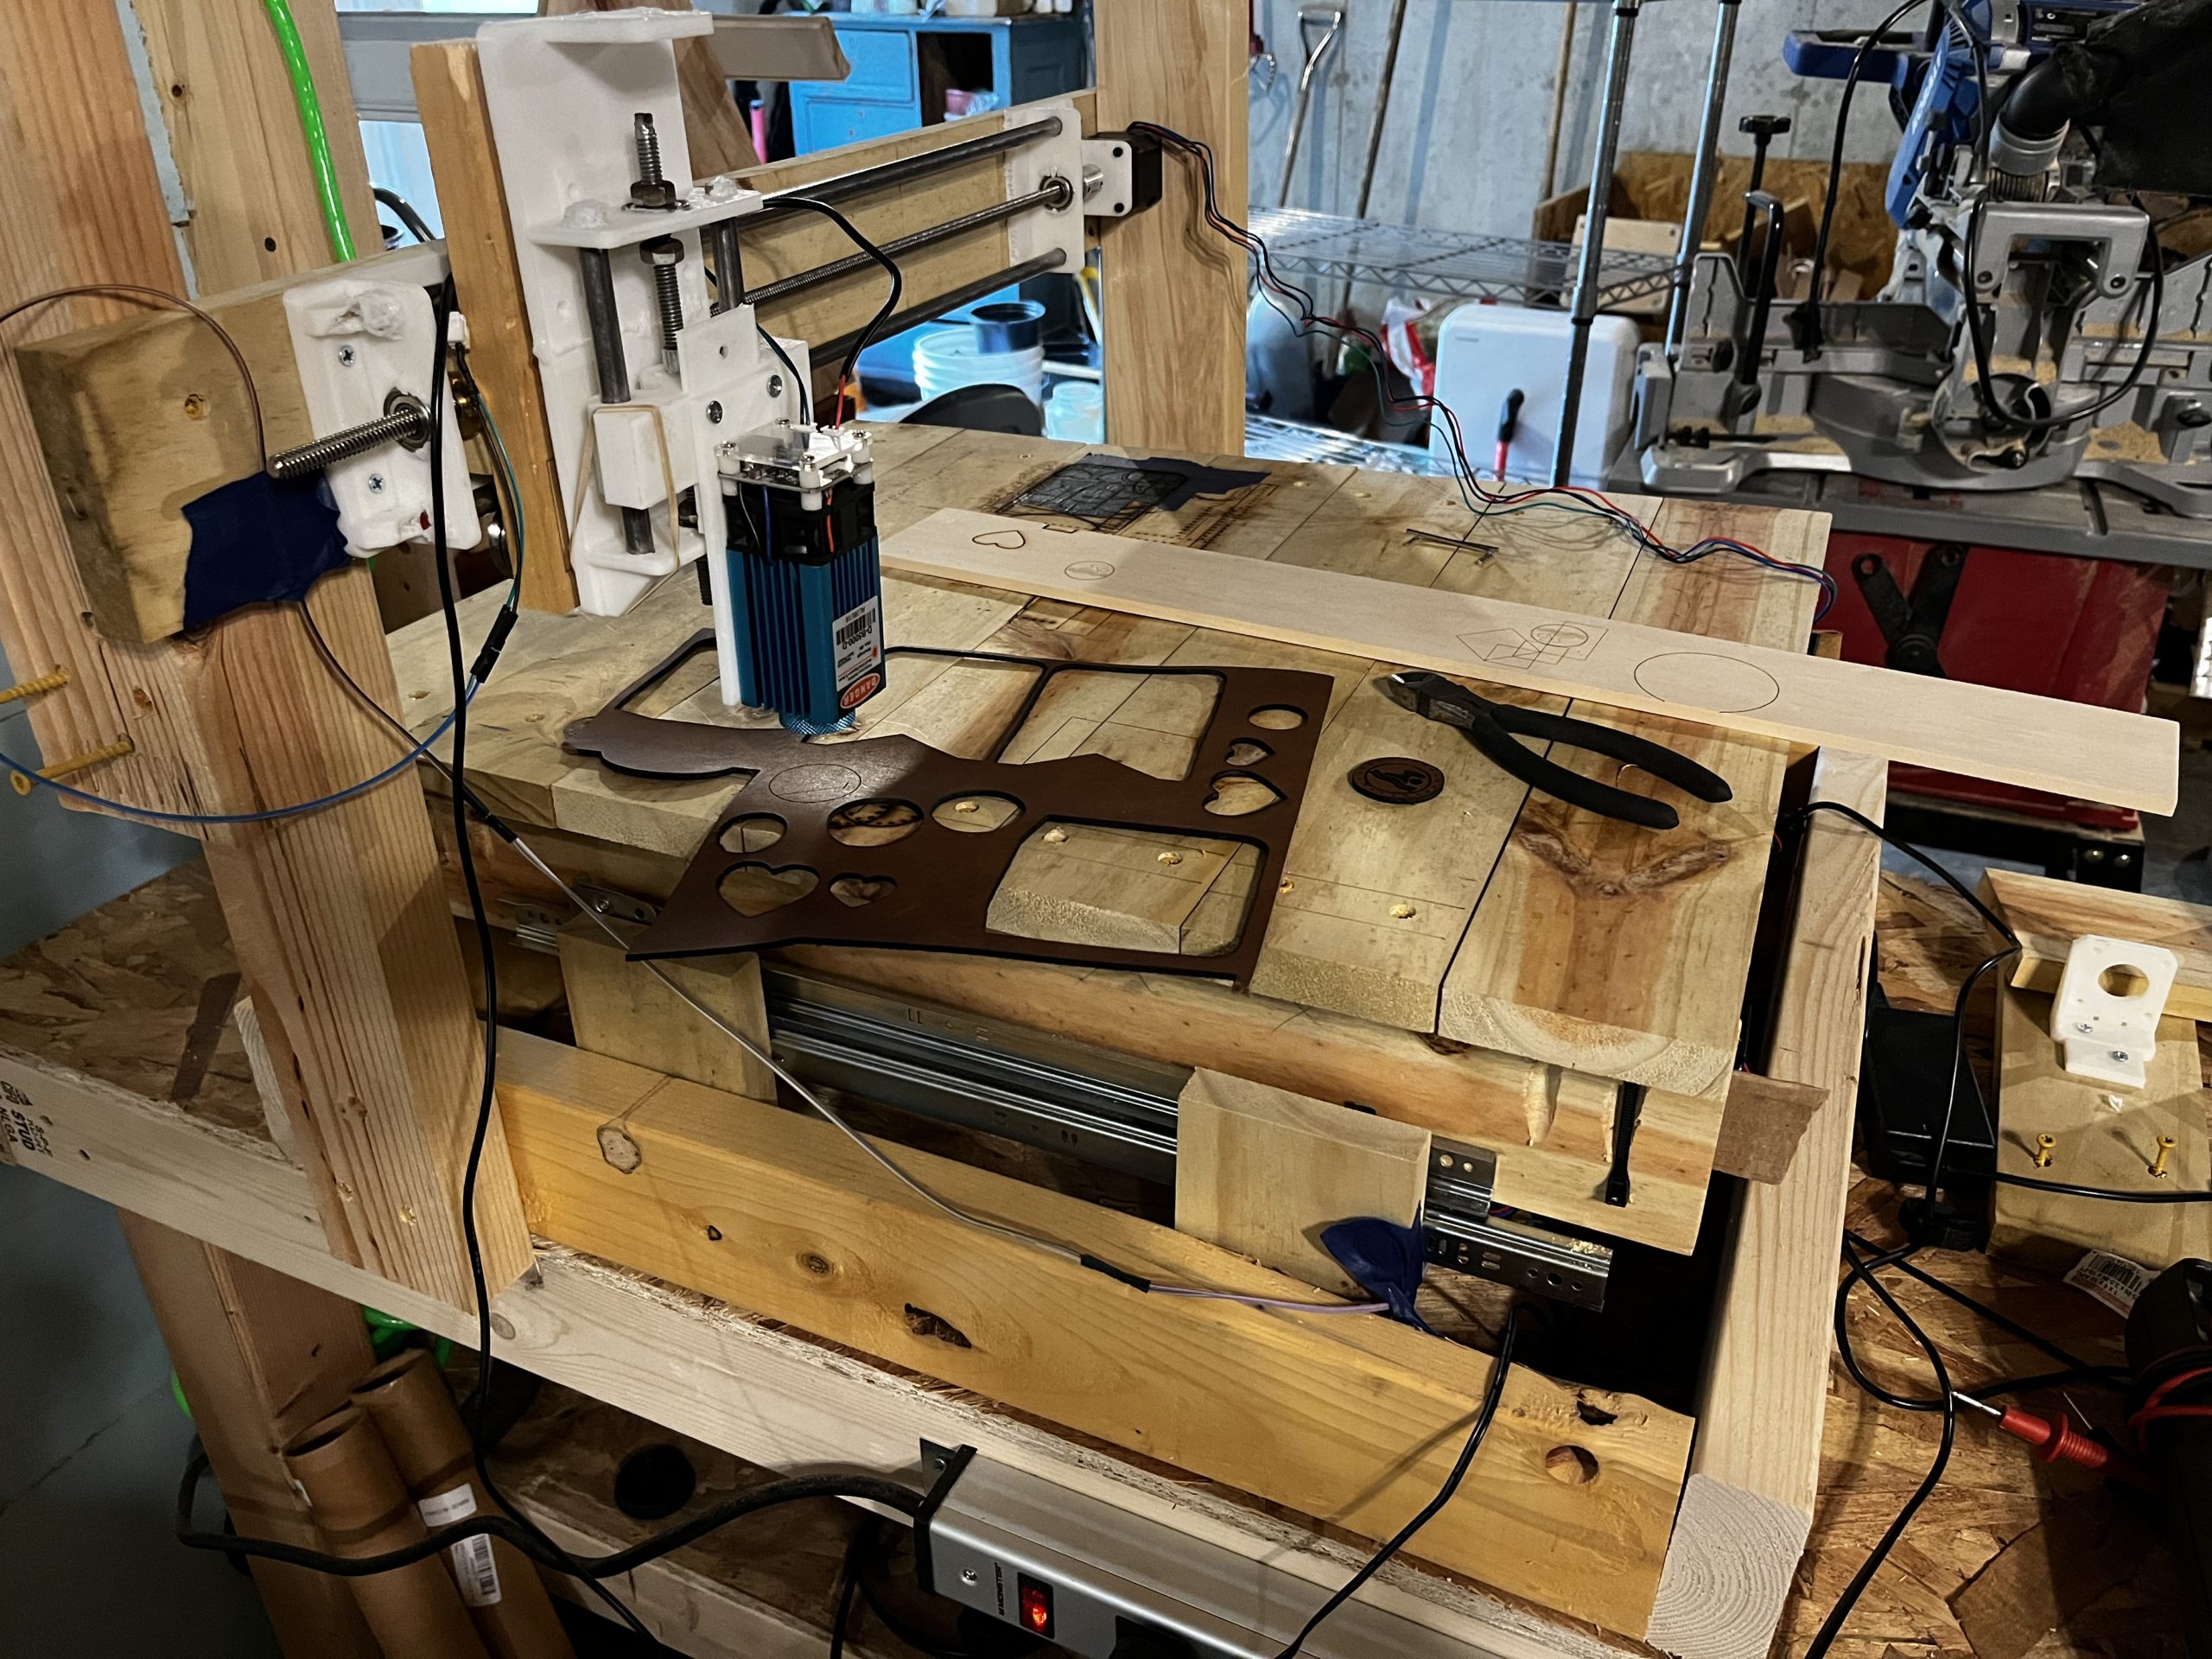
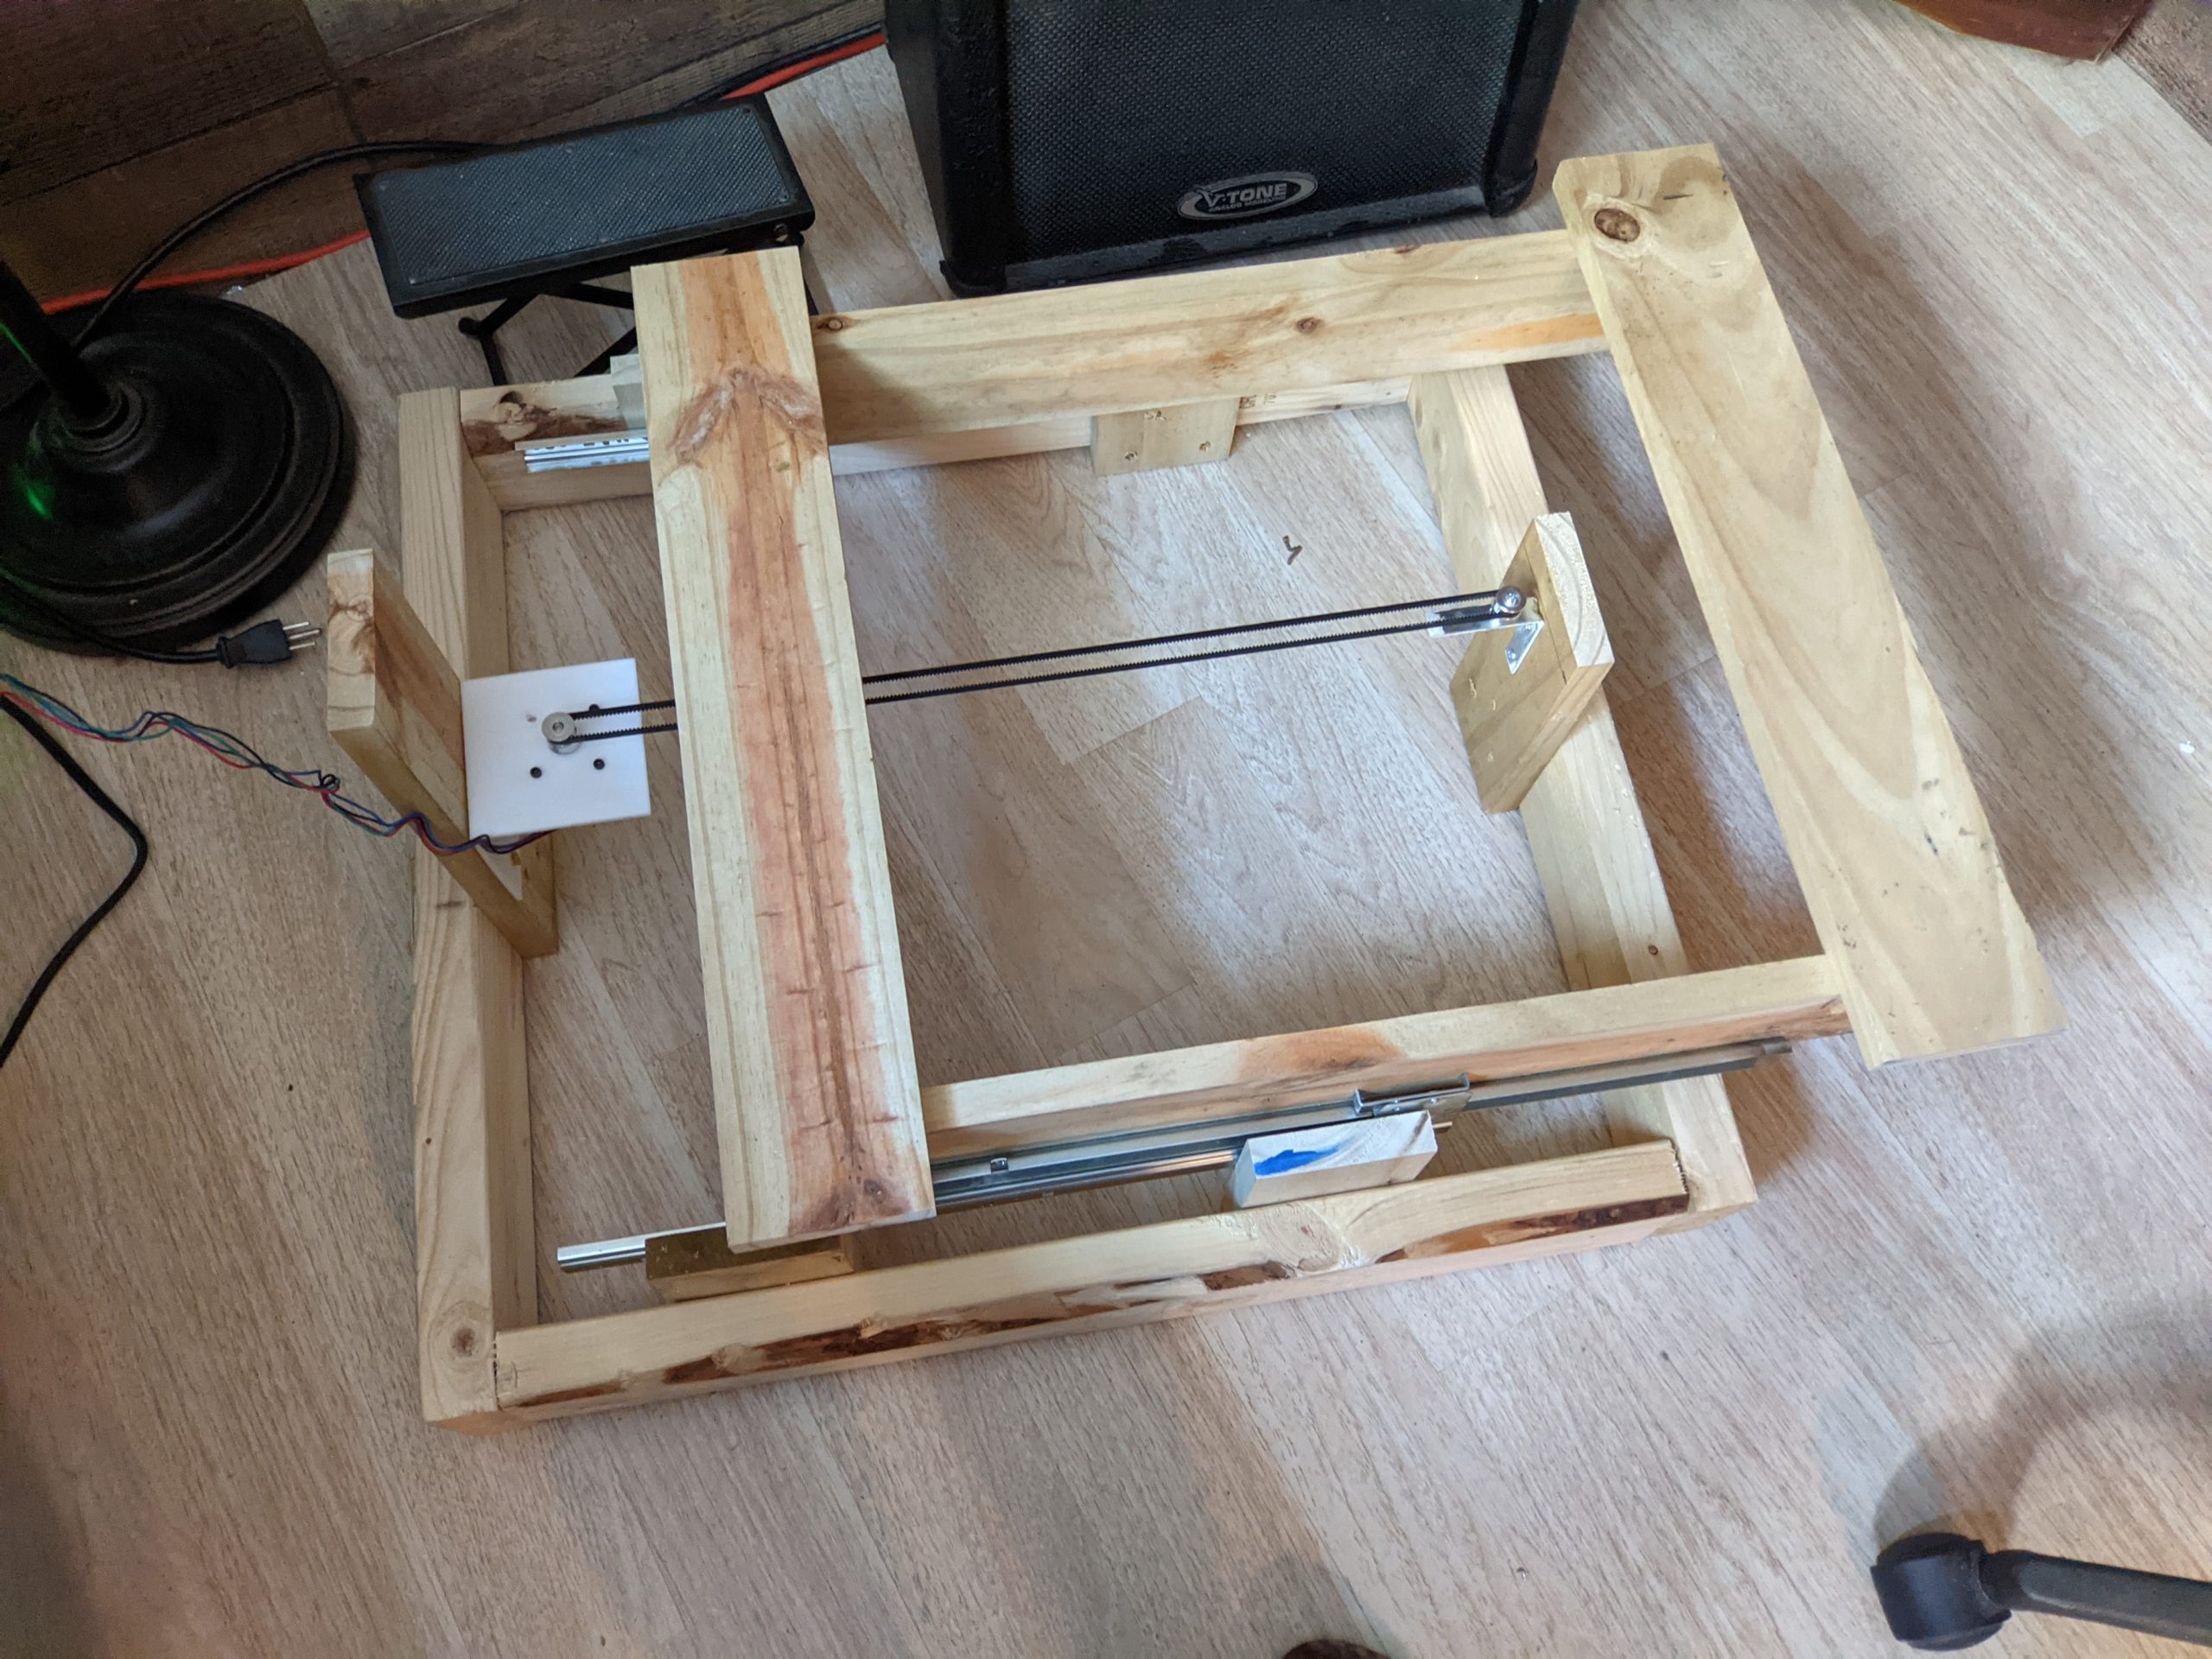
So I originally started with some old printer parts and had a small working laser engraver. I am using some drawer rails as the X axis and now I’ve got some 3/8 rods for the Y axis. I happen to have the v-slotted bearings that a friend gave me a while ago which work great as the carriage.
I ended up purchasing 4 of the precision threaded rods as the regular threaded rods you buy at the hardware store have a bit of a dead zone to them (found that out the hard way). I originally had my X axis using a single belt…then went to two motors with 2 belts…and finally swapped them over to using the precision rods. Now it is pretty solid, especially for using drawer rails to hold it together. =)
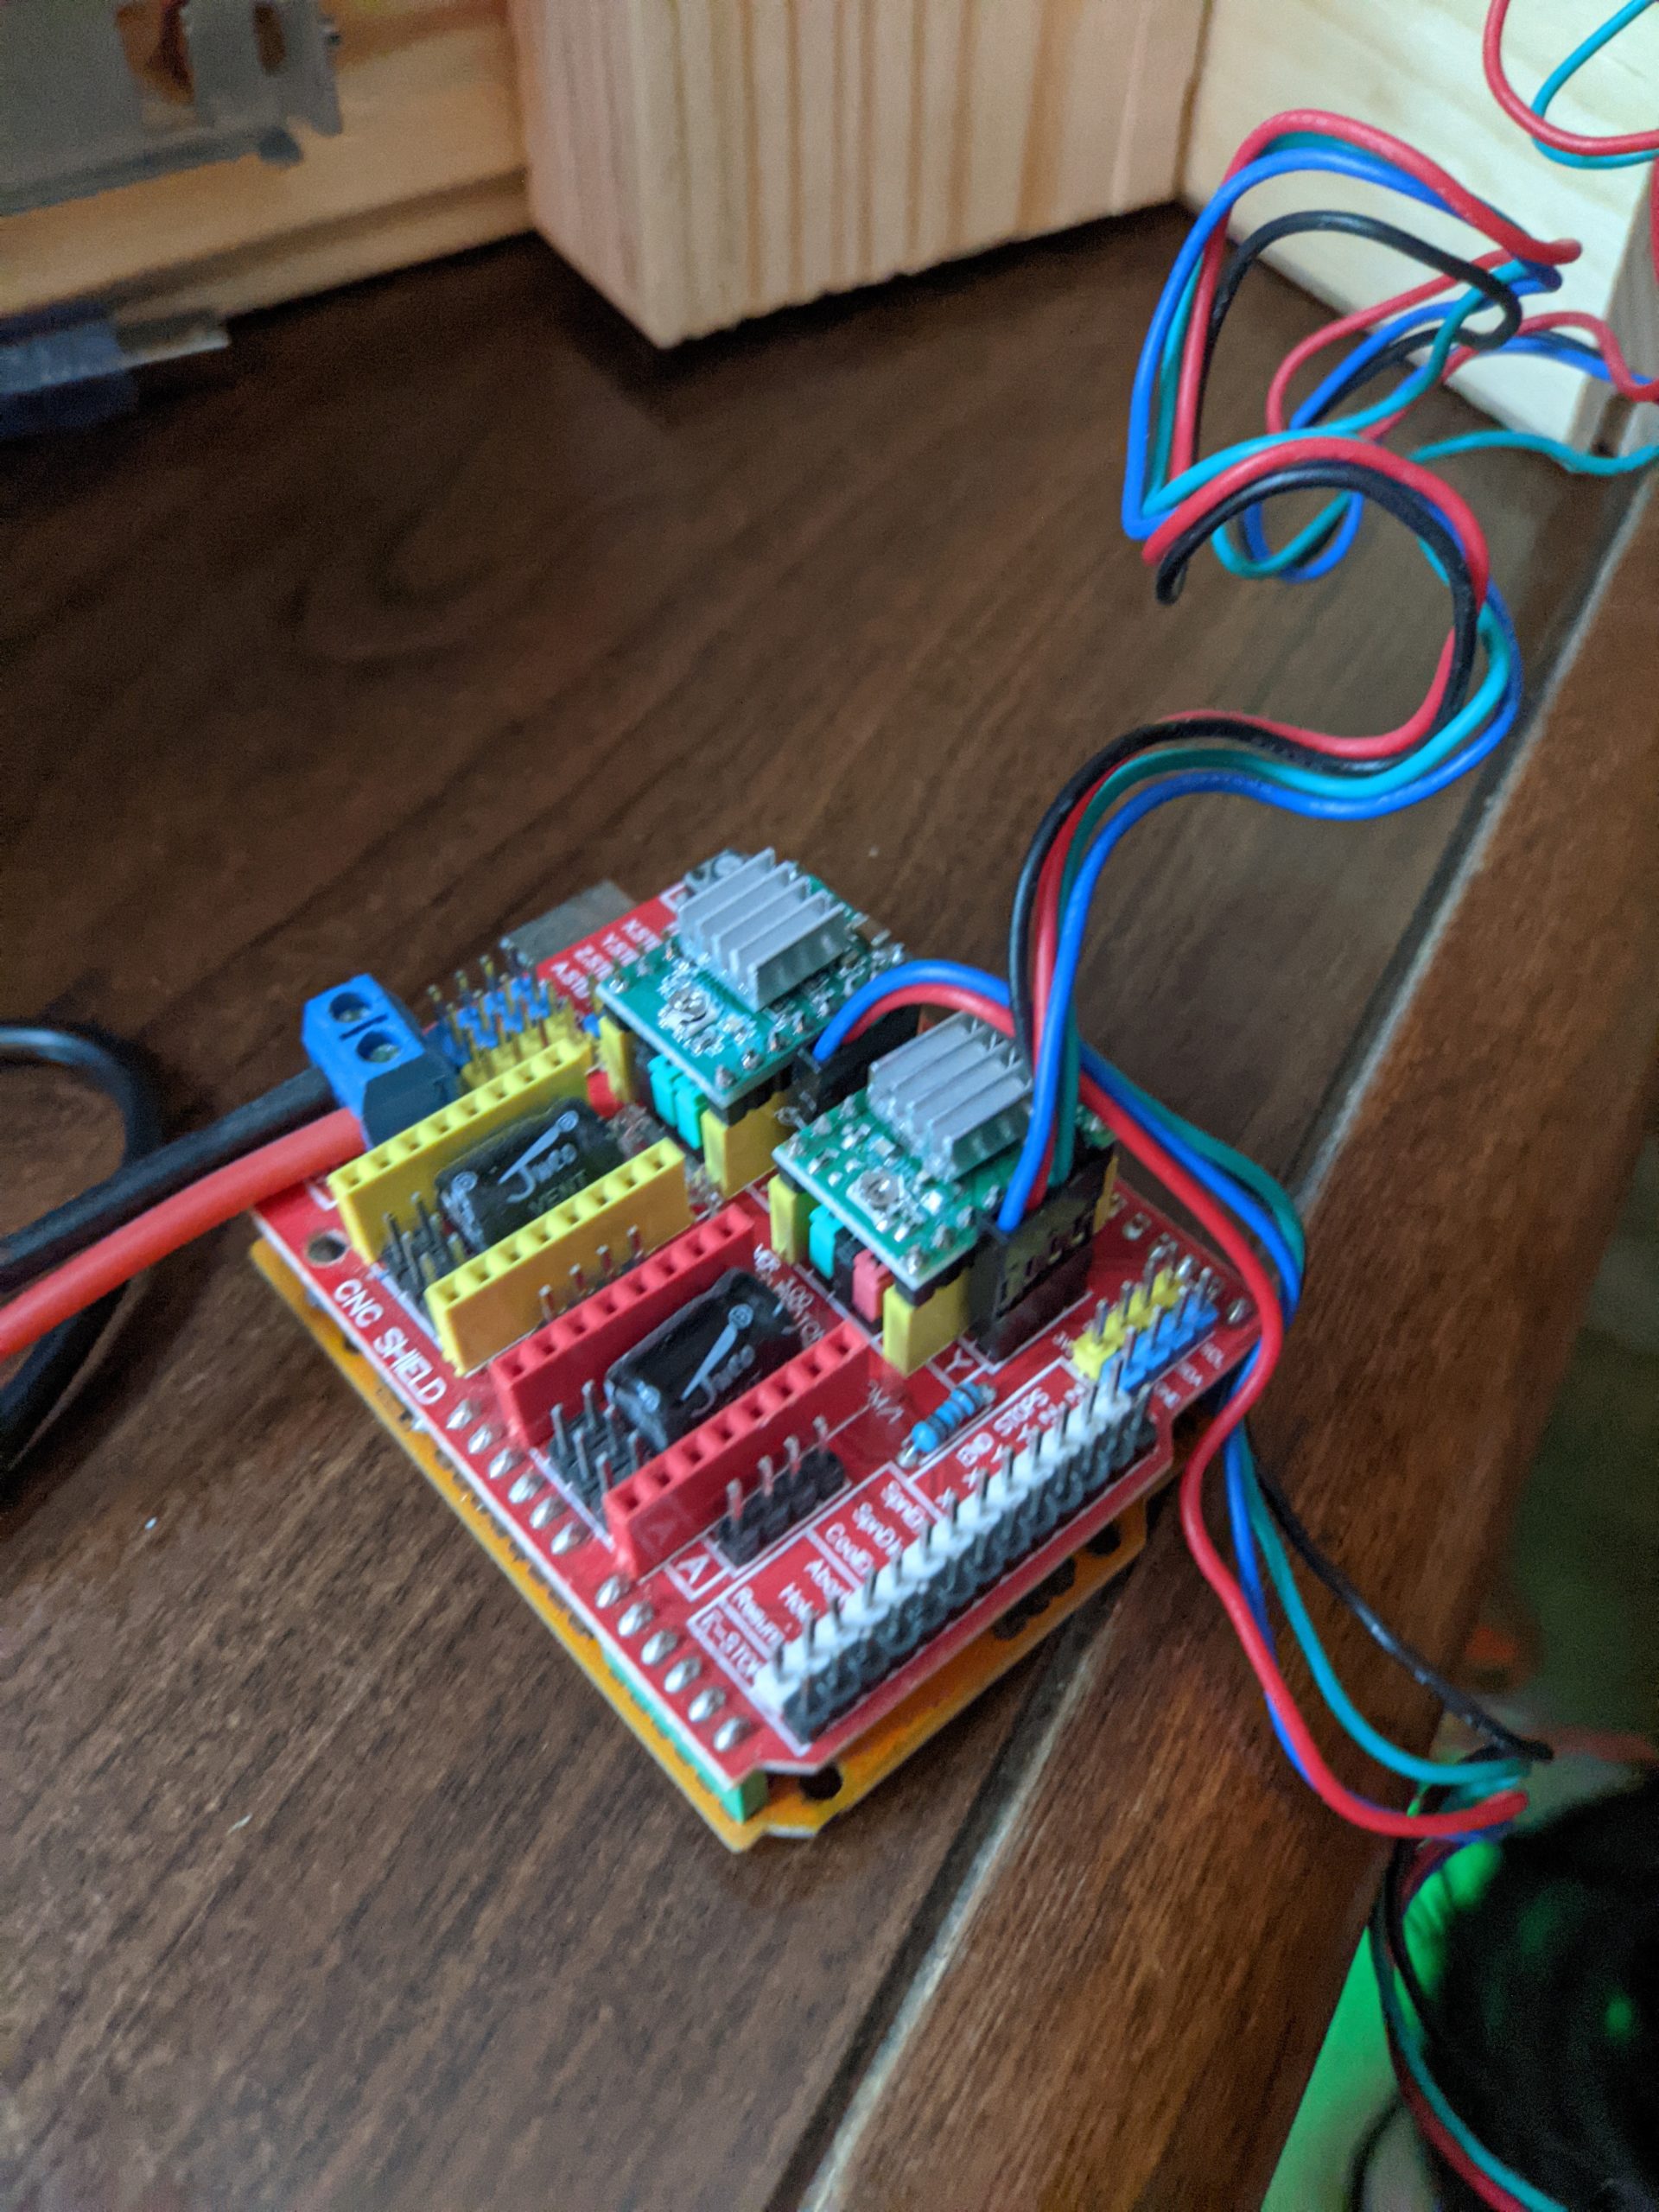
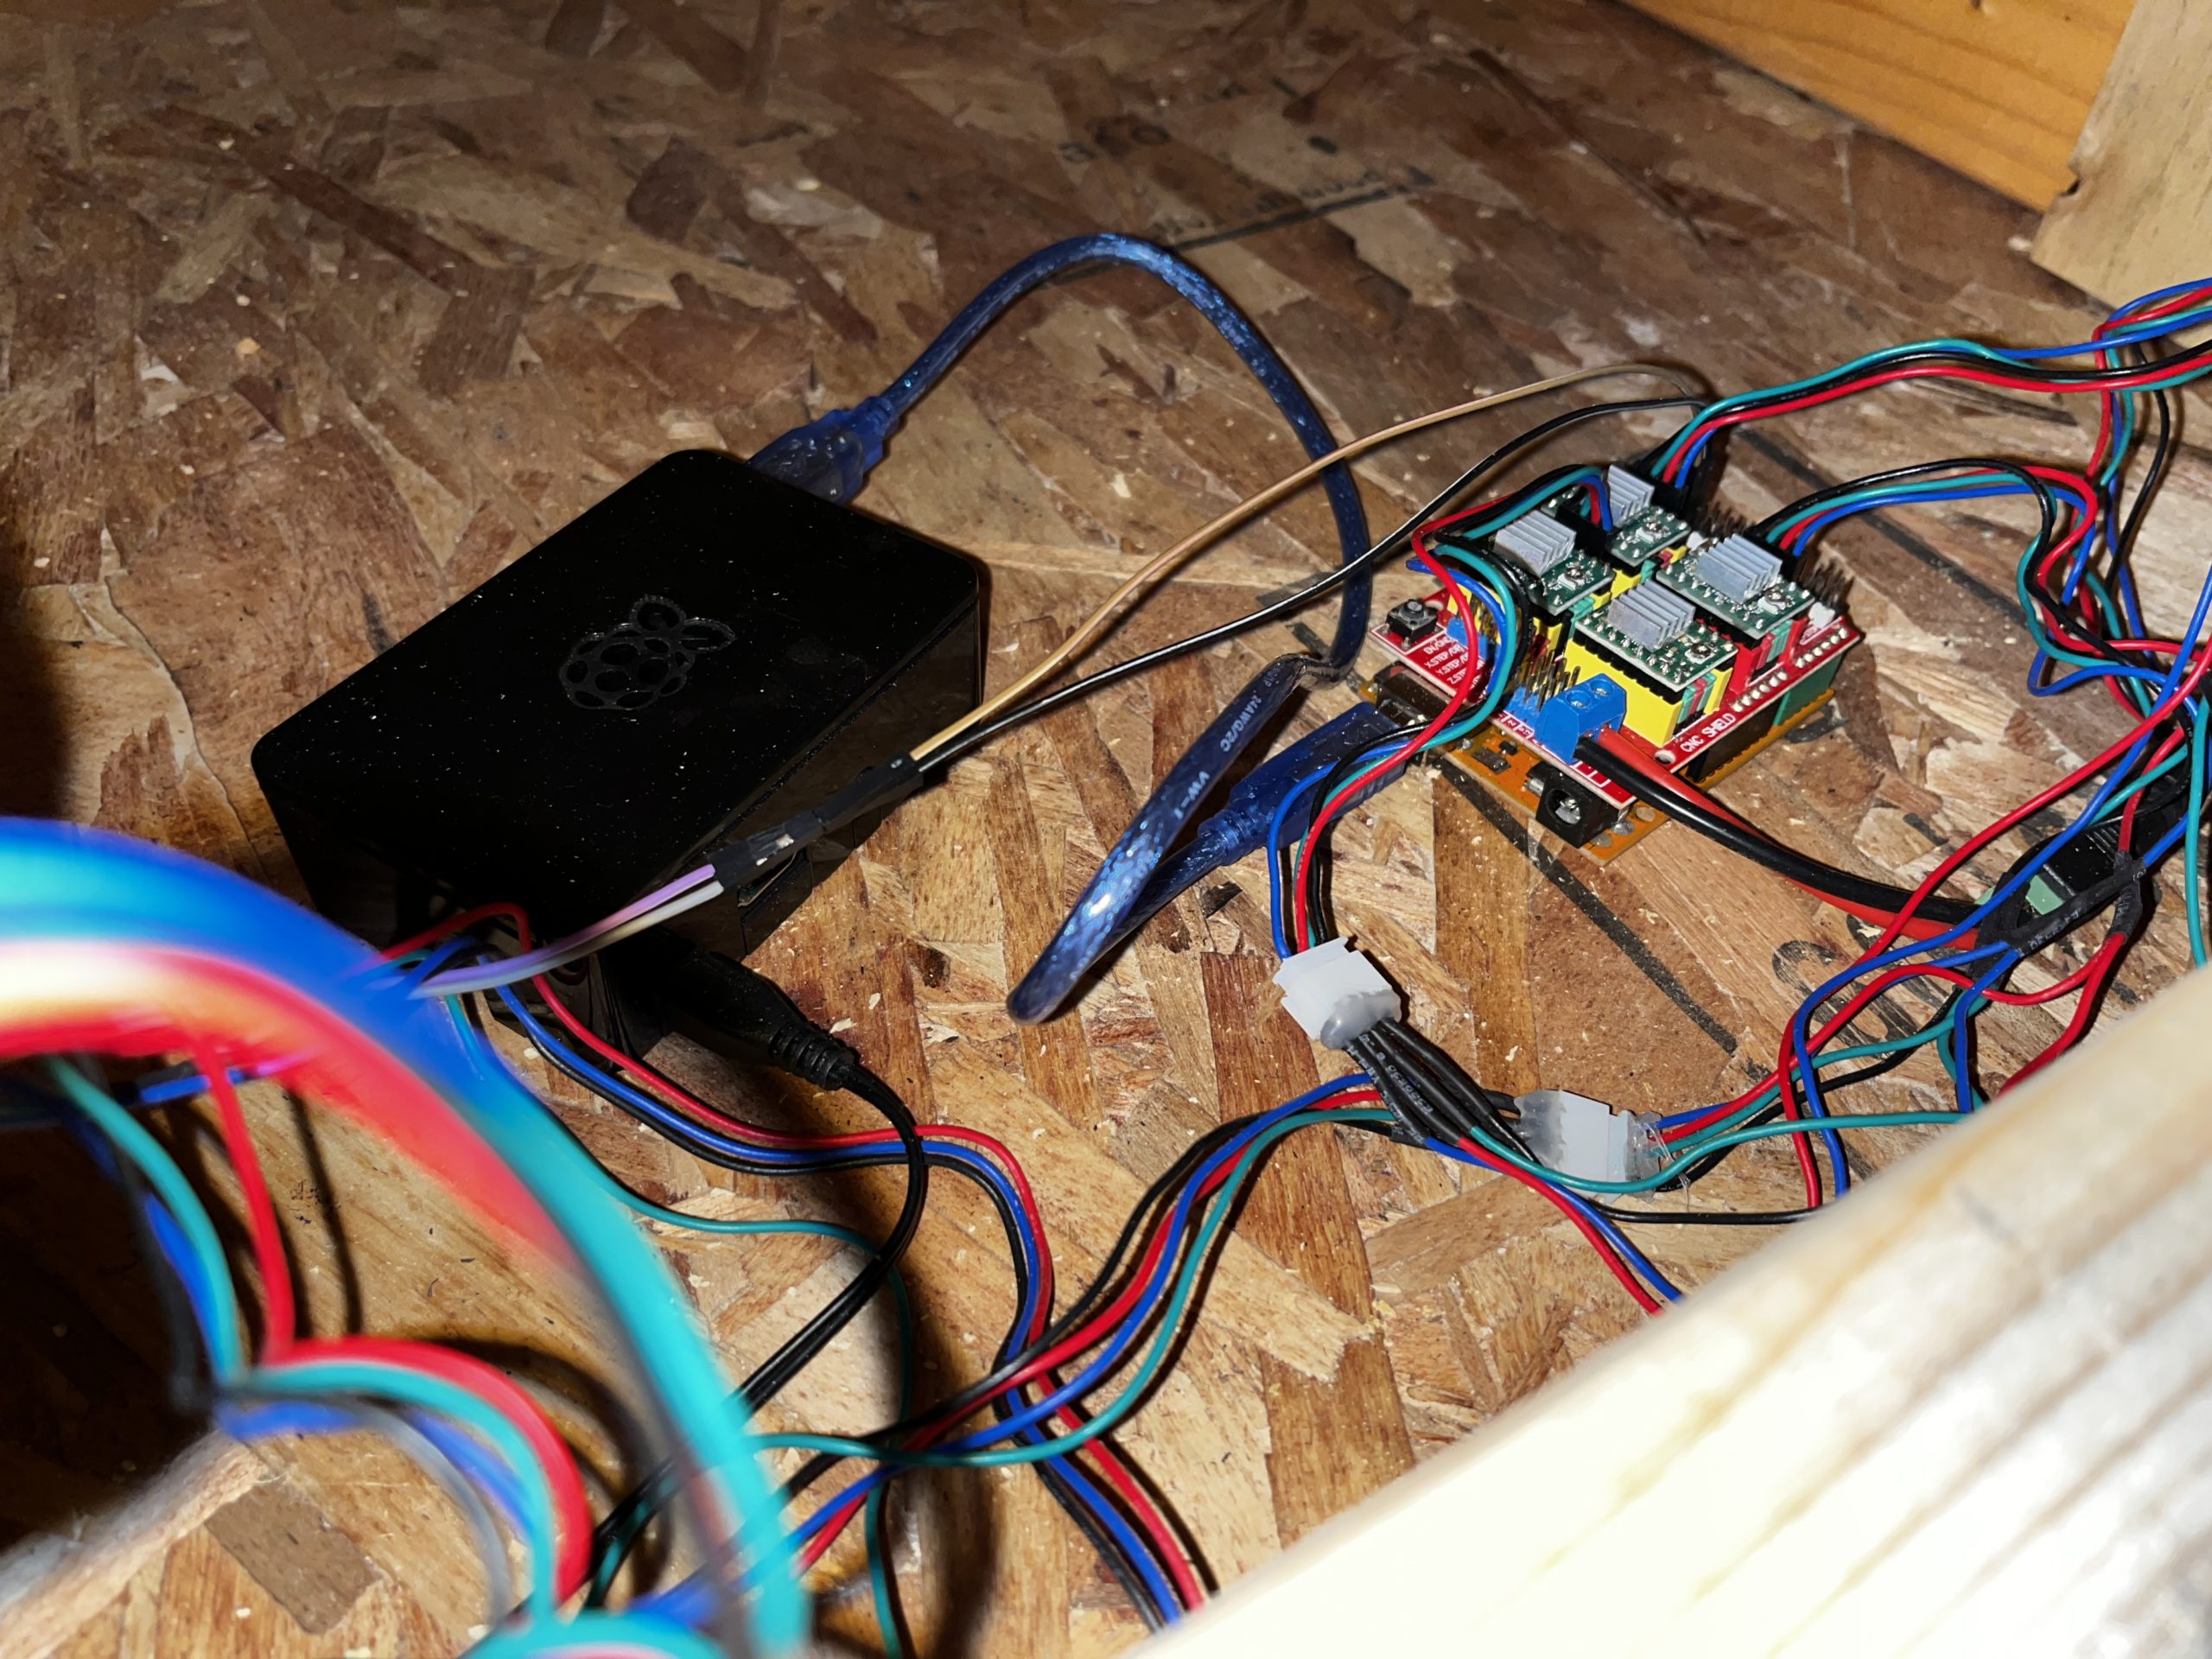
It’s all run by a raspberry pi running OctoPi and then an arduino uno with the cnc hat.
I originally had my Y axis using two 3/8 rods with a 3d printed carriage that slid onto the rods…but this proved too stiff and the laser would show a slight warping when the Y axis would change directions. I then swapped it to the v-slotted bearings and a wooded rig as the carriage. This slid much easier and required no real torque from the motor at all to move around.
My next step with this is to rig the carriage to hold my dremel and act as a sort of mini-cnc…and ultimately handle doing circuit boards!


Modified Power Wheels
Backstory
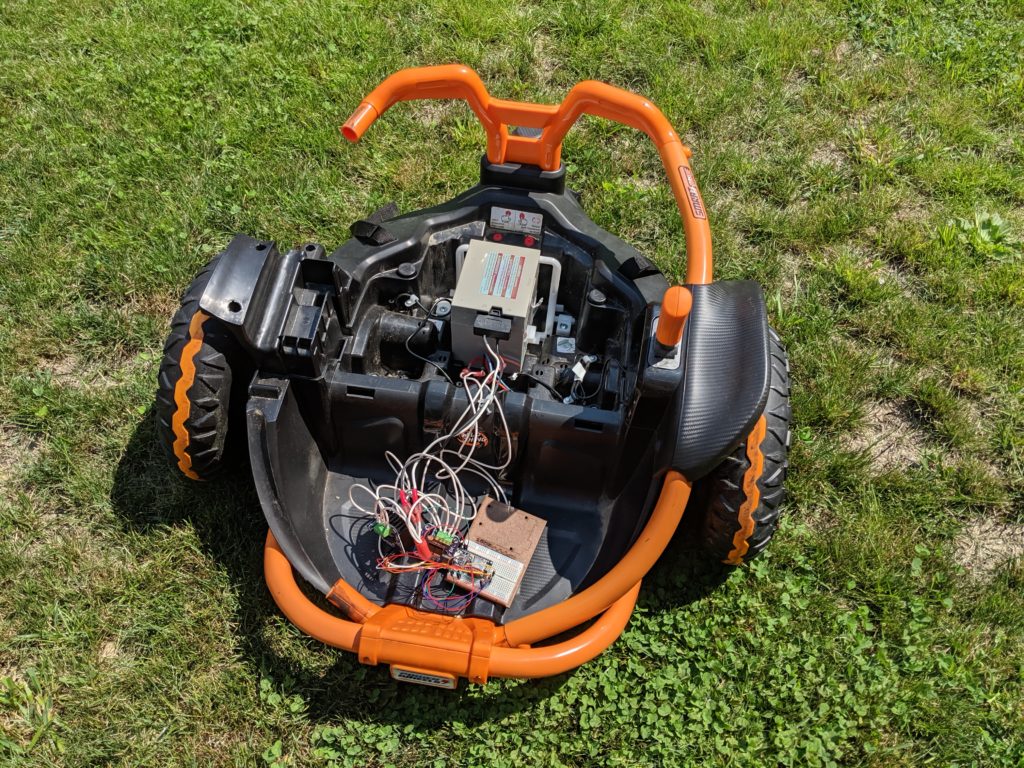
Back in 2016, we were about to bring home our new daughter from India. She has been diagnosed with Caudal Regression Syndrome. In her case, she is actually missing her legs. So when we saw that Power Wheels was about to release their new “Wild Thing” model, we thought it would be great for her to be able to play in the yard with the kids. Of course, the price wasn’t great at the time and we ended up forgetting about it.
Delta 3d Printer Build (He3d DLT-180)
So I sold a few other things and ordered the cheapest delta 3d printer kit I could find. It came in and took a bit of learning curve… but that is the point when you get into 3d printing, isn’t it? =)
First off, my stepper motors were wired incorrectly. Thanks to the help of those into he 3d printing community, I found I could just play with the wiring till I found out what worked. It did help that I had my little tessel board already programmed to play with a stepper.
Once I got the wiring corrected the motors were still extremely loud when moving. Finally a user on reddit mentioned I should check my jumper settings. Jumper settings?! I just assumed the firmware could do all that. Guess not. Of course, the kit I got was missing all the jumpers needed. Between some help from my awesome neighbor and some old computer drives I had laying around and was able to get all that I needed (12 in total). Once those were in, no more shaking and buzzing! Still not done though.
After scouring through the G-Code wiki and reading up on the firmware that I had (micromake) I found the key setting that I really needed to tweak was the z-endstop-offset. Using the “paper test” that many refer to, I was able to home that setting in. Then came the fun of learning how to load filament in this thing.