Debugging a Lambda with VSCode
Writing code for the cloud is great! So many positives that it just makes sense. The biggest downside with some is debugging your code….it gets tricky making a change, deploy, test then dig through your logs. Of course this can be automated but still get tiresome. With AWS enhancing their SAM (Serverless Application Model), it is now possible to actually run your lambdas locally within a docker container and have your IDE’s debugger attach. There are plenty of tools/plugins to utilize this (Eclipse, IntelliJ, Visual Studio…full list here) but I’m a big fan of Visual Studio Code. So let’s take a deeper dive in how to debug our java lambda line by line with VSCode!
Pre-requisites
This tutorial is assuming you’ve got previous experience with AWS Lambdas
Install AWS-Toolkit Plugin
Let’s make sure you’ve got the AWS-Toolkit plugin installed for VS-Code. Instructions can be found here. I don’t believe this is actually required but as you play more with AWS, it gives you a view of all of your deployed project so will come in handy regardless.
We’re also assuming you have the aws-cli installed and working properly on your machine. If not, check here on how to do this.
Install SAM
You will want to follow the instructions here to install the SAM cli on your machine.
I’m running Fedora (Linux) and there is a section about having to update your ‘PATH’ environmental variable. I actually didn’t have to do this as I had python3 installed…but it doesn’t hurt to double check.
Python notes
Also, if you have python3 and python2 installed, you may run into issues doing a `sam build` crying about `<block>` issues. If this is the case, you will want to ensure you have the devel packages installed for python3 ONLY! To do this, ensure the `python-devel` packages are not installed or remove them. For Fedora (RHEL) you would use a dnf command like `dnf remove python-devel`. Then we need to make sure we have the devel packages for python3 installed. For Fedora, I used `dnf install python3-devel`. Now give your `sam build` command a try. Keep in mind, if you do this in a directory where a project isn’t setup, it will automatically setup the ‘HelloWorldExample’ project. So you may want to delete that directory if you ran it by accident.
Install MS Docker plugin (optional)

This comes in handy to view the docker containers and such. A little easier than using the command line. You can find the plugin by simply searching within VSCode.
Setup the SAM test project
In a terminal (even in VSCode) lets go to a directory of our choice to setup this new test project. Since we’re wanting to do a java project, the command we’re going to run is `sam init --runtime java8`. If you leave the ‘runtime’ part out, it will default to nodejs.
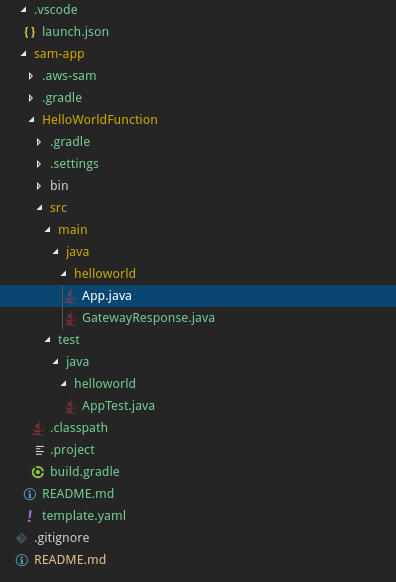
You’ll notice a new directory called ‘sam-app’ and then the sub directory ‘HelloWorldFunction’. It defaults to maven to build the project…but I’m becoming more of a Gradle fan…either will work but feel free to use the ‘build.gradle’ file that is in the repo.
Setup the launch config
This is assuming you have the ‘Debugger for Java’ plugin installed.
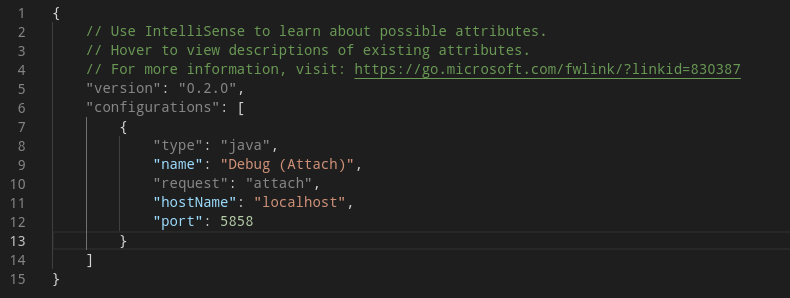
Click on the debugging icon on the left of VSCode and at the top, let’s create our config. We’re going to choose ‘Java Attach’ (not the launch!). You’ll notice it wants you to give it a port number to use. For this example, we’re going to use ‘5858’. Just has to be some port available at the moment but next we’re going to tell SAM to launch an instance using that same port.
Your launch.json should look something like this.
Get SAM ready
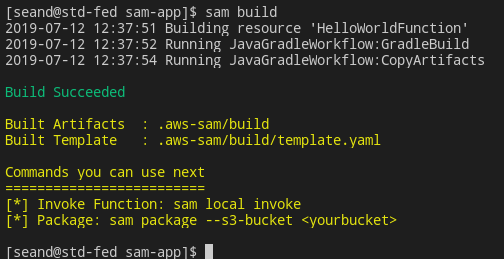
In your terminal, go to the root directory of the project (inside the ‘sam-app’ directory). We’re going to run `sam build`. You should get a nice success message (assuming you haven’t touched the maven file and project). If you’re using maven and have a custom corporate endpoint, you might get an error as it can’t get the dependencies needed. There are tricks around this with maven, but I’ll leave that to you to troubleshoot. Removing it temporarily is probably the easiest thing.
Now that everything is built, your directory structure should look pretty close to this.
Running locally
Let’s tell sam to launch it! Run `sam local invoke --no-event --debug-port 5858`. Notice the port number we’re using is the same we put in our launch.json for the ‘Java Attach’ operation.
If this is the first time you’ve done this, it’s going to take a while downloading the docker image. But once it goes, you should see the default output of the project. Now, if you’re like me, you might have seen a bunch of ‘Too many errors, abort’ in the terminal. This seems to be when parsing the web page to get the IP. So, I simply commented it out.
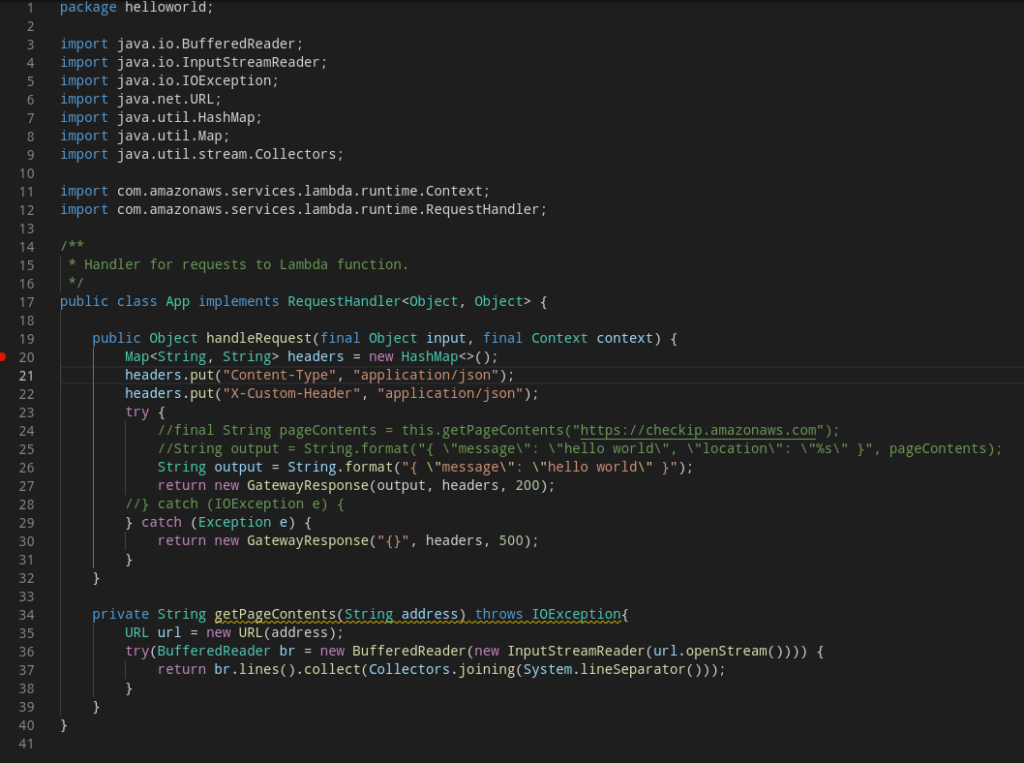
App.java
AppTest.java – since it is using Junit, we’ve got to change the expectations of the test or else it won’t build.
We will want to do a build again till we get a success. sam build in your terminal.
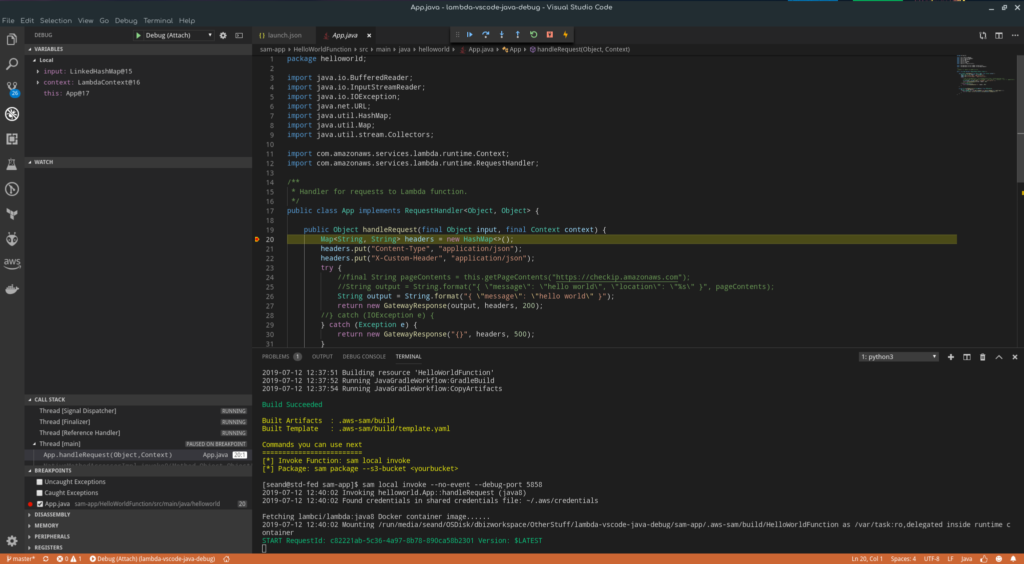
Add some breakpoints
Simply add some break points this time. We’re going to run the terminal command again (`sam local invoke --no-event --debug-port 5858`) but you’ll notice it waits this time….now we can launch our debugger operation and it will start cooking as we expect!
Final thoughts
At this point, we actually haven’t deployed anything to AWS though you do need your credentials setup on your machine as that is how it pulls the templates and such.
If you run into issues or if I missed something, let me know.
Source code can be found on Github.
Have fun coding!